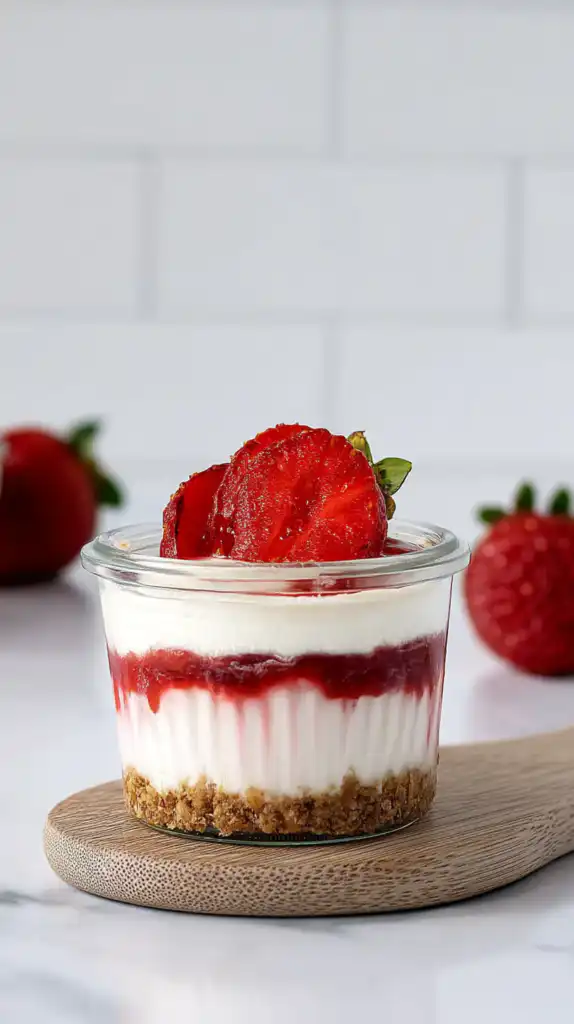
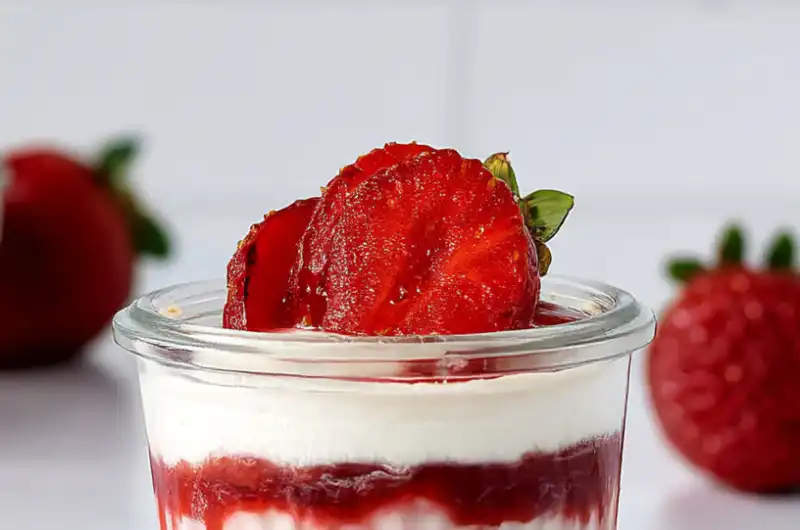
No Bake Strawberry Cheesecake Cups are honestly one of the cutest and most delicious desserts I’ve ever made, and they’re perfect for everything from dinner parties to casual summer gatherings. The first time I made these individual cheesecake portions, I was amazed at how professional they looked with those beautiful layers visible through the glass. The combination of buttery graham cracker crust, silky cream cheese filling, sweet strawberry jam, and fluffy whipped cream creates this perfectly balanced dessert that everyone goes crazy for. Plus, the fact that you don’t need to turn on your oven makes these ideal for warm weather.
What Are No Bake Strawberry Cheesecake Cups?
No Bake Strawberry Cheesecake Cups are individual portion desserts made by layering graham cracker crust, creamy no-bake cheesecake filling, strawberry jam, and whipped cream in clear cups or jars. What makes these special is the gorgeous layers you can see through the sides of the glass, which makes them look incredibly impressive and bakery-quality. They’re made without any baking, which means no oven required and no water bath stress like traditional cheesecake. Think of them as deconstructed cheesecake that’s easier to make and even more fun to serve.
Everything You’ll Need
Let’s go through all the ingredients for these beautiful No Bake Strawberry Cheesecake Cups. I’ve organized everything by component so you can see exactly what goes into each layer.
For the Crust:
- Graham cracker crumbs (1 cup): Use store-bought crumbs or crush about 7-8 full graham cracker sheets. If you need gluten-free, make sure to use certified gluten-free graham crackers.
- Dark brown sugar (3 tablespoons, packed): Adds a deeper, molasses-like sweetness to the crust. You could use light brown sugar or regular white sugar if that’s what you have.
- Unsalted butter (¼ cup, melted): Binds the crumbs together to create that perfect crust. Make sure it’s fully melted but not too hot.
For the Cheesecake Filling:
- Heavy whipping cream (½ cup, cold): Gets whipped separately and then folded into the cream cheese to create that light, airy texture in your No Bake Strawberry Cheesecake Cups.
- Full-fat cream cheese (8 oz block, room temperature): The base of your filling. Room temperature is crucial for smooth mixing without lumps.
- Granulated sugar (¼ cup): Sweetens the cream cheese mixture. Don’t reduce this or the filling won’t be sweet enough.
- Powdered sugar (2 tablespoons): Adds extra sweetness and helps stabilize the whipped cream.
- Sour cream (2 tablespoons, room temperature): Adds tanginess and makes the filling extra creamy. Greek yogurt can substitute in a pinch.
- Pure vanilla extract (½ teaspoon): Always use pure vanilla for the best flavor.
For the Strawberry Layer:
- Strawberry jam (¾ cup): Use good quality jam for the best flavor. You could also use strawberry preserves if you like bigger fruit pieces.
For the Whipped Cream:
- Heavy whipping cream (½ cup, cold): Make sure it’s very cold for the best whipping results.
- Powdered sugar (1½ tablespoons): Sweetens and helps stabilize the whipped cream.
- Pure vanilla extract (½ teaspoon): Adds flavor to the whipped cream topping.
For Toppings:
- Fresh strawberries (6, sliced, optional): For garnish and adding fresh fruit flavor.
- Dark chocolate (2 tablespoons, roughly chopped, optional): Adds a nice contrast and extra indulgence to your No Bake Strawberry Cheesecake Cups.
Building Your Cheesecake Cups
Alright, let’s make these gorgeous layered desserts. The process is straightforward, and the hardest part is just waiting for them to chill properly.
Make the Crust
In a medium bowl, mix together the graham cracker crumbs, melted butter, and dark brown sugar until the mixture looks crumbly and holds together when you squeeze it. The texture should be like wet sand.
Divide the crust mixture evenly among 6 clear cups or jars, using approximately 2 tablespoons per cup. Press it down firmly with the back of a spoon or your fingers to create a compact layer at the bottom of each cup.
Prepare the Filling
Using either a stand mixer with a whisk attachment or a large bowl with a hand mixer, beat the heavy whipping cream on medium-high speed until it has fully thickened and holds stiff peaks. This takes approximately 4 minutes. You’ll know it’s ready when you lift the beaters and the cream stands up in firm peaks.
Scrape the whipped cream into a small bowl and place it in the fridge while you make the rest of the filling. This keeps it cold and stable.
In the bowl of your mixer, combine the room temperature cream cheese and granulated sugar. Mix on medium speed until it’s completely smooth with no lumps, which takes approximately 3 minutes. Scrape down the sides of the bowl as needed.
Add the sour cream, powdered sugar, and pure vanilla extract to the cream cheese mixture. Mix until just combined and smooth.
Fold and Layer
Add the chilled whipped cream to the cream cheese mixture. Using a rubber spatula, gently fold the whipped cream into the cream cheese mixture using a gentle lifting motion. Don’t overmix because you want to maintain all that air you incorporated into the whipped cream. Stop as soon as everything is combined and you don’t see any white streaks.
Spoon about 1/6 of the cheesecake mixture into each cup, which comes out to roughly ⅓ cup per serving. If you want those gorgeous crisp layers visible from the side that look super professional, transfer the filling to a piping bag and pipe it neatly into each jar instead of spooning. This creates much cleaner layers in your No Bake Strawberry Cheesecake Cups.
Chill and Set
Refrigerate the cups for 4-6 hours minimum, or preferably overnight. This chilling time is crucial because it allows the cream cheese filling to firm up properly. Overnight chilling gives you the best texture and makes the layers more stable.
Add Strawberry Layer
After the cheesecake cups have set completely, spoon 2 tablespoons of strawberry jam into each jar, spreading it gently over the top of the cheesecake layer. The jam creates that beautiful pink layer that makes these cups so pretty.
Make Whipped Cream Topping
Using either a stand mixer with a whisk attachment or a large bowl with a hand mixer, beat the heavy whipping cream on medium-high speed until it has fully thickened and holds stiff peaks, which takes approximately 4 minutes. Add the powdered sugar and pure vanilla extract, then mix until just combined.
Place the whipped cream into a plastic bag and cut off the tip to create a makeshift piping bag. Pipe the whipped cream onto the top of each cheesecake cup in pretty swirls. Top with fresh strawberry slices and chopped dark chocolate if using for that final gorgeous presentation.
Serving These Beauties
These No Bake Strawberry Cheesecake Cups are best served chilled straight from the refrigerator. The individual portions make them perfect for parties because there’s no slicing required and everyone gets their own perfectly portioned dessert. I love serving these at summer gatherings, baby showers, bridal showers, or any time I want an impressive dessert that’s actually easy to transport. They’re also great for potlucks because you can stack them carefully in a container. For a complete dessert spread, pair them with other creamy treats like my Baileys Cheesecake to give guests different flavor options.
Pro Tips for Success
- Use clear cups or jars: The whole point is showing off those beautiful layers, so use clear glass cups, mason jars, or plastic cups so people can see the gorgeous stripes.
- Room temperature ingredients matter: Cold cream cheese will never get smooth no matter how long you mix. Let it sit out for at least an hour before starting.
- Don’t overmix the whipped cream: Once you fold the whipped cream into the cream cheese, stop as soon as it’s combined. Overmixing deflates the air and makes your filling dense instead of light.
- Pipe for perfect layers: If you want those Instagram-worthy clean layers, use a piping bag for the filling instead of spooning. It makes such a difference in presentation.
- Chill overnight for best results: While 4-6 hours is the minimum, overnight chilling gives you the firmest, best-textured No Bake Strawberry Cheesecake Cups.
- Make ahead friendly: You can make these up to 2 days ahead. Just wait to add the whipped cream topping and fresh strawberries until a few hours before serving.
- Customize the fruit: Try blueberry jam, raspberry jam, or mixed berry for different flavors. Lemon curd is also amazing instead of strawberry jam.
- Transport carefully: If bringing these to a party, keep them in a shallow box or container so they don’t tip over in transit.
Common Questions Answered
Can I use low-fat cream cheese?
I really don’t recommend it for No Bake Strawberry Cheesecake Cups. Low-fat cream cheese has a different texture and doesn’t create that rich, creamy filling you want. It also doesn’t hold up as well when folded with whipped cream. Full-fat cream cheese is essential for the best flavor and texture. This is a treat, so go with the real stuff.
How long do these keep?
Stored covered in the refrigerator, these cheesecake cups keep for up to 3 days. The whipped cream topping might soften slightly after day one, but they still taste delicious. I actually think they’re best on day two after all the flavors have melded together. Don’t freeze these because the texture changes dramatically when thawed.
Can I make these in a different size container?
Absolutely! You can make these in small 4-ounce jars for more servings, or larger 12-ounce jars for fewer, bigger portions. You could even make one large trifle bowl instead of individual cups. Just adjust the amounts per serving accordingly and keep the layer ratios similar to these No Bake Strawberry Cheesecake Cups.
Why is my filling runny?
The most common reasons are using cold cream cheese that didn’t mix smoothly, not whipping the cream to stiff enough peaks, or overmixing after folding the whipped cream in. Make sure your cream cheese is truly room temperature, whip the cream until it’s very stiff, and fold gently but stop as soon as combined. If your filling seems too soft, refrigerate it for an hour before layering into cups.
Why These Are Perfect
No Bake Strawberry Cheesecake Cups are the ultimate make-ahead dessert for entertaining because they look impressive, taste amazing, and require no last-minute fussing. The individual portions mean no cutting, no mess, and perfect serving sizes every time. They’re light enough for summer but indulgent enough to feel special. The no-bake aspect makes them ideal for warm weather when you don’t want to heat up your kitchen. Plus, those gorgeous visible layers make them incredibly photogenic and perfect for sharing on social media.
more no-bake dessert inspiration and easy summer treats, check out my Pinterest page where I share all my favorite recipes.
No Bake Strawberry Cheesecake Cups
Course: DessertCuisine: AmericanDifficulty: Easy6
Cups25
minutes380
kcalIngredients
- For the Crust:
Graham cracker crumbs (1 cup)
Dark brown sugar (3 tablespoons, packed)
Unsalted butter (¼ cup, melted)
- For the Cheesecake Filling:
Heavy whipping cream (½ cup, cold)
Full-fat cream cheese (8 oz block, room temperature)
Granulated sugar (¼ cup)
Powdered sugar (2 tablespoons)
Sour cream (2 tablespoons, room temperature)
Pure vanilla extract (½ teaspoon)
- For the Strawberry Layer:
Strawberry jam (¾ cup)
- For the Whipped Cream:
Heavy whipping cream (½ cup, cold)
Powdered sugar (1½ tablespoons)
Pure vanilla extract (½ teaspoon)
- For Toppings:
Fresh strawberries (6, sliced, optional)
Dark chocolate (2 tablespoons, roughly chopped, optional)
Directions
- Make the Crust
- In a medium bowl, mix together the graham cracker crumbs, melted butter, and dark brown sugar until the mixture looks crumbly and holds together when you squeeze it. The texture should be like wet sand.
- Divide the crust mixture evenly among 6 clear cups or jars, using approximately 2 tablespoons per cup. Press it down firmly with the back of a spoon or your fingers to create a compact layer at the bottom of each cup.
- Prepare the Filling
- Using either a stand mixer with a whisk attachment or a large bowl with a hand mixer, beat the heavy whipping cream on medium-high speed until it has fully thickened and holds stiff peaks. This takes approximately 4 minutes. You’ll know it’s ready when you lift the beaters and the cream stands up in firm peaks.
- Scrape the whipped cream into a small bowl and place it in the fridge while you make the rest of the filling. This keeps it cold and stable.
- In the bowl of your mixer, combine the room temperature cream cheese and granulated sugar. Mix on medium speed until it’s completely smooth with no lumps, which takes approximately 3 minutes. Scrape down the sides of the bowl as needed.
- Add the sour cream, powdered sugar, and pure vanilla extract to the cream cheese mixture. Mix until just combined and smooth.
- Fold and Layer
- Add the chilled whipped cream to the cream cheese mixture. Using a rubber spatula, gently fold the whipped cream into the cream cheese mixture using a gentle lifting motion. Don’t overmix because you want to maintain all that air you incorporated into the whipped cream. Stop as soon as everything is combined and you don’t see any white streaks.
- Spoon about 1/6 of the cheesecake mixture into each cup, which comes out to roughly ⅓ cup per serving. If you want those gorgeous crisp layers visible from the side that look super professional, transfer the filling to a piping bag and pipe it neatly into each jar instead of spooning. This creates much cleaner layers in your No Bake Strawberry Cheesecake Cups.
- Chill and Set
- Refrigerate the cups for 4-6 hours minimum, or preferably overnight. This chilling time is crucial because it allows the cream cheese filling to firm up properly. Overnight chilling gives you the best texture and makes the layers more stable.
- Add Strawberry Layer
- After the cheesecake cups have set completely, spoon 2 tablespoons of strawberry jam into each jar, spreading it gently over the top of the cheesecake layer. The jam creates that beautiful pink layer that makes these cups so pretty.
- Make Whipped Cream Topping
- Using either a stand mixer with a whisk attachment or a large bowl with a hand mixer, beat the heavy whipping cream on medium-high speed until it has fully thickened and holds stiff peaks, which takes approximately 4 minutes. Add the powdered sugar and pure vanilla extract, then mix until just combined.
- Place the whipped cream into a plastic bag and cut off the tip to create a makeshift piping bag. Pipe the whipped cream onto the top of each cheesecake cup in pretty swirls. Top with fresh strawberry slices and chopped dark chocolate if using for that final gorgeous presentation.