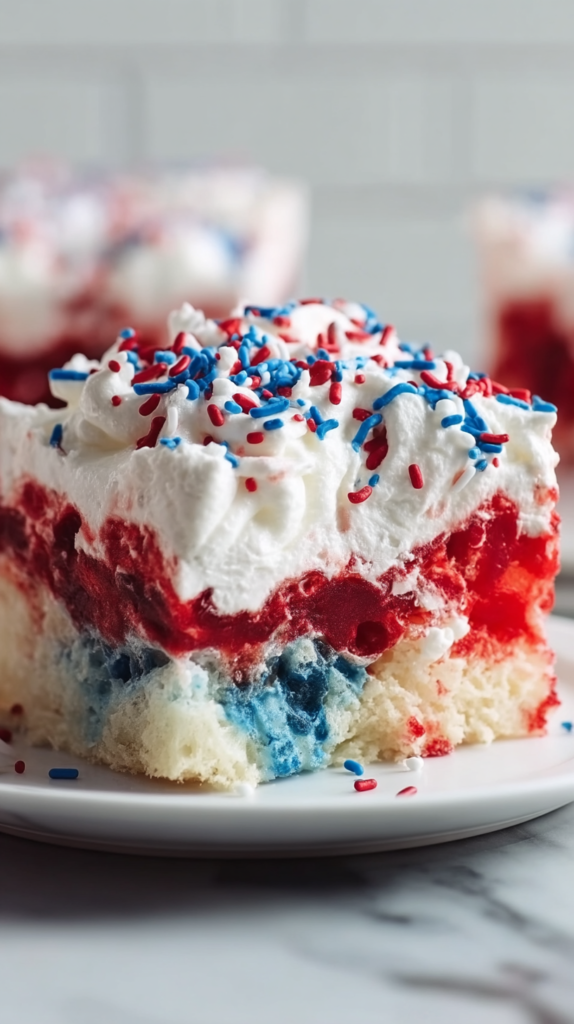
4th of July Poke Cake is hands down the most fun and festive dessert you can make for Independence Day because this easy cake features vibrant red and blue gelatin soaked into every bite of fluffy white cake topped with whipped cream and patriotic sprinkles. The combination of soft vanilla cake infused with sweet cherry and blue raspberry gelatin creates pockets of amazing flavor and gorgeous color that look stunning when you slice into it. What makes this 4th of July Poke Cake so perfect is how simple it is to make with just a cake mix and Jell-O, but it looks incredibly impressive with those bold red, white, and blue colors showing your patriotic spirit.
What Is 4th of July Poke Cake?
4th of July Poke Cake is a patriotic sheet cake made by baking white cake, poking holes throughout, then pouring red and blue gelatin into the holes to create vibrant colored pockets that soak through the cake. Unlike regular cakes, the poke cake method infuses every bite with fruity flavor and creates stunning visual appeal when sliced. The cake is topped with fluffy whipped topping and festive sprinkles for the perfect patriotic presentation. Think of it as an easy make-ahead dessert that combines simple ingredients to create show-stopping results perfect for Fourth of July parties and summer celebrations.
Ingredient Breakdown
Let me walk you through everything you need for this stunning 4th of July Poke Cake. The ingredients are incredibly simple and create amazing results.
For the Cake Base:
- White cake mix (1 box): Creates fluffy base for your 4th of July Poke Cake. Follow package directions for eggs, water, and oil.
- Egg whites, water, and vegetable oil (as directed on box): Typically needs 3 egg whites, 1 cup water, 1/3 cup oil for perfect texture.
For the Colorful Gelatin:
- Cherry Jell-O (1 box or 3 ounces): Creates vibrant red color and cherry flavor for your 4th of July Poke Cake. Strawberry works too.
- Berry blue Jell-O (1 box or 3 ounces): Provides beautiful blue color. Can substitute blue raspberry flavor.
- Boiling water (2 cups total, 1 cup per flavor): Dissolves gelatin completely for smooth texture in your 4th of July Poke Cake.
For the Topping:
- Whipped topping (1 container or 8 ounces, thawed): Cool Whip works perfectly. Creates fluffy white layer on your 4th of July Poke Cake.
- Red, white, and blue sprinkles: Adds festive patriotic touch to finished cake. Use generous amount for visual impact.
Step-by-Step Instructions
Creating this colorful dessert is easier than you think. Let me guide you through making perfect 4th of July Poke Cake every time.
Bake the White Cake
Preheat your oven according to the directions on the white cake mix box for your 4th of July Poke Cake. Most cake mixes call for 350 degrees Fahrenheit or 175 degrees Celsius.
Prepare the cake batter exactly as instructed on the package. Typically this means combining the cake mix with egg whites, water, and vegetable oil in a large bowl and mixing until smooth and well combined.
Pour the prepared batter into a greased 9 by 13 inch baking pan for your 4th of July Poke Cake. Spread it evenly to the edges so the cake bakes uniformly without thick or thin spots.
Bake for 25 to 30 minutes or until a toothpick inserted in the center comes out clean. The top should be golden and spring back when lightly touched.
Remove the cake from the oven and let it cool in the pan for 15 to 20 minutes before poking holes for your 4th of July Poke Cake. The cake should be warm but not hot to the touch.
Prepare the Jell-O
While the cake cools, prepare the gelatin for your 4th of July Poke Cake. Work with each flavor separately to keep colors distinct and vibrant.
Dissolve the cherry Jell-O in 1 cup of boiling water in a medium bowl or large measuring cup. Stir constantly until the gelatin powder is completely dissolved with no granules remaining. Set aside.
In a separate bowl, dissolve the berry blue Jell-O in another 1 cup of boiling water for your 4th of July Poke Cake. Stir until completely dissolved and set aside separately from the red gelatin.
Let both gelatin mixtures cool slightly for about 5 minutes before pouring into the cake. They should be liquid but not steaming hot to avoid making the cake too soggy.
Poke the Cake
Use the handle end of a wooden spoon, a thick straw, or a skewer to poke holes across the entire surface of the cooled cake for your 4th of July Poke Cake. Space the holes about 1 inch apart for even gelatin distribution.
Poke all the way down through the cake to the bottom of the pan. The deeper the holes, the more gelatin soaks through and the more dramatic the color effect in your finished dessert.
Make sure to create holes across the entire cake surface for your 4th of July Poke Cake. Don’t skip the edges or corners so every slice has beautiful color throughout.
Add the Colorful Gelatin
Carefully spoon or slowly pour the red cherry Jell-O into half of the holes across the cake for your 4th of July Poke Cake. Work methodically so you remember which holes got red gelatin.
Pour the blue berry Jell-O into the remaining holes, alternating with the red for an even distribution of colors. Try to create a pattern or alternate colors for best visual effect when slicing.
Use a clean spoon for each gelatin color to avoid mixing red and blue together for your 4th of July Poke Cake. This keeps the colors bright and distinct instead of muddy purple.
Gently tap or tilt the pan slightly to help the gelatin settle into the holes and spread through the cake. You’ll see the colored gelatin seeping into the white cake creating beautiful patterns.
Cover the cake tightly with plastic wrap or foil and refrigerate for at least 3 hours for your 4th of July Poke Cake. Overnight chilling is even better for the cleanest slices and best flavor.
Frost and Decorate
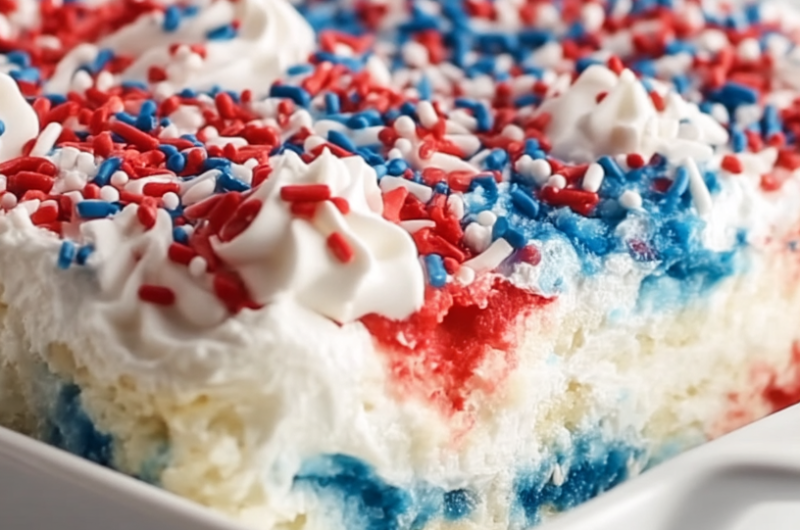
Once the cake is completely chilled and the gelatin has set firm throughout, remove the plastic wrap for your 4th of July Poke Cake. The surface should look marbled with red and blue colors.
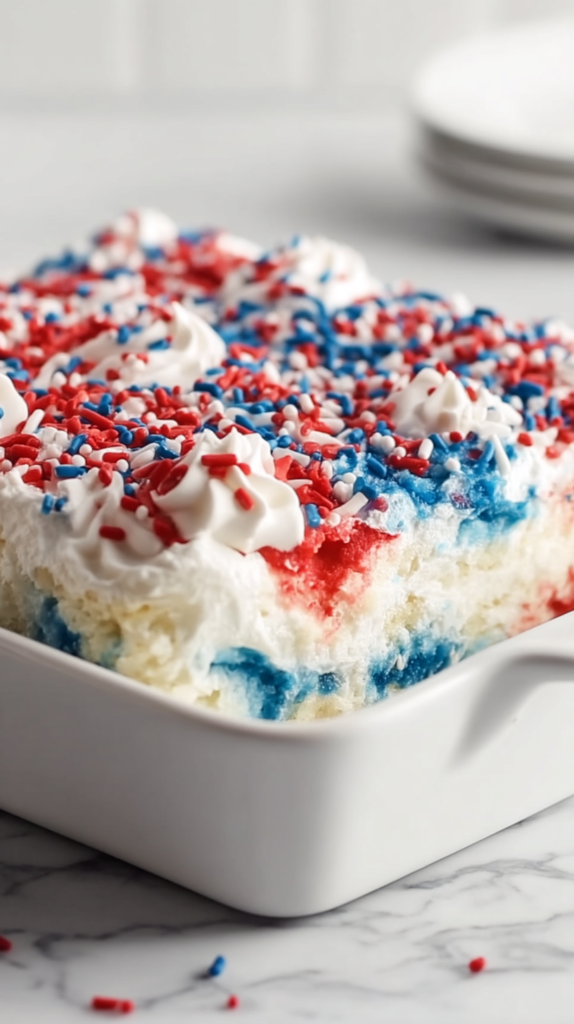
Spread the thawed whipped topping evenly over the entire top of the cake using an offset spatula or the back of a spoon. Cover the colored gelatin completely with a generous fluffy white layer.
Sprinkle a generous amount of red, white, and blue patriotic sprinkles over the whipped topping for your 4th of July Poke Cake. Don’t be shy with the sprinkles because they add so much festive appeal and visual impact.
Keep the cake refrigerated until ready to serve. Slice with a sharp knife, wiping the blade clean between cuts for the neatest presentation that shows off all those beautiful colors.
How to Serve
This 4th of July Poke Cake is perfect for Independence Day parties, Memorial Day celebrations, summer barbecues, picnics, or any patriotic gathering where you want an easy impressive dessert. Serve chilled directly from the refrigerator for best texture and flavor. The cold cake with fruity gelatin is incredibly refreshing on hot summer days. Cut into squares and serve on individual plates to show off those gorgeous red and blue pockets throughout the white cake. This dessert pairs wonderfully with vanilla ice cream, fresh whipped cream, or just enjoyed on its own. Store covered in the refrigerator for up to 3 days. The make-ahead nature makes it ideal for parties because you can prepare it the day before and just add sprinkles before serving.
Expert Tips
- Cool cake before poking: Hot cake will absorb too much gelatin and become mushy for your 4th of July Poke Cake. Wait 15 to 20 minutes.
- Poke deep holes: Shallow holes don’t distribute gelatin throughout. Poke all the way to pan bottom.
- Use separate spoons: Keep one spoon for red, one for blue to avoid mixing colors into purple.
- Space holes evenly: About 1 inch apart creates good coverage without cake falling apart.
- Let gelatin cool slightly: Steaming hot gelatin makes cake soggy for your 4th of July Poke Cake. Wait 5 minutes after dissolving.
- Chill minimum 3 hours: Gelatin needs time to set firm. Overnight is best for clean slicing.
- Alternate colors: Create pattern with red and blue holes for best visual effect when cutting.
- Wipe knife between cuts: Clean blade makes neat slices showing colors for your 4th of July Poke Cake.
- Use thawed topping: Cold whipped topping is stiff and tears cake. Let it thaw completely before spreading.
- Add sprinkles before serving: Keeps them crunchy and colorful. Adding too early makes them soggy.
Common Questions
Can I make this poke cake ahead of time?
Yes! 4th of July Poke Cake is perfect for making ahead and actually tastes better when made the day before because the gelatin has more time to soak through the cake and the flavors meld together beautifully. Bake the cake, poke holes, add gelatin, and refrigerate overnight. Add the whipped topping and sprinkles just a few hours before serving for freshest appearance and texture.
Can I use homemade cake instead of a mix?
Absolutely! Any white or vanilla cake recipe that fits a 9 by 13 inch pan works perfectly for your 4th of July Poke Cake. Homemade cake often has better flavor and texture than boxed mix. Just make sure the cake is baked completely and cooled properly before poking holes and adding the gelatin for best results.
Why is my gelatin not soaking into the cake?
Gelatin doesn’t soak in when holes aren’t deep enough, gelatin has cooled too much and started setting, or you poured it too quickly for your 4th of July Poke Cake. Make sure to poke holes all the way through the cake, pour gelatin while still liquid and warm, and pour slowly to give it time to seep down into the holes properly.
Can I use different Jell-O flavors?
Yes! While red and blue create classic patriotic colors for your 4th of July Poke Cake, you can use any gelatin flavors you prefer. Strawberry, raspberry, or cranberry work for red. Blue raspberry or berry blue for blue. Just make sure to use colors that create visual contrast for the most impressive presentation when sliced.
For more amazing Fourth of July dessert recipes and patriotic baking ideas, check out my Pinterest page where you’ll find expert tips and creative inspiration.
4th of July Poke Cake
Course: DessertCuisine: AmericanDifficulty: Easy12
servings15
minutes30
minutes285
kcalIngredients
- For the Cake Base:
White cake mix (1 box)
Egg whites, water, and vegetable oil (as directed on cake mix box)
- For the Colorful Gelatin:
Cherry Jell-O (1 box or 3 ounces)
Berry blue Jell-O (1 box or 3 ounces)
Boiling water (2 cups total, 1 cup per flavor)
- For the Topping:
Whipped topping (1 container or 8 ounces, thawed)
Red, white, and blue sprinkles
Directions
- Bake the White Cake
- Preheat oven according to white cake mix box directions, typically 350°F (175°C).
- Prepare cake batter exactly as instructed on package.
- Typically combine cake mix with egg whites, water, and vegetable oil.
- Mix until smooth and well combined.
- Pour prepared batter into greased 9×13 inch baking pan.
- Spread evenly to edges.
- Bake for 25-30 minutes or until toothpick inserted in center comes out clean.
- Top should be golden and spring back when touched.
- Remove from oven and let cool in pan for 15-20 minutes before poking holes.
- Cake should be warm but not hot.
- Prepare the Jell-O
- While cake cools, work with each flavor separately.
- Dissolve cherry Jell-O in 1 cup boiling water in medium bowl.
- Stir constantly until gelatin powder completely dissolved with no granules.
- Set aside.
- In separate bowl, dissolve berry blue Jell-O in another 1 cup boiling water.
- Stir until completely dissolved and set aside separately.
- Let both gelatin mixtures cool slightly for 5 minutes before pouring into cake.
- Should be liquid but not steaming hot.
- Poke the Cake
- Use handle end of wooden spoon, thick straw, or skewer to poke holes across entire cake surface.
- Space holes about 1 inch apart for even distribution.
- Poke all the way down through cake to bottom of pan.
- Deeper holes = more gelatin soaks through = more dramatic color.
- Create holes across entire surface including edges and corners.
- Add the Colorful Gelatin
- Carefully spoon or slowly pour red cherry Jell-O into half of the holes across cake.
- Work methodically.
- Pour blue berry Jell-O into remaining holes, alternating with red.
- Create pattern or alternate colors for best visual effect.
- Use clean spoon for each color to avoid mixing red and blue into purple.
- Keeps colors bright and distinct.
- Gently tap or tilt pan to help gelatin settle into holes.
- You’ll see colored gelatin seeping into white cake.
- Cover cake tightly with plastic wrap or foil.
- Refrigerate for at least 3 hours.
- Overnight is better for cleanest slices and best flavor.
- Frost and Decorate
- Once cake completely chilled and gelatin set firm, remove plastic wrap.
- Surface should look marbled with red and blue.
- Spread thawed whipped topping evenly over entire top using offset spatula.
- Cover colored gelatin completely with fluffy white layer.
- Sprinkle generous amount of red, white, and blue patriotic sprinkles over whipped topping.
- Don’t be shy with sprinkles.
- Keep refrigerated until ready to serve.
- Slice with sharp knife, wiping blade clean between cuts.
Notes
- Cool cake 15-20 minutes before poking. Hot cake becomes mushy.
Poke deep holes all the way to pan bottom for best distribution.
Use separate spoons for each color to avoid mixing.
Space holes 1 inch apart for good coverage.
Let gelatin cool 5 minutes after dissolving. Too hot makes cake soggy.
Chill minimum 3 hours. Overnight is best.
Alternate red and blue holes for best visual pattern.
Wipe knife clean between cuts for neat slices.
Use thawed whipped topping. Cold topping tears cake.
Add sprinkles just before serving to keep crunchy.
Can use homemade white or vanilla cake instead of mix.
Can substitute strawberry or raspberry Jell-O for red.
Can use blue raspberry instead of berry blue.
Store covered in refrigerator up to 3 days.
Make ahead the day before and add topping/sprinkles before serving.