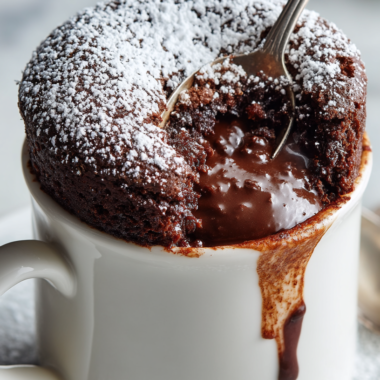
Boston Cream Pie is honestly one of those desserts that sounds fancy but is so incredibly worth every single step. I remember the first time I tried making it from scratch, I was a little nervous, but once I took that first slice and saw those gorgeous layers, I was completely hooked. If you love soft yellow cake, silky vanilla pastry cream, and a glossy chocolate ganache dripping down the sides, then you are absolutely going to fall in love with this recipe.

What Is Boston Cream Pie?
Despite its name, Boston Cream Pie is actually a cake, not a pie. It originally comes from the Parker House Hotel in Boston, Massachusetts, and has been a beloved American classic since the 1800s. Basically, it is two layers of tender yellow butter cake filled with a thick, creamy vanilla custard and topped with a rich chocolate glaze. So yes, it is called a pie, but it is 100% a dreamy layered cake that deserves all the love.
What You Will Need for Boston Cream Pie
Let me walk you through everything you need before you get started. Having all your ingredients measured and ready makes the whole process so much smoother. Trust me, I learned this the hard way after scrambling mid-bake more times than I care to admit. Here is a full breakdown of what goes into each component of this classic Boston Cream Pie recipe.
Pastry Cream
- Whole milk (453g / 2 cups): The base of your custard. Whole milk gives you that rich, creamy texture. You can use 2% in a pinch, but I really recommend sticking with whole milk here.
- Granulated sugar (71g / 1/3 cup, divided): Half goes into the egg mixture and half goes into the milk. Splitting it up helps prevent scorching and gives you a smoother custard.
- Pure vanilla extract (1 1/2 tsp): Please use pure vanilla, not imitation. The flavor difference is real and noticeable in a simple custard like this.
- Large egg yolks (3): These add richness and help thicken the cream beautifully.
- Large egg (1): Adds extra body to the pastry cream.
- Cornstarch (28g / 3 tbsp): The thickening agent. Make sure you whisk it in well to avoid lumps.
- Unsalted butter (57g / 4 tbsp): Stirred in at the end for that glossy, silky finish. Do not skip this step.
Yellow Cake Layers
- Cake flour (397g / 3 1/2 cups): Gives the cake a tender, soft crumb. If you only have all-purpose flour, you can substitute by removing 2 tbsp per cup and replacing with cornstarch.
- Granulated sugar (340g / 1 2/3 cups): For sweetness and moisture.
- Baking powder (2 tsp): Helps the layers rise evenly.
- Baking soda (1 tsp): Works together with baking powder for a light texture.
- Salt (1 tsp): Balances out the sweetness.
- Unsalted butter (170g / 3/4 cup), room temperature: Make sure it is properly softened. Cold butter will not blend into the flour the right way.
- Large eggs (2), room temperature: Room temperature eggs incorporate better into the batter.
- Large egg yolks (3), room temperature: Extra yolks add richness and a beautiful golden color to the cake.
- Whole milk (227g / 1 cup), room temperature: Keep it at room temperature so the batter stays smooth.
- Vegetable oil (57g / 1/4 cup): Keeps the cake moist even after refrigerating. Such an important addition.
- Pure vanilla extract (1 tbsp): Generous amount for that warm, classic flavor.
Chocolate Ganache
- Semi-sweet chocolate (113g / 4 oz), finely chopped: Finely chopping the chocolate helps it melt evenly. You can also use good quality chocolate chips in a pinch.
- Heavy whipping cream (113g / 1/2 cup): Creates that pourable, glossy ganache topping that makes Boston Cream Pie so stunning.
Step-by-Step Instructions for Boston Cream Pie
Making the Pastry Cream
Step 1: Mix the egg base. In a medium bowl, whisk together half the sugar, the cornstarch, egg yolks, and whole egg until smooth and fully combined. Set this aside while you heat the milk.
Step 2: Heat the milk. In a medium saucepan over medium heat, combine the milk, remaining sugar, and vanilla extract. Bring it to a gentle simmer, stirring occasionally. Adding sugar directly to the milk helps prevent it from scorching on the bottom of the pan.
Step 3: Temper the eggs. Slowly pour about one third of the hot milk into the egg bowl, whisking constantly. This step gradually raises the temperature of the egg mixture and prevents scrambling. Pour everything back into the saucepan.
Step 4: Cook until thick. Cook the mixture over medium heat, whisking constantly, until it thickens and starts to bubble. A few small lumps at this stage are totally fine.
Step 5: Strain and finish. Remove from heat and immediately strain through a fine mesh sieve into a large bowl. Do this while the cream is still warm because straining cold pastry cream can break the cornstarch and make it runny. Whisk in the butter until fully melted and smooth.
Step 6: Chill. Press plastic wrap directly onto the surface of the cream so no skin forms. Refrigerate for at least 2 hours until fully set and cold.
Baking the Yellow Cake Layers
Step 7: Prep your pans and oven. Preheat your oven to 175°C (350°F). Spray two 20cm (8-inch) round cake pans generously with nonstick baking spray. Set them aside.
Step 8: Divide the liquid ingredients. In one small bowl, combine two thirds of the milk with the vanilla extract and vegetable oil. In another bowl, whisk together the eggs, egg yolks, and remaining milk. Keeping these separate makes adding them at the right time much easier.
Step 9: Mix the dry ingredients with butter. In the bowl of a stand mixer fitted with the paddle attachment, combine the cake flour, sugar, baking powder, baking soda, salt, and softened butter. Mix on low speed until the texture looks like coarse, sandy crumbs. This method coats the flour in fat and gives you that incredibly tender crumb.
Step 10: Add the milk and oil mixture. With the mixer on low, slowly stream in the milk and oil mixture. Then increase to medium speed and mix for exactly 2 full minutes. Set a timer because this step builds the structure of your cake. Do not skip or shorten it.
Step 11: Add the egg mixture. Stream in the egg and milk mixture on low speed. Mix just until the batter looks smooth and uniform. Scrape down the sides and bottom of the bowl to make sure everything is evenly mixed.
Step 12: Bake. Divide the batter evenly between the two prepared pans. Weighing the batter in each pan gives you perfectly even layers. Bake for 30 to 35 minutes, until a toothpick inserted in the center comes out clean.
Step 13: Cool. Let the cakes cool in their pans for 10 minutes. Then invert onto wire racks. You can also wrap them in plastic wrap while still slightly warm and freeze for at least 1 hour before assembling. This makes trimming and handling so much easier.
Assembling the Boston Cream Pie
Step 14: Level the cakes. Once your cakes are fully chilled, use a serrated knife to trim off any domed tops so your layers are flat and even. This helps everything stack cleanly.
Step 15: Set up your assembly ring. Place the first cake layer on a cake board or serving plate. For the cleanest, most beautiful result, use an 8-inch cake ring lined on the inside with a strip of acetate that extends about 15cm (6 inches) above the ring. This holds everything in shape while it sets.
Step 16: Pipe the pastry cream. Transfer the chilled pastry cream into a piping bag. Pipe it evenly over the first cake layer in a layer about 1.5cm (half an inch) thick. Spread it out to the edges as evenly as possible.
Step 17: Add the top layer and chill. Place the second cake layer on top and press it down gently. Cover the top of the cake with plastic wrap and refrigerate for a minimum of 6 hours, or ideally overnight. This rest time is what makes the cake slice beautifully.
Making the Chocolate Ganache
Step 18: Melt the chocolate and cream. Place the finely chopped semi-sweet chocolate in a heatproof glass bowl and microwave for 1 minute. In a separate bowl, microwave the heavy cream for 1 minute. Pour the hot cream over the chocolate and let it sit for 5 full minutes without stirring.
Step 19: Whisk until smooth. Start whisking from the center outward until the ganache is completely smooth and glossy. Let it rest and thicken slightly for a few minutes while you unmold the cake.
Unmolding and Finishing
Step 20: Unmold and decorate. Carefully remove the cake ring and peel away the acetate strip. Pour the ganache over the top of the cake, letting it drip naturally and generously down the sides. Smooth the top with an offset spatula. Serve immediately or refrigerate. This Boston Cream Pie keeps well for up to 4 days in the fridge, covered in plastic wrap.
Serving Suggestions for Your Boston Cream Pie
This cake is honestly stunning on its own, but a few little touches can make it even more special. Serve it chilled straight from the fridge for the cleanest slices. A small dusting of powdered sugar on the plate looks lovely for a more formal presentation. If you want to serve it at a dinner party, pair it with a scoop of vanilla ice cream on the side. Fresh berries like raspberries or strawberries next to each slice also add a bright, colorful contrast to the rich chocolate and cream.
Tips for the Perfect Boston Cream Pie
- Strain your pastry cream while warm: Cold pastry cream is hard to strain and can actually break down the cornstarch, making your filling too loose. Always strain it right after cooking.
- Use the acetate and cake ring: This might feel fussy, but it gives you those gorgeous straight sides and keeps the pastry cream filling perfectly in place while the cake sets overnight.
- Freeze your cake layers before assembling: This makes trimming and handling so much easier. The cake does not crumble and the layers sit flat without slipping.
- Set a timer for the 2-minute mixing step: That exact 2 minutes of mixing with the oil and milk mixture is what gives the yellow cake its structure. Do not eyeball it.
- Let the ganache thicken slightly before pouring: If it is too warm and thin, it will all run off the cake. Give it just a few minutes to reach a slightly pourable but coatable consistency.
- Refrigerate overnight for best results: The longer the cake chills after assembly, the more beautifully it slices. Overnight is really the sweet spot here.
Your Questions About Boston Cream Pie, Answered
Can I make Boston Cream Pie ahead of time?
Yes, and actually I highly recommend it. You can make the pastry cream up to 3 days in advance and keep it in the fridge. The cake layers can be baked, wrapped tightly, and frozen for up to 2 weeks. Assemble everything at least 6 hours before you plan to serve it so it has enough time to set properly in the fridge.
Why did my pastry cream turn out lumpy?
This usually happens when the eggs are added too quickly to the hot milk, which causes them to cook unevenly. Make sure you temper slowly by pouring the hot milk in a thin stream while whisking constantly. And always strain the finished cream through a fine mesh sieve while it is still warm. That step catches any lumps and gives you a silky smooth custard.
Can I use a different type of chocolate for the ganache?
Absolutely. Semi-sweet chocolate gives you that classic balanced flavor, but you can use dark chocolate if you prefer a more intense, slightly bitter ganache. Milk chocolate works too if you want something sweeter and milder. Just keep the ratio of chocolate to cream the same so the consistency stays right.
How do I get clean slices when cutting the cake?
The key is to use a sharp, thin knife that has been run under hot water and wiped dry between each cut. Serving the cake cold from the fridge also helps a lot because the pastry cream filling is firm and holds its shape. Cutting at room temperature can make the filling squish out of the sides, which is frustrating after all that effort.
Why You Are Going to Absolutely Love This Recipe
This Boston Cream Pie truly has it all. You get a soft, buttery yellow cake that stays moist even after being refrigerated. The vanilla custard filling is thick, creamy, and not too sweet. And that chocolate ganache on top is just pure joy. Once you make this from scratch, store-bought versions will never compare. It is one of those recipes that feels impressive but is totally achievable at home, and it is honestly perfect for birthdays, holidays, or just a weekend when you want to bake something truly special.
If you love classic dessert recipes like this one and want to save it for later, you can find more of my favorites over on my Pinterest page. I am always pinning beautiful bakes, tips, and step-by-step ideas that make home baking more fun and less stressful. Come find me over there and let me know what you bake next!
Print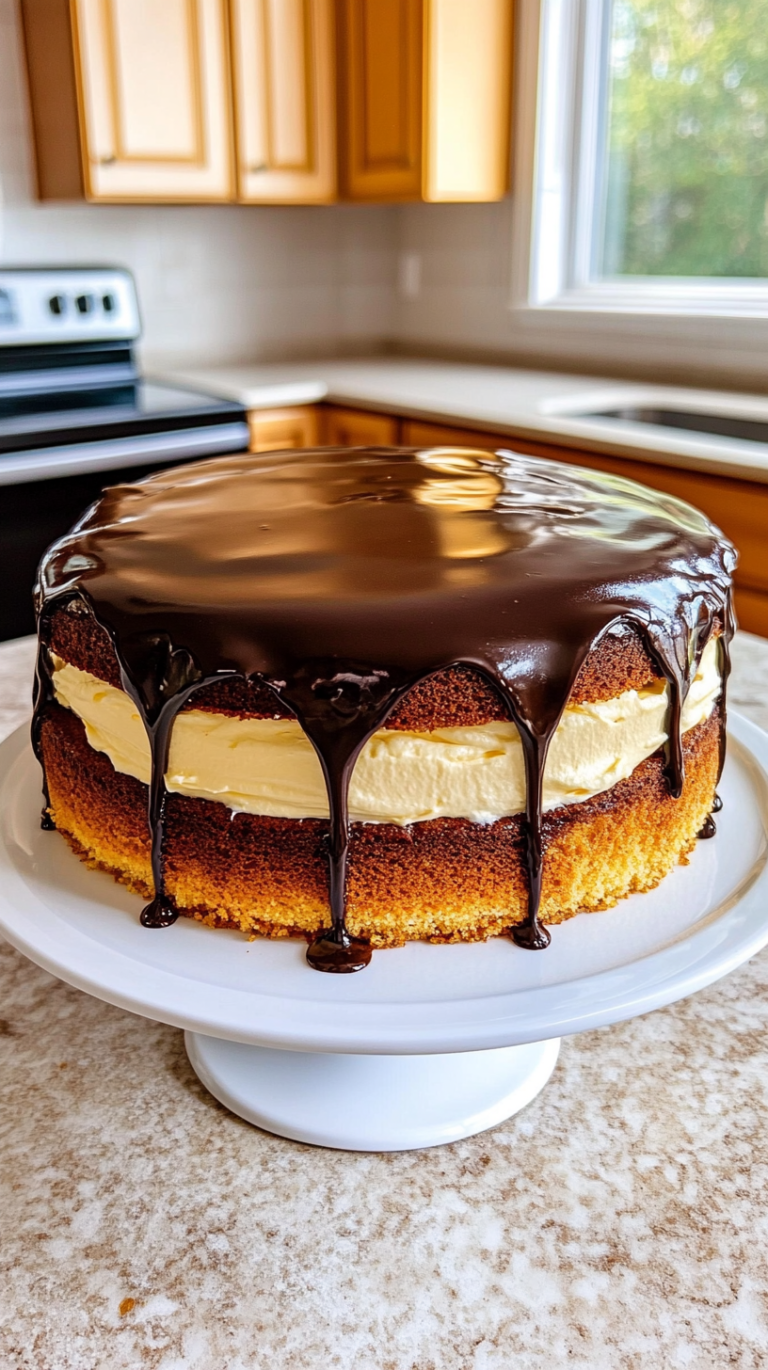
Boston Cream Pie
A classic layered dessert featuring tender yellow cake filled with silken vanilla custard and a rich chocolate glaze. Perfect for celebrating American culinary heritage.
- Total Time: 75
- Yield: 8 servings 1x
Ingredients
2 cups cake flour
1/2 cup granulated sugar (for cake)
4 sticks unsalted butter, softened
4 large eggs
1 1/2 cups buttermilk
1 tbsp pure vanilla extract (for cake)
2 tsp baking powder
1/2 tsp salt
2 cups whole milk
1/3 cup granulated sugar (total for custard)
1 1/2 tsp pure vanilla extract (for custard)
3 large egg yolks
1 large egg
3 tbsp cornstarch
4 tbsp unsalted butter (for custard)
1 cup semi-sweet chocolate chips
1/4 cup granulated sugar (for ganache)
2 tbsp unsalted butter (for ganache)
1 1/2 cups heavy cream
Instructions
Preheat oven to 350°F (175°C). Grease and flour two 8-inch round cake pans.
In a bowl, combine flour, baking powder, and salt. Set aside.
In another bowl, cream butter and granulated sugar (cake). Add eggs one at a time, then stir in vanilla.
Alternate adding flour mixture and buttermilk to the butter mixture, beginning and ending with flour. Pour batter into prepared pans.
Bake 25-30 minutes or until a toothpick inserted in centers comes out clean. Cool completely on wire racks.
For custard, whisk 1/2 cup sugar, yolks, egg, and cornstarch in a bowl. In a saucepan, gently heat milk and remaining 1/6 cup sugar until warm. Slowly add milk to egg mixture, whisking constantly.
Return mixture to saucepan. Cook over medium heat 8-10 minutes, stirring constantly, until thickened. Remove from heat, stir in 4 tbsp butter until smooth. Chill 30 minutes.
For chocolate ganache, heat heavy cream, sugar, and 2 tbsp butter in a heatproof bowl over simmering water. Add chocolate and stir until smooth. Whisk until glossy.
Place one cake layer on a plate. Spread custard evenly over. Add second layer. Drizzle ganache over top and sides. Refrigerate 30 minutes before serving.
Notes
Use whole milk for creamiest custard texture. Substitute cake flour with all-purpose by decreasing total flour by 2 tbsp and sifting with cornstarch. Store refrigerated up to 4 days. Freeze assembled layers unglazed for up to 3 months.
- Prep Time: 45
- Cook Time: 30
- Category: Desserts
- Method: Baking
- Cuisine: American
- Diet: Vegetarian
Nutrition
- Serving Size: 1 slice
- Calories: 650
- Sugar: 48g
- Sodium: 320mg
- Fat: 32g
- Saturated Fat: 20g
- Carbohydrates: 78g
- Fiber: 2g
- Protein: 8g
- Cholesterol: 85mg