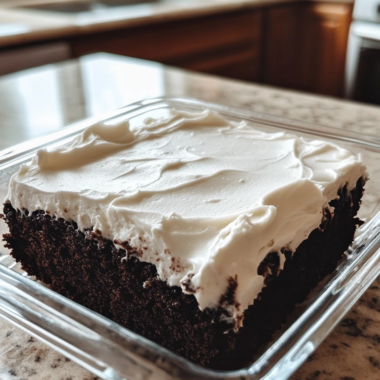
Chocolate Blackout Cake is literally the most dramatic, deeply chocolatey cake I have ever made in my life, and I mean that in the best way possible. I stumbled across the recipe one rainy Saturday afternoon when I was craving something seriously indulgent. Not just a regular chocolate cake, but something over-the-top, rich, and completely unforgettable. Let me just say, this cake delivered on every single level.
What Is Chocolate Blackout Cake?
So, if you have never heard of it before, Chocolate Blackout Cake is a classic Brooklyn-style dessert that originally came from a bakery called Ebinger’s. It is a layered chocolate cake filled and coated entirely with thick, glossy chocolate pudding, then covered in chocolate cake crumbs. The result is this incredibly moist, fudgy, almost truffle-like experience. It is different from your usual frosted layer cake, and honestly, it is so much more fun.
What You Will Need for Chocolate Blackout Cake
Before we get into the steps, let me walk you through everything you need. I promise the ingredient list looks long but it is very straightforward. Here is what goes into both the chocolate pudding filling and the chocolate cake layers.
Chocolate Pudding Filling
- 250g (1 1/4 cups) granulated sugar – this sweetens the pudding beautifully without being cloying
- 32g (1/4 cup) cornstarch – the key thickener that gives the pudding its luscious, spoonable texture
- 1/2 tsp salt – just a pinch to balance the sweetness
- 480ml (2 cups) half-and-half – adds creaminess; you can use a mix of heavy cream and whole milk if needed
- 240ml (1 cup) whole milk – keeps the pudding rich but not too heavy
- 170g (6 oz) unsweetened chocolate, finely chopped – use good quality chocolate here, it truly makes a difference
- 2 tsp pure vanilla extract – a warm, round flavor that rounds out the chocolate perfectly
Chocolate Cake Layers
- 113g (1/2 cup) unsalted butter – melted right into the batter for extra richness
- 180g (1 1/2 cups) all-purpose flour – gives the cake structure without making it dense
- 2 tsp baking powder – helps the cake rise nicely
- 1/2 tsp baking soda – works alongside the buttermilk for a tender crumb
- 1/2 tsp salt – always needed to bring out all those chocolate flavors
- 75g (3/4 cup) Dutch-processed cocoa powder – deeper, darker chocolate flavor compared to natural cocoa
- 240ml (1 cup) brewed coffee – trust me on this one; it intensifies the chocolate without tasting like coffee at all
- 240ml (1 cup) buttermilk, at room temperature – makes the cake incredibly soft and moist; substitute with plant-based milk plus 1 tbsp lemon juice if needed
- 200g (1 cup) granulated sugar – for sweetness
- 200g (1 cup) light brown sugar, packed – adds a subtle molasses depth
- 2 large eggs, at room temperature – room temp eggs blend into the batter much more smoothly
- 1 tsp pure vanilla extract – a little goes a long way here
Step-by-Step Instructions for Chocolate Blackout Cake
Okay, so let us start with the pudding since it needs time to chill before assembly. I always make it the night before to make the whole process way less stressful the next day.
Make the Chocolate Pudding Filling
Step 1: Whisk the base. In a large saucepan, whisk together the sugar, cornstarch, salt, half-and-half, and whole milk until everything is well combined. You want no lumps in there before you apply any heat.
Step 2: Melt the chocolate in. Set the pan over medium heat. Add in your finely chopped unsweetened chocolate and keep whisking constantly. You will see it slowly melt and the mixture will begin to thicken, turn glossy, and eventually large bubbles will start breaking at the surface. That is your sign it is ready!
Step 3: Finish and chill. Remove the pan from heat and whisk in the vanilla extract. Pour the pudding into a large bowl, then press plastic wrap directly onto the surface so a skin does not form. Refrigerate for at least 4 hours or overnight. The pudding needs to be fully set before you use it.
Bake the Chocolate Cake Layers
Step 1: Preheat and prep. Heat your oven to 163 degrees C (325 degrees F). Grease and flour two 20cm (8-inch) round cake pans. Set them aside.
Step 2: Mix the dry ingredients. In a medium bowl, whisk together the flour, baking powder, baking soda, and salt. Set this bowl aside for now.
Step 3: Bloom the cocoa. Melt the butter in a large saucepan over medium heat. Stir in the Dutch-processed cocoa powder and cook it for about 1 minute until it smells deep and fragrant. This step is so worth it because it really wakes up the cocoa’s flavor.
Step 4: Build the batter. Remove the pan from heat and whisk in the brewed coffee, buttermilk, and both sugars until fully dissolved. Then whisk in the eggs and vanilla. Slowly add in the flour mixture and whisk until the batter is smooth and combined. It will be thin, which is totally normal!
Step 5: Bake. Divide the batter evenly between your two prepared pans and bake for 30 to 35 minutes, or until a toothpick inserted in the center comes out clean. Let the cakes cool in the pans for 15 minutes, then turn them out onto a wire rack to cool completely for at least 1 hour.
Assemble Your Chocolate Blackout Cake
Step 1: Slice the layers. Once both cakes are fully cooled, slice each one horizontally in half so you end up with four cake layers total. A long serrated knife works great for this.
Step 2: Make the crumb coating. Take one of the four layers and crumble it into medium-sized crumbs. Set these aside because they are going to coat the outside of your finished cake and make it look absolutely stunning.
Step 3: Layer it up. Place one cake layer on your serving plate. Spread 1 cup of the chilled pudding evenly over the top. Add the second cake layer on top, then spread another cup of pudding. Place the third and final cake layer on top.
Step 4: Coat the whole cake. Spread the remaining pudding generously over the entire top and all sides of the cake. Do not be shy here. The pudding acts as both the filling and the frosting, so get it everywhere.
Step 5: Add the crumbs. Sprinkle your reserved cake crumbs all over the top and sides, pressing them gently so they stick into the pudding. This is truly the signature look of a classic chocolate blackout cake and it is seriously beautiful.
Step 6: Chill before serving. Refrigerate the finished cake for at least 1 hour before slicing. This helps everything set up and makes cutting so much cleaner.
How to Serve This Showstopper
This chocolate blackout cake is seriously impressive all on its own, but a cold glass of milk or a hot cup of coffee alongside it is just chef’s kiss. Because the cake is so rich and dense, smaller slices are actually very satisfying. I also love serving it slightly chilled straight from the fridge, since the pudding firms up a bit and gives you the most gorgeous, clean slices. It works beautifully as a birthday cake or a dinner party dessert when you really want to wow everyone at the table.
Tips for the Perfect Chocolate Blackout Cake
- Make the pudding ahead. Seriously, do this the night before. It needs a good 4 to 8 hours to firm up properly, and rushing it leads to a runny filling that slides right off.
- Use room temperature ingredients. Cold eggs and buttermilk can cause the batter to curdle slightly. Letting them come to room temp first makes the batter so much smoother.
- Do not skip the coffee. I know it sounds weird in a chocolate cake, but brewed coffee amplifies the cocoa flavor in a way that water simply cannot. You will not taste the coffee at all.
- Chop the chocolate finely. The finer the chocolate pieces, the faster and more evenly they melt into the pudding. Larger chunks can cause lumps.
- Press those crumbs in gently. When coating the outside, press just lightly enough so the crumbs stick without pushing them too deeply into the pudding. You want a beautiful, even coating.
- Cool the cakes fully before slicing. Even slightly warm cake layers will make the pudding slide around during assembly. Patience is genuinely the secret here.
Your Questions About Chocolate Blackout Cake, Answered
Can I make chocolate blackout cake ahead of time?
Yes, absolutely! In fact, it actually gets better after sitting overnight. The cake layers absorb a bit of the pudding and everything kind of melds together into this incredibly fudgy, moist texture. Just keep it well covered in the fridge and it stays perfect for up to 3 days.
Can I use a box mix for the cake layers to save time?
You totally can! A good quality dark chocolate box mix will work in a pinch, especially on busy days. That said, I really encourage you to try the homemade version at least once because the depth of flavor from blooming the cocoa in butter is genuinely next level and very worth the extra effort.
What if my pudding is too runny?
This usually means it did not cook long enough. The key is to keep whisking over medium heat until you see those large bubbles breaking at the surface and the mixture is visibly thick and glossy. If your pudding still seems loose after chilling, pop it back in the fridge for another hour or two. It firms up a lot as it cools.
Can I freeze this cake?
Technically yes, but I would not recommend freezing it already assembled because the pudding can become grainy and watery once it thaws. Instead, freeze the individual baked cake layers wrapped tightly in plastic, then make the pudding fresh when you are ready to assemble. That way everything stays perfect.
Why You Are Going to Absolutely Love This Cake
Honestly, this chocolate blackout cake is the kind of recipe that makes you feel like a total rockstar baker. The layers are deeply chocolatey and moist, the pudding is silky and rich, and the crumb coating gives it the most gorgeous textured finish. It is a true crowd-pleaser that looks incredibly impressive but is actually very manageable to make at home. Once you make it for someone, they will be asking you for this recipe forever.
If you love recipe inspiration and beautiful baking ideas, come find me on Pinterest where I share all my favorite dessert recipes, baking tips, and so much more. You can check out my boards right here at my Pinterest page and save this recipe for later!
Print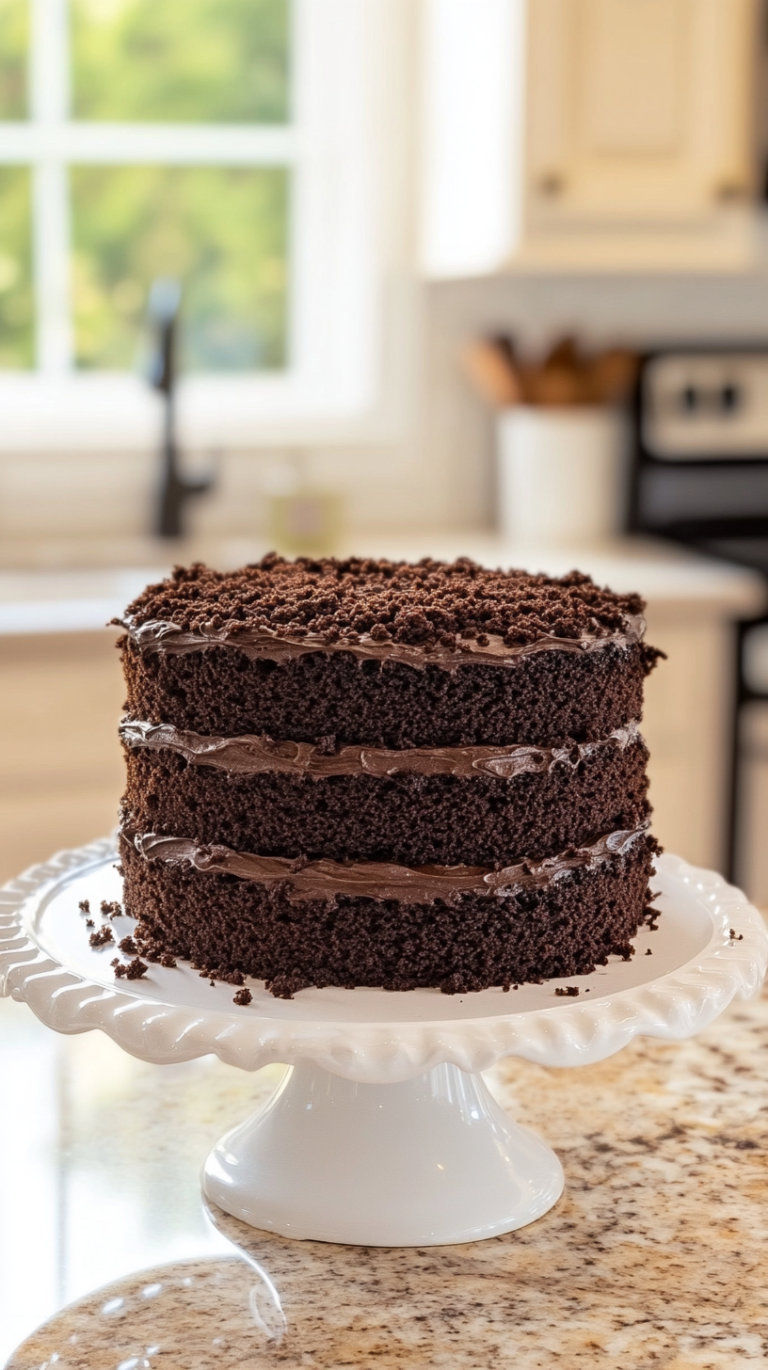
Chocolate Blackout Cake
A rich, fudgy Brooklyn-style dessert with layers of chocolate cake filled and coated in glossy chocolate pudding, topped with chocolate cake crumbs for an intensely chocolatey experience.
- Total Time: 70
- Yield: 12 servings 1x
Ingredients
250g granulated sugar
32g cornstarch
1/2 tsp salt
480ml half-and-half
240ml whole milk
170g unsweetened chocolate (finely chopped)
2 tsp pure vanilla extract
113g unsalted butter
180g all-purpose flour
2 tsp baking powder
1/2 tsp baking soda
1/2 tsp salt
150g buttermilk
60g semisweet chocolate chips
240g chocolate cake crumbs (store-bought or homemade)
Instructions
Preheat oven to 350°F (175°C)
Line a 9×13 inch baking pan with parchment paper
In a large bowl, whisk flour, baking powder, baking soda, and salt
In a separate bowl, cream melted butter until smooth
Add sugars and mix until combined
Gradually add dry ingredients to butter mixture
Alternate adding buttermilk, stirring to form a smooth batter
Fold in chocolate chips
Spread half the batter into prepared pan
Bake for 18-22 minutes until firm
While cake layers cool, prepare pudding by heating half-and-half, milk, sugar, cornstarch, salt, and vanilla in a saucepan
Once pudding thickens, remove from heat and stir in chopped chocolate until smooth and glossy
Assemble cake by spreading pudding between layers and coating the sides of the cake
Dust with cake crumbs for the outer coating
Notes
Use high-quality chocolate (70% cacao recommended)
Adjust pudding thickness by adding a splash of milk if too thick
Store in refrigerator for up to 3 days
Optional: Use dark cocoa powder for enhanced depth of flavor
- Prep Time: 30
- Cook Time: 40
- Category: Desserts
- Method: Baking
- Cuisine: American
- Diet: Vegetarian
Nutrition
- Serving Size: 1 slice (1/12th of cake)
- Calories: 620
- Sugar: 45g
- Sodium: 400mg
- Fat: 35g
- Saturated Fat: 22g
- Carbohydrates: 60g
- Fiber: 2g
- Protein: 6g
- Cholesterol: 65mg