
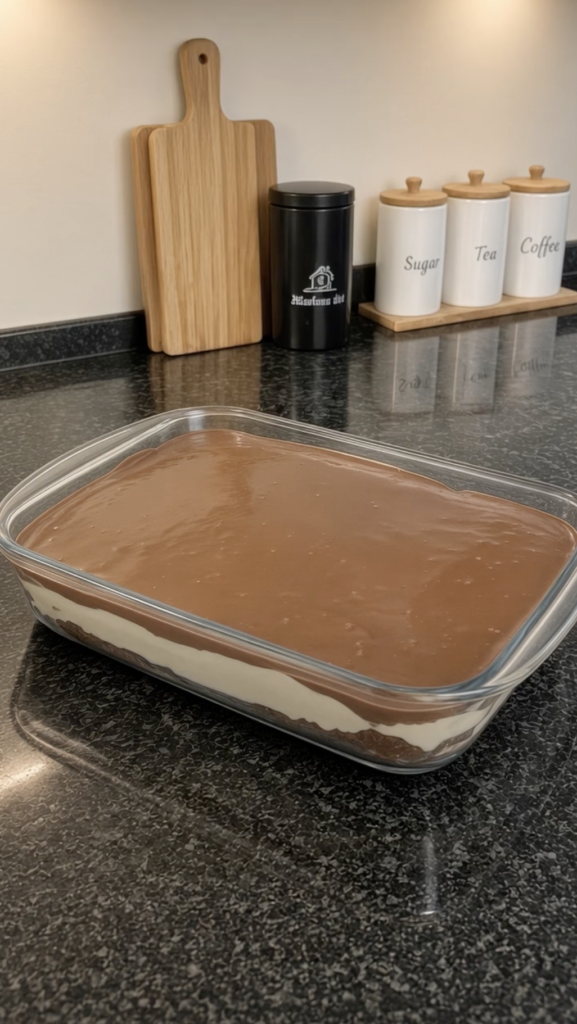
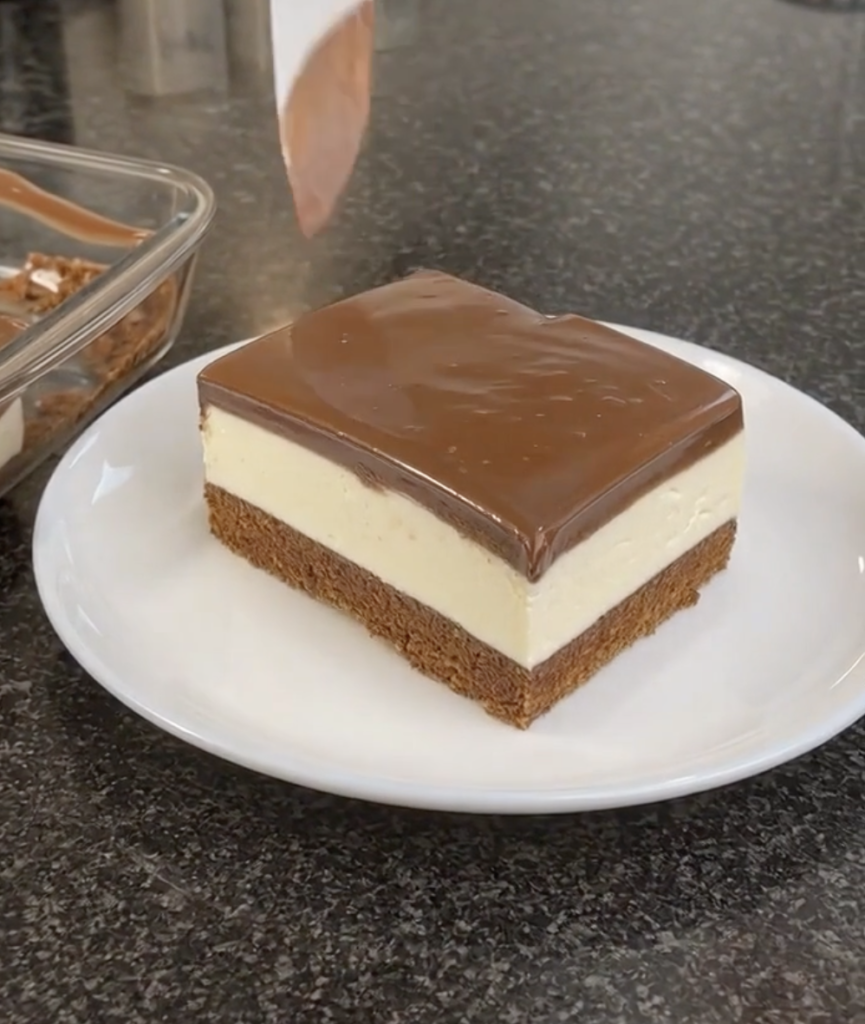
Chocolate Dream Bars are an absolutely stunning layered dessert that delivers pure indulgence in every single bite because these spectacular bars feature three distinct layers of pure decadence including a buttery biscuit base, silky vanilla custard cream layer, and a glossy chocolate ganache topping creating a dessert experience that tastes completely luxurious and unforgettable. The combination of a crumbly biscuit foundation that provides crunch, a velvety smooth vanilla custard cream that’s made with real custard and cream cheese creating incredible richness, and a smooth mirror-like chocolate ganache that’s silky and sophisticated creates layers of texture and flavor that are absolutely irresistible.
What Are Chocolate Dream Bars?
Chocolate Dream Bars are a sophisticated three-layer dessert featuring a buttery biscuit base, silky vanilla custard cream made with real custard and cream cheese, and topped with a smooth glossy chocolate ganache that sets to the perfect consistency. The biscuit base provides satisfying crunch that contrasts beautifully with the creamy vanilla layer and smooth chocolate topping. The vanilla custard cream is made from scratch with real eggs and milk creating authentic custard flavor that’s far superior to store-bought options. The chocolate ganache is made with semi-sweet chocolate creating the perfect balance of sweetness and chocolate flavor. These Chocolate Dream Bars are perfect for special occasions, celebrations, elegant dessert platters, or any time you want an impressive fancy dessert that looks professionally made.
Ingredient Overview
Here’s everything you need for these spectacular Chocolate Dream Bars. Each ingredient plays an important role in creating those perfect layers and incredible flavor.
For the Biscuit Base:
- Digestive biscuits or graham crackers, finely crushed (2 cups or 200g): Creates crunchy base for your Chocolate Dream Bars.
- Unsalted butter, melted (1/3 cup or 75g): Binds biscuits together for your Chocolate Dream Bars.
- Granulated sugar (2 tbsp): Adds sweetness to base for your Chocolate Dream Bars.
For the Vanilla Custard Cream Layer:
- Whole milk (2 cups or 480ml): Creates custard for your Chocolate Dream Bars.
- Granulated sugar (1/2 cup or 100g): Sweetens custard for your Chocolate Dream Bars.
- Cornstarch (3 tbsp or 24g): Thickens custard for your Chocolate Dream Bars.
- Large egg yolks (3): Creates rich custard for your Chocolate Dream Bars.
- Vanilla extract (2 tsp): Flavors custard for your Chocolate Dream Bars.
- Unsalted butter (2 tbsp): Enriches custard for your Chocolate Dream Bars.
- Cream cheese, softened (8 oz or 226g): Creates creamy layer for your Chocolate Dream Bars.
- Heavy cream, cold (1/2 cup or 120ml): Creates light airy texture for your Chocolate Dream Bars.
For the Chocolate Ganache Topping:
- Semi-sweet chocolate, finely chopped (7 oz or 200g): Creates chocolate topping for your Chocolate Dream Bars.
- Heavy cream (3/4 cup or 180ml): Creates smooth ganache for your Chocolate Dream Bars.
- Unsalted butter (1 tbsp): Enriches ganache for your Chocolate Dream Bars.
How To Make Chocolate Dream Bars
Creating these spectacular bars requires patience and attention to detail, but the results are absolutely worth the effort because they look and taste completely restaurant-quality and impressive.
Make the Biscuit Base
In a medium bowl, mix the crushed biscuits, melted butter, and sugar until evenly combined and resembling wet sand for your Chocolate Dream Bars. The mixture should hold together when pressed.
Press firmly and evenly into the bottom of a 9×9-inch or 9×13-inch glass baking dish lined with parchment paper for your Chocolate Dream Bars. Use the bottom of a measuring cup to press firmly and evenly.
Refrigerate while preparing the custard layer for your Chocolate Dream Bars.
Make the Vanilla Custard
In a medium saucepan, whisk together the sugar and cornstarch for your Chocolate Dream Bars. Add the egg yolks and whisk until smooth and pale.
Slowly pour in the milk while whisking constantly for your Chocolate Dream Bars. This prevents lumps from forming.
Place over medium heat and cook, stirring continuously, until the mixture thickens and begins to bubble for your Chocolate Dream Bars. Cook for 1 minute more then remove from heat. The custard should coat the back of a spoon.
Stir in the butter and vanilla extract until fully melted and incorporated for your Chocolate Dream Bars. The custard should be smooth and silky.
Press plastic wrap directly onto the surface and refrigerate until completely cool for your Chocolate Dream Bars. This takes about 2 hours. Pressing plastic wrap directly on the surface prevents a skin from forming.
Make the Custard Cream Layer
Once cool, beat the cream cheese with an electric mixer until completely smooth for your Chocolate Dream Bars. There should be no lumps remaining.
Add the cooled custard to the cream cheese and beat until fully combined and silky for your Chocolate Dream Bars. The mixture should be smooth and creamy.
In a separate cold bowl, whip the heavy cream to soft peaks for your Chocolate Dream Bars. Soft peaks mean the cream holds its shape but tips over slightly.
Gently fold the whipped cream into the custard cream cheese mixture for your Chocolate Dream Bars. Fold gently to maintain airiness and light texture.
Spread the vanilla custard cream evenly over the chilled biscuit base for your Chocolate Dream Bars, smoothing the top completely flat. Use an offset spatula for smooth even coverage.
Refrigerate for at least 1 hour until set for your Chocolate Dream Bars.
Make the Chocolate Ganache
Place the chopped chocolate and butter in a heatproof bowl for your Chocolate Dream Bars.
Heat the heavy cream until steaming for your Chocolate Dream Bars. Do not boil.
Pour the hot cream over the chocolate and let sit 2 minutes undisturbed for your Chocolate Dream Bars. This allows the chocolate to melt from residual heat.
Stir until completely smooth and glossy for your Chocolate Dream Bars. The ganache should be silky smooth.
Let the ganache cool for 10 to 15 minutes until slightly thickened but still pourable for your Chocolate Dream Bars. This timing is important for achieving the perfect mirror finish.
Assemble and Finish
Pour the ganache evenly over the set custard layer for your Chocolate Dream Bars and spread gently to the edges with an offset spatula for a smooth mirror finish.
Refrigerate for at least 2 hours or overnight until fully set for your Chocolate Dream Bars. Overnight chilling creates the most beautiful glossy finish.
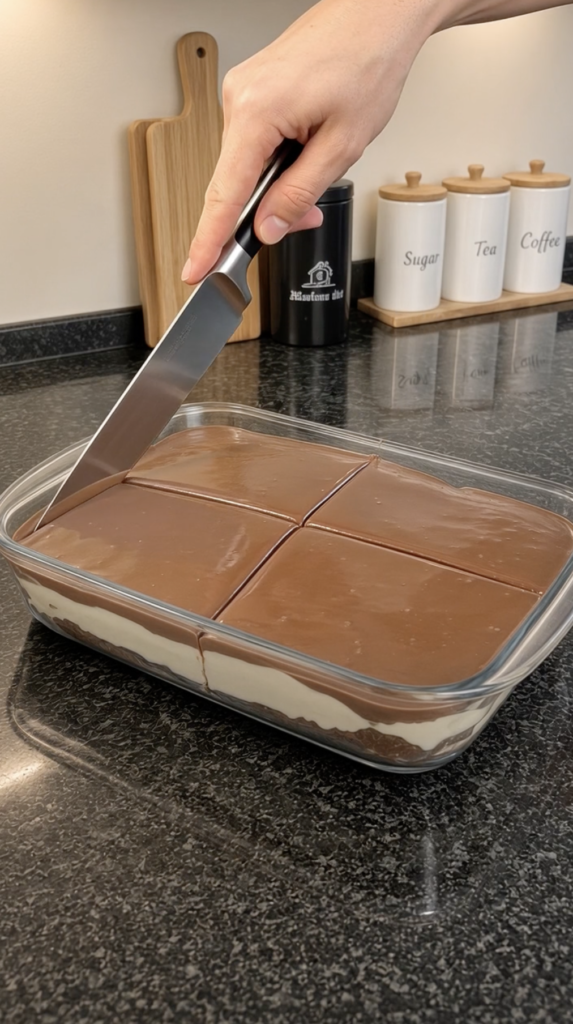
Lift out using the parchment overhang and cut into squares with a hot dry knife for your Chocolate Dream Bars. Wipe the knife between cuts for clean edges.
Serve cold for your Chocolate Dream Bars.
How to Serve
These Chocolate Dream Bars are perfect for elegant dessert platters, special occasions, celebrations, dinner parties, or any time you want an impressive fancy dessert that looks professionally made. Serve cold directly from the refrigerator. The bars pair beautifully with hot coffee, espresso, or hot chocolate. Makes 12 generous servings depending on how you cut them. Store covered in refrigerator for up to 4 days.
Expert Tips
- Crush biscuits finely: Creates better texture for your Chocolate Dream Bars.
- Press base firmly: Ensures biscuit layer holds together for your Chocolate Dream Bars.
- Use fresh eggs: Ensures safe custard for your Chocolate Dream Bars.
- Whisk constantly while cooking custard: Prevents lumps for your Chocolate Dream Bars.
- Chill custard completely: Ensures safe and smooth mixing for your Chocolate Dream Bars.
- Use cold cream: Whips to better peaks for your Chocolate Dream Bars.
- Fold gently: Maintains airiness for your Chocolate Dream Bars.
- Smooth custard layer flat: Creates even surface for chocolate topping for your Chocolate Dream Bars.
- Cool ganache properly: Achieves perfect mirror finish for your Chocolate Dream Bars.
- Use hot dry knife: Creates clean cuts for your Chocolate Dream Bars.
Common Questions
Why must the custard be completely cool?
Warm custard will melt the cream cheese and whipped cream creating a thin runny mixture for your Chocolate Dream Bars. Cooling the custard completely ensures it blends smoothly with the cream cheese and whipped cream creating a thick creamy layer.
Can I use a custard powder instead of making custard?
Yes, you can use instant vanilla pudding powder mixed according to package directions for your Chocolate Dream Bars. However, homemade custard creates superior flavor and texture that’s worth the extra effort.
What if my ganache is too thick to pour?
If your ganache is too thick for your Chocolate Dream Bars, gently reheat it over a double boiler or microwave for 5 to 10 seconds until pourable again.
Can I make these ahead?
Yes! These bars are actually better made 1 to 2 days ahead for your Chocolate Dream Bars. The layers have time to set and flavors develop. Store covered in refrigerator for up to 4 days for your Chocolate Dream Bars.
Why These Are Amazing
Chocolate Dream Bars are absolutely the perfect elegant dessert because the three-layer construction creates sophistication that looks completely professionally made. The real custard filling creates authentic flavor that’s far superior to quick pudding alternatives. The mirror-like chocolate ganache finish makes these bars look like they came from a fancy bakery. The combination of textures from crunchy biscuit to creamy custard to smooth chocolate creates perfect eating experience. Whether you’re impressing guests or treating yourself, these Chocolate Dream Bars deliver luxury and elegance.
More Recipes You’ll Love
If you enjoyed these Chocolate Dream Bars, you’ll absolutely love these other elegant dessert recipes from our collection. Try our No-Bake Eclair Cake for another layered no-bake option, or make 4-Layer Chocolate Heaven for dramatic presentation.
For more amazing dessert inspiration and elegant baking techniques, check out King Arthur Baking where you’ll find incredible tips and creative recipes.
