Classic Crème Brûlée has always been one of my absolute favorite desserts, and this version takes it to a whole new level by combining it with creamy cheesecake. I know what you’re thinking because that’s exactly what I thought too when I first saw this gorgeous dessert at a bakery in Brooklyn. The combination of silky smooth cheesecake with that signature caramelized sugar top is absolutely mind-blowing. Every time I make this, people can’t believe I did it at home because it looks and tastes like something straight from a fancy French restaurant.
What Makes This Dessert Special?
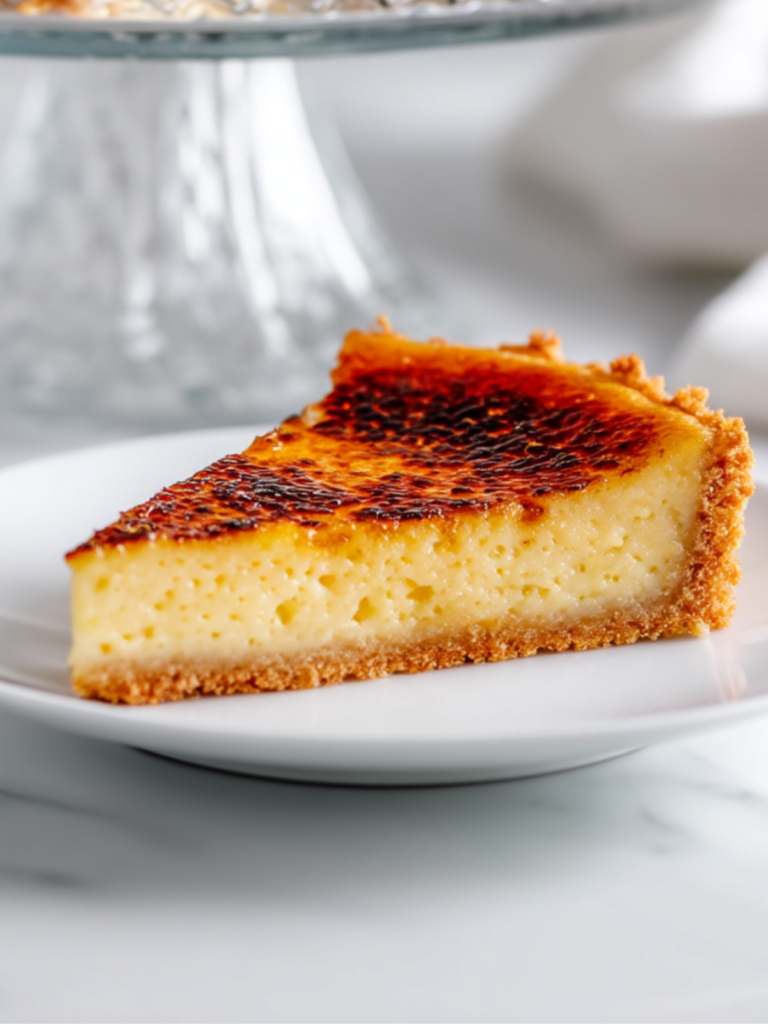
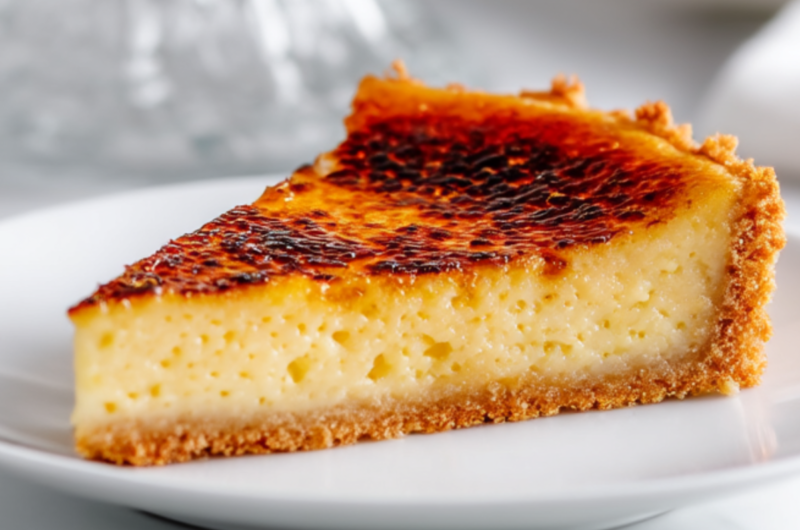
This Classic Crème Brûlée recipe is actually a brilliant fusion of two beloved desserts. You get a buttery graham cracker crust on the bottom, a layer of rich, velvety cheesecake in the middle, and that iconic crackly caramelized sugar shell on top. The beauty of this approach is that you get all the satisfaction of cracking through that hard sugar layer with your spoon, just like traditional crème brûlée, but with the added richness and creaminess of cheesecake. It’s basically the best of both worlds in one stunning dessert.
Ingredients Breakdown
Let’s go through everything you need to make this incredible Classic Crème Brûlée cheesecake. I’ve broken it down by component so you can see exactly what goes into each layer.
For the Graham Cracker Crust:
- Graham cracker crumbs (1½ cups): You can buy pre-made crumbs or crush about 10-12 whole graham crackers. I prefer crushing my own because they’re fresher and you can control the texture.
- Granulated sugar (3 tablespoons): Adds a touch of sweetness to the crust and helps it hold together better.
- Melted butter (6 tablespoons): Binds the crumbs together. Make sure it’s fully melted but not too hot or it’ll start cooking the other ingredients.
- Salt (pinch): Just a tiny bit to balance the sweetness and make the crust taste more complex.
For the Cheesecake Filling:
- Cream cheese (24 oz, three 8-oz packages, softened): This is the base of your filling. Room temperature is absolutely crucial here because cold cream cheese creates lumps no matter how long you mix.
- Granulated sugar (¾ cup): Sweetens the filling without making it overly sweet. You want balance because the caramelized top adds more sweetness.
- Heavy cream (½ cup): Makes the cheesecake extra creamy and smooth. You could use sour cream instead for a tangier flavor.
- Eggs (3 large): Room temperature eggs incorporate better. They give the cheesecake structure without making it dense.
- Vanilla extract (2 teaspoons): Pure vanilla is worth it here. It adds that classic custard flavor that makes this feel like true crème brûlée.
- Vanilla bean paste (1 teaspoon, optional): Those little vanilla specks make it look and taste extra special, just like classic French custard.
- Salt (¼ teaspoon): Balances all the sweetness and makes the vanilla flavor pop.
For the Caramelized Top:
- Granulated sugar (¼ cup): This gets sprinkled on top and torched to create that signature crunchy brûlée layer. Regular white sugar works best because it caramelizes evenly.
Making Your Classic Crème Brûlée
Alright, let’s make this stunning dessert. Don’t be intimidated by the multiple steps because each one is actually quite simple. The key is just being patient and letting everything chill properly.
Prep Your Pan
Preheat your oven to 325°F. Line the bottom of a 9-inch springform pan with parchment paper and spray the sides lightly with cooking spray. The springform pan is essential here because you need to remove the sides cleanly to show off your beautiful creation. Wrap the outside of the pan tightly with aluminum foil to prevent any water from seeping in during the water bath.
Create the Crust
In a medium bowl, mix together the graham cracker crumbs, sugar, and salt. Pour in the melted butter and stir until the mixture looks like wet sand and holds together when you squeeze it. Press this mixture firmly into the bottom of your prepared pan. I use the bottom of a measuring cup to really pack it down evenly.
Bake the crust for 10 minutes until it’s lightly golden and smells toasty. Remove from the oven and let it cool while you make the filling. This pre-baking step prevents the crust from getting soggy.
Make the Filling
In a large bowl or stand mixer, beat the softened cream cheese on medium speed for about 2-3 minutes until it’s completely smooth with no lumps. Scrape down the sides of the bowl frequently because cream cheese loves to stick to the edges.
Add the sugar and beat until well combined and fluffy. Then add the heavy cream, vanilla extract, vanilla bean paste if using, and salt. Mix until smooth. Add the eggs one at a time, mixing on low speed just until each egg is incorporated. Don’t overmix after adding the eggs because that creates too much air and can cause cracks.
Bake in a Water Bath
Pour the cheesecake filling over the cooled crust and smooth the top with a spatula. Place the springform pan inside a larger roasting pan. Carefully pour hot water into the roasting pan until it comes about halfway up the sides of the springform pan. This water bath helps the cheesecake bake evenly and prevents cracks.
Bake for 55-65 minutes until the edges are set but the center still has a slight jiggle when you gently shake the pan. It should look like barely set Jell-O in the middle. The residual heat will continue cooking it as it cools. Turn off the oven, crack the door open, and let the cheesecake cool in the oven for 1 hour. This gradual cooling prevents cracks from forming.
Chill Completely
Remove the cheesecake from the water bath and the oven. Let it cool to room temperature, then cover and refrigerate for at least 6 hours or overnight. This chilling time is crucial for the Classic Crème Brûlée to set properly and develop the best texture.
Caramelize the Top
When you’re ready to serve, remove the cheesecake from the fridge and take off the springform pan sides. Sprinkle the top evenly with a thin layer of granulated sugar. Using a kitchen torch, move the flame constantly in a circular motion across the sugar until it melts and caramelizes to a deep amber color.
Let the sugar harden for about 2 minutes before serving. That crackly top is the signature of Classic Crème Brûlée, and tapping it with a spoon to break through is half the fun of eating this dessert.
Serving This Showstopper
This Classic Crème Brûlée cheesecake is rich and indulgent, so smaller slices are perfect. I love serving it with fresh berries on the side because the tartness cuts through the richness beautifully. A small dollop of lightly sweetened whipped cream is also lovely. For an extra fancy presentation, add a sprig of fresh mint or dust the plate with a tiny bit of powdered sugar. This pairs wonderfully with coffee or a dessert wine. If you’re serving multiple desserts, my Chocolate Mousse Dream makes an elegant companion.
Expert Tips for Success
- Room temperature ingredients are crucial: Cold cream cheese will never get smooth no matter how long you beat it. Set everything out at least an hour before you start baking.
- Don’t skip the water bath: I know it seems fussy, but the water bath prevents cracks and helps the cheesecake bake evenly. The gentle, moist heat is essential for that silky texture.
- Watch for the jiggle: The center should still wobble like Jell-O when you remove it from the oven. It firms up as it cools, and overbaking creates a grainy texture.
- Torch technique matters: Keep the flame moving constantly and hold it about 3-4 inches from the surface. If you stay in one spot too long, the sugar will burn instead of caramelize.
- No torch? No problem: You can use your oven’s broiler, but watch it like a hawk because it burns quickly. Place the chilled cheesecake under the broiler for 1-2 minutes max.
- Make it ahead: This Classic Crème Brûlée is perfect for entertaining because you can make the cheesecake 2-3 days ahead. Just caramelize the top right before serving.
- Clean cuts every time: Dip your knife in hot water and wipe it clean between each slice for those perfect, Instagram-worthy cuts.
- Store properly: Once you’ve caramelized the top, it’s best eaten within a few hours. The sugar top softens as it sits, losing that signature crack.
Your Questions Answered
Can I make this without a kitchen torch?
Yes! While a kitchen torch gives you the most control, you can absolutely use your oven’s broiler. Make sure your cheesecake is very cold, sprinkle on the sugar, and place it under a preheated broiler for 1-2 minutes. Watch it constantly because it goes from perfect to burnt in seconds. The broiler method works, it’s just trickier to get an even caramelization.
Why did my cheesecake crack?
Cracks usually happen from overmixing, overbaking, or cooling too quickly. When you add the eggs, mix just until combined because overmixing creates air bubbles that expand and crack. Don’t overbake it because the center should still jiggle. Finally, let it cool gradually in the oven with the door cracked open instead of going straight to room temperature. These steps will give you a crack-free Classic Crème Brûlée every time.
How long does this keep?
The cheesecake itself keeps beautifully in the fridge for up to 5 days when covered. However, once you caramelize the sugar top, it’s best eaten within 2-3 hours because the sugar gradually absorbs moisture and loses its crunch. For the best results, caramelize individual slices as you serve them rather than doing the whole cake at once.
Can I freeze this dessert?
You can freeze the cheesecake portion before adding the caramelized top. Wrap it tightly in plastic wrap and then aluminum foil, and freeze for up to 2 months. Thaw it overnight in the fridge, then add the sugar and torch it right before serving. Never freeze it after caramelizing because the sugar top becomes a sticky mess when thawed.
What Makes This Irresistible
Classic Crème Brûlée in this cheesecake form one of the most impressive desserts you can make. You get that satisfying crack of the caramelized sugar, the creamy richness of cheesecake, and the buttery crunch of the graham cracker crust all in one bite. It looks incredibly fancy and restaurant-quality, but the secret is that it’s actually quite doable at home if you follow the steps. The combination of textures and flavors keeps you coming back for more, and people always assume it’s way harder to make than it actually is.
Developing This Recipe
Classic Crème Brûlée actually found me first! I was visiting France with my partner Joe when we stumbled across this gorgeous dessert at a little café, and I was instantly obsessed. The moment I got home, I knew I had to recreate it as a cheesecake. My first attempt at torching the top was a total disaster because I held the flame too close and ended up with burnt patches instead of that beautiful even caramelization. But once I nailed the right distance and kept the flame moving in circles, everything clicked.
Classic Crème Brûlée With Graham Cracker Crust
Course: DessertCuisine: FrenchDifficulty: Intermediate12
servings25
minutes1
hour10
minutes420
kcalIngredients
- For the Graham Cracker Crust:
Graham cracker crumbs (1½ cups): You can buy pre-made crumbs or crush about 10-12 whole graham crackers. I prefer crushing my own because they’re fresher and you can control the texture.
Granulated sugar (3 tablespoons): Adds a touch of sweetness to the crust and helps it hold together better.
Melted butter (6 tablespoons): Binds the crumbs together. Make sure it’s fully melted but not too hot or it’ll start cooking the other ingredients.
Salt (pinch): Just a tiny bit to balance the sweetness and make the crust taste more complex.
- For the Cheesecake Filling:
Cream cheese (24 oz, three 8-oz packages, softened): This is the base of your filling. Room temperature is absolutely crucial here because cold cream cheese creates lumps no matter how long you mix.
Granulated sugar (¾ cup): Sweetens the filling without making it overly sweet. You want balance because the caramelized top adds more sweetness.
Heavy cream (½ cup): Makes the cheesecake extra creamy and smooth. You could use sour cream instead for a tangier flavor.
Eggs (3 large): Room temperature eggs incorporate better. They give the cheesecake structure without making it dense.
Vanilla extract (2 teaspoons): Pure vanilla is worth it here. It adds that classic custard flavor that makes this feel like true crème brûlée.
Vanilla bean paste (1 teaspoon, optional): Those little vanilla specks make it look and taste extra special, just like classic French custard.
Salt (¼ teaspoon): Balances all the sweetness and makes the vanilla flavor pop.
- For the Caramelized Top:
Granulated sugar (¼ cup): This gets sprinkled on top and torched to create that signature crunchy brûlée layer. Regular white sugar works best because it caramelizes evenly.
Directions
- Prep Your Pan
- Preheat your oven to 325°F. Line the bottom of a 9-inch springform pan with parchment paper and spray the sides lightly with cooking spray. The springform pan is essential here because you need to remove the sides cleanly to show off your beautiful creation. Wrap the outside of the pan tightly with aluminum foil to prevent any water from seeping in during the water bath.
- Create the Crust
- In a medium bowl, mix together the graham cracker crumbs, sugar, and salt. Pour in the melted butter and stir until the mixture looks like wet sand and holds together when you squeeze it. Press this mixture firmly into the bottom of your prepared pan. I use the bottom of a measuring cup to really pack it down evenly.
- Bake the crust for 10 minutes until it’s lightly golden and smells toasty. Remove from the oven and let it cool while you make the filling. This pre-baking step prevents the crust from getting soggy.
- Make the Filling
- In a large bowl or stand mixer, beat the softened cream cheese on medium speed for about 2-3 minutes until it’s completely smooth with no lumps. Scrape down the sides of the bowl frequently because cream cheese loves to stick to the edges.
- Add the sugar and beat until well combined and fluffy. Then add the heavy cream, vanilla extract, vanilla bean paste if using, and salt. Mix until smooth. Add the eggs one at a time, mixing on low speed just until each egg is incorporated. Don’t overmix after adding the eggs because that creates too much air and can cause cracks.
- Bake in a Water Bath
- Pour the cheesecake filling over the cooled crust and smooth the top with a spatula. Place the springform pan inside a larger roasting pan. Carefully pour hot water into the roasting pan until it comes about halfway up the sides of the springform pan. This water bath helps the cheesecake bake evenly and prevents cracks.
- Bake for 55-65 minutes until the edges are set but the center still has a slight jiggle when you gently shake the pan. It should look like barely set Jell-O in the middle. The residual heat will continue cooking it as it cools. Turn off the oven, crack the door open, and let the cheesecake cool in the oven for 1 hour. This gradual cooling prevents cracks from forming.
- Chill Completely
- Remove the cheesecake from the water bath and the oven. Let it cool to room temperature, then cover and refrigerate for at least 6 hours or overnight. This chilling time is crucial for the Classic Crème Brûlée to set properly and develop the best texture.
- Caramelize the Top
- When you’re ready to serve, remove the cheesecake from the fridge and take off the springform pan sides. Sprinkle the top evenly with a thin layer of granulated sugar. Using a kitchen torch, move the flame constantly in a circular motion across the sugar until it melts and caramelizes to a deep amber color.
- Let the sugar harden for about 2 minutes before serving. That crackly top is the signature of Classic Crème Brûlée, and tapping it with a spoon to break through is half the fun of eating this dessert.