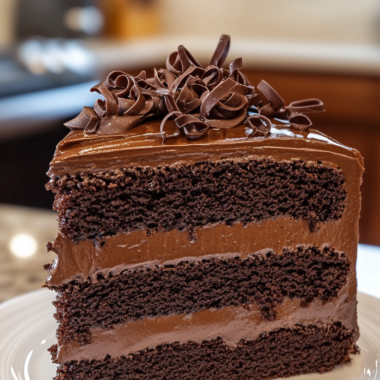
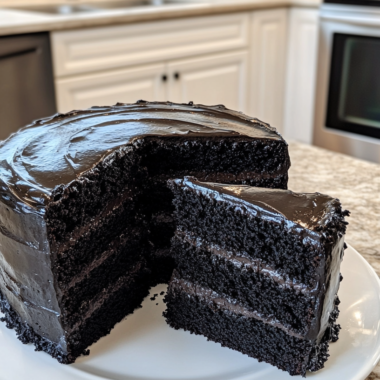
Ding Dong Cake is hands down the most nostalgic and delicious dessert I’ve ever recreated because this showstopping cake features two soft moist chocolate layers filled with fluffy cream filling and topped with silky chocolate ganache that tastes exactly like those beloved snack cakes. The combination of rich chocolate cake, light airy cream filling, and smooth ganache coating creates the ultimate nostalgia dessert that brings back childhood memories while tasting sophisticated enough for any celebration.
What Is Ding Dong Cake?
Ding Dong Cake is a homemade version of the classic snack cake featuring two layers of moist chocolate cake separated by a fluffy vanilla cream filling and coated entirely with smooth chocolate ganache. The name comes from the iconic snack cakes that inspired this delicious cake recipe. Unlike the packaged version, this homemade Ding Dong Cake uses quality ingredients and creates incredible flavor and texture that’s far superior to store-bought. Think of it as the ultimate comfort dessert that combines childhood nostalgia with elegant homemade bakery quality in every single bite.
What You’ll Need
Let me walk you through everything you need for this delicious Ding Dong Cake. Each ingredient plays an important role in creating perfection.
For the Chocolate Cake Layers:
- All-purpose flour (210g or 1 and 3/4 cups): Provides structure for your Ding Dong Cake. Measure by spooning and leveling.
- Granulated sugar (350g or 1 and 3/4 cups): Sweetens and creates tender moist crumb in your Ding Dong Cake layers.
- Unsweetened cocoa powder (75g or 3/4 cup): Creates rich chocolate flavor essential for your Ding Dong Cake.
- Baking powder (1 and 1/2 teaspoons): Helps cake rise properly for your Ding Dong Cake layers.
- Baking soda (1 teaspoon): Works with buttermilk for tenderness in your Ding Dong Cake.
- Salt (1/2 teaspoon): Balances sweetness and brings out chocolate flavor beautifully.
- Buttermilk (240ml or 1 cup, room temperature): Creates incredibly moist tender crumb in your Ding Dong Cake.
- Vegetable oil (120ml or 1/2 cup): Keeps cake moist and tender. Neutral oil works best.
- Large eggs (2, room temperature): Bind ingredients and add richness to your Ding Dong Cake.
- Pure vanilla extract (2 teaspoons): Enhances chocolate flavor and adds depth.
- Very hot brewed coffee (90ml or 3/4 cup): Intensifies chocolate flavor without tasting like coffee in your Ding Dong Cake.
For the Cream Filling:
- Granulated sugar (200g or 1 cup): Sweetens cream filling for your Ding Dong Cake.
- All-purpose flour (40g or 1/3 cup): Thickens filling to perfect consistency for your Ding Dong Cake.
- Whole milk (240ml or 1 cup): Creates smooth filling for your Ding Dong Cake. Use room temperature.
- Pure vanilla extract (1 teaspoon): Adds vanilla flavor to filling for your Ding Dong Cake.
- Unsalted butter (226g or 1 cup, softened): Creates fluffy light filling for your Ding Dong Cake. Must be softened.
For the Chocolate Ganache:
- Semisweet chocolate (226g or 1 and 1/2 cups, chopped or chips): Creates smooth ganache coating for your Ding Dong Cake.
- Heavy whipping cream (90ml or 3/4 cup): Creates pourable ganache for your Ding Dong Cake coating.
How To Make
Creating this amazing cake is easier than you think. Let me guide you through making perfect Ding Dong Cake every time.
Prepare the Pans
Preheat your oven to 175 degrees Celsius or 350 degrees Fahrenheit for your Ding Dong Cake. Make sure the oven is fully preheated before baking.
Grease two 20-centimeter or 8-inch round cake pans with butter or baking spray. Line the bottoms with parchment paper circles to prevent sticking.
Mix Dry Ingredients
In a large bowl, whisk together the all-purpose flour, granulated sugar, unsweetened cocoa powder, baking powder, baking soda, and salt for your Ding Dong Cake. Make sure everything is fully combined with no cocoa lumps.
Combine Wet Ingredients
In a separate medium bowl or liquid measuring cup, whisk together the buttermilk, vegetable oil, eggs, and vanilla for your Ding Dong Cake. Mix just until blended with no egg streaks visible.
Make the Batter
Add the buttermilk mixture to the flour mixture and whisk until combined for your Ding Dong Cake. Then pour in the very hot brewed coffee and whisk until fully incorporated and smooth.
The batter will be quite thin and pourable. This is completely normal and expected for your Ding Dong Cake batter.
Bake the Cake
Divide the batter evenly between the two prepared cake pans for your Ding Dong Cake. Make sure each pan gets equal amounts of batter.
Bake at 175 degrees Celsius for 28 to 30 minutes until a toothpick inserted in the center comes out clean for your Ding Dong Cake. The tops should look set.
Let the cake layers cool in the pans for 15 minutes on wire racks for your Ding Dong Cake. Then carefully turn out onto wire racks, remove parchment paper, and let cool completely. This takes about 1 and 1/2 hours.
Make Cream Filling
In a medium saucepan, whisk together sugar and flour for your Ding Dong Cake filling. Pour in the milk while whisking constantly until smooth.
Cook over medium heat, whisking frequently, until the mixture begins to simmer for your Ding Dong Cake. This takes 5 to 7 minutes. Then reduce heat to medium-low and hold at a simmer, whisking constantly, until the mixture thickens like pudding. This takes 1 to 2 minutes more.
Pour the mixture into a medium bowl and press plastic wrap directly onto the surface for your Ding Dong Cake filling. This prevents a skin from forming. Let cool to room temperature, about 2 hours. You can refrigerate to speed this up for your Ding Dong Cake.
In the bowl of a stand mixer fitted with the paddle attachment, beat the softened butter on medium speed for 2 minutes for your Ding Dong Cake filling. Beat until smooth and creamy. Scrape down the sides.
Add the cooled flour mixture to the butter 2 to 3 tablespoons at a time for your Ding Dong Cake. Mix on medium-low speed until fully combined between each addition.
Add vanilla extract to your Ding Dong Cake filling. Increase speed to medium and beat for about 1 minute until the filling is smooth, light, and airy. The filling should be very thick.
Assemble the Cake
Place one cake layer top-side down on a cake stand or serving plate for your Ding Dong Cake. Make sure it’s level and stable.
Spread the cream filling evenly over the top for your Ding Dong Cake. Use an offset spatula for even coverage.
Place the second cake layer top-side down on top for your Ding Dong Cake. Press down gently to push the filling to the edges.
Smooth the filling around the sides with an offset spatula for your Ding Dong Cake. Create even coverage all around.
Refrigerate the assembled cake for 20 minutes while preparing the ganache for your Ding Dong Cake. This helps everything set properly.
Make Chocolate Ganache
Place the chopped semisweet chocolate in a medium heatproof bowl for your Ding Dong Cake ganache. Make sure the bowl is heat-safe.
Microwave the heavy whipping cream in a liquid measuring cup on high for about 90 seconds until steaming for your Ding Dong Cake. Immediately pour over the chocolate and let stand for 5 minutes without stirring.
Stir until the chocolate is fully melted and the ganache is smooth and glossy for your Ding Dong Cake. Mix gently from the center outward.
Coat with Ganache
Let the ganache cool for about 15 minutes until thick enough to spread without sliding off for your Ding Dong Cake. It should still be pourable but not too runny.
Dollop the ganache over the top of the chilled cake for your Ding Dong Cake. Using a small offset spatula, spread it into an even layer on top.
Gently push the ganache over the edges to run down the sides for your Ding Dong Cake. Spread evenly all over the cake creating that iconic coating.
Let the ganache set completely before slicing your Ding Dong Cake. Refrigerate until ready to serve.
How to Serve
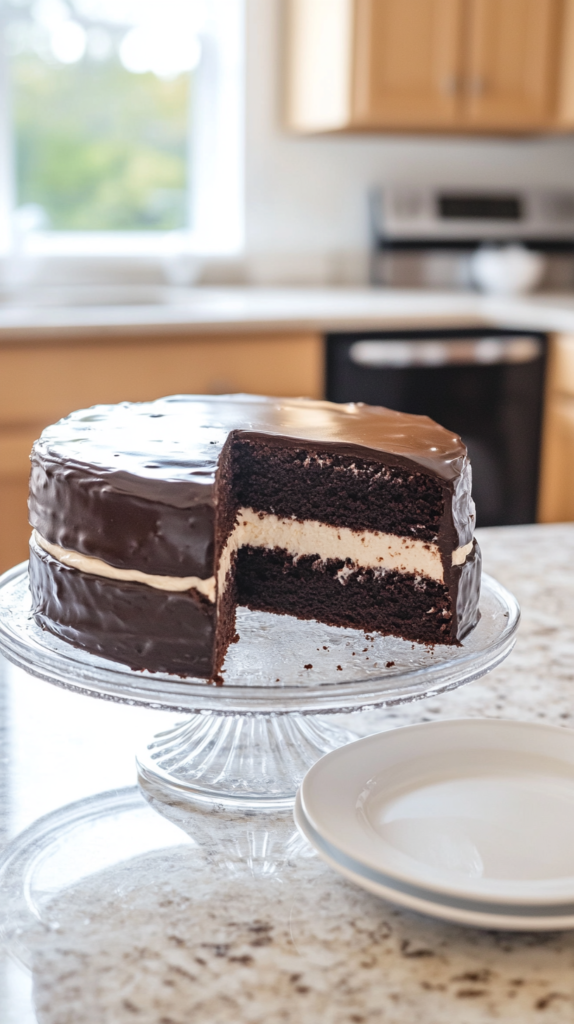
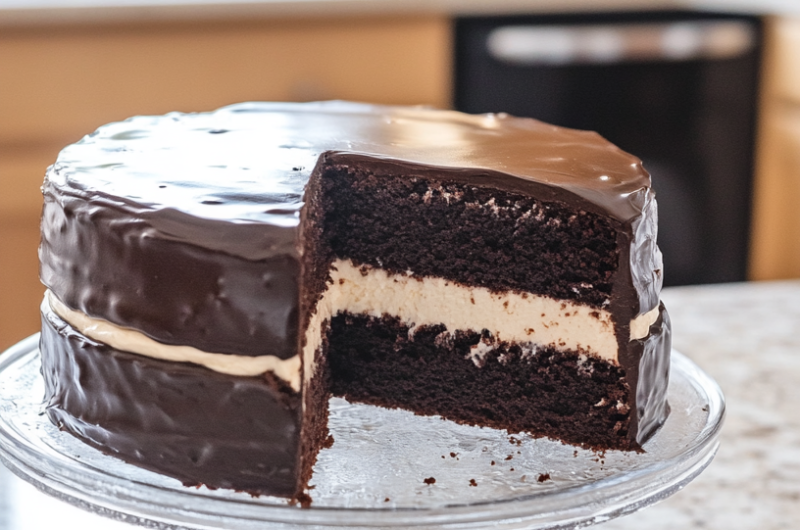
This Ding Dong Cake is perfect for birthdays, parties, gatherings, or whenever you want a nostalgic treat that tastes incredible. Serve chilled straight from the refrigerator for best taste and texture. The cake slices beautifully to show off the chocolate layers with cream filling between them. Pair with cold milk, coffee, or vanilla ice cream for perfect combination. Store covered in refrigerator for up to 4 days. Let slices sit at room temperature 10 minutes before serving for optimal texture. This makes 8 generous servings perfect for families and small gatherings.
Expert Tips
- Thin batter is normal: Ding Dong Cake batter should be quite thin with coffee added. This creates moist tender cake.
- Cool filling completely: Room temperature filling mixes better with butter for your Ding Dong Cake. Don’t skip this step.
- Beat filling well: Light airy filling makes better texture for your Ding Dong Cake than dense filling.
- Use softened butter: Cold butter won’t incorporate smoothly into filling for your Ding Dong Cake.
- Chill before ganache: Cold assembled cake prevents ganache from melting filling for your Ding Dong Cake.
- Room temperature cream: All ingredients at proper temp mix better for your Ding Dong Cake.
- Don’t overmix batter: Mix just until combined or cake will be tough instead of moist.
- Hot cream melts chocolate: Use hot not warm cream for smooth ganache on your Ding Dong Cake.
- Let ganache cool slightly: Too hot ganache runs right off for your Ding Dong Cake.
- Press plastic wrap down: Prevents skin from forming on cooled filling for your Ding Dong Cake.
Common Questions
Why is my filling too thin or too thick?
Thin filling means you didn’t cook the flour mixture long enough for your Ding Dong Cake. Thicken it by cooking 1 more minute. Too thick means overcooking. For your Ding Dong Cake, aim for pudding-like thickness after cooking.
Can I make Ding Dong Cake ahead?
Yes! Bake cake layers up to 2 days before for your Ding Dong Cake. Assemble with filling and ganache 1 day before serving. The flavors improve as they meld together overnight in your Ding Dong Cake.
Can I freeze Ding Dong Cake?
Yes! Wrap unfrosted cake layers tightly in plastic wrap and aluminum foil, then freeze for up to 3 months. Wrap assembled cake for up to 1 month. Thaw at room temperature before serving your Ding Dong Cake.
What if my ganache seizes or breaks?
Ganache breaks when cream and chocolate separate for your Ding Dong Cake. To fix, reheat cream and slowly whisk in. Or start over with fresh chocolate for your Ding Dong Cake ganache.
Why You’ll Love This
Ding Dong Cake is absolutely the perfect dessert because it combines nostalgic childhood memories with sophisticated homemade bakery quality that tastes incredible. The soft moist chocolate cake paired with light fluffy cream filling and silky ganache creates irresistible flavor that keeps people coming back for seconds. The homemade version tastes so much better than packaged snack cakes because you control the quality of ingredients. Whether you’re celebrating a special occasion or just want comfort food that tastes amazing, this Ding Dong Cake delivers on every level.
More Recipes You’ll Love
If you enjoyed this Ding Dong Cake, you’ll absolutely love these other classic snack-inspired dessert recipes from our collection. Try our Chocolate Wacky Cake for another easy chocolate option, or make Death By Chocolate Cake for ultimate chocolate indulgence.
For more amazing cake recipes and nostalgic dessert ideas, check out King Arthur Baking where you’ll find expert tips and creative inspiration.
Ding Dong Cake
Course: DessertsCuisine: AmericanDifficulty: Easy8
servings25
minutes30
minutes486
kcalIngredients
- for the Chocolate Cake Layers:
All-purpose flour (210g or 1 and 3/4 cups)
Granulated sugar (350g or 1 and 3/4 cups)
Unsweetened cocoa powder (75g or 3/4 cup)
Baking powder (1 and 1/2 teaspoons)
Baking soda (1 teaspoon)
Salt (1/2 teaspoon)
Buttermilk (240ml or 1 cup, room temperature)
Vegetable oil (120ml or 1/2 cup)
Large eggs (2, room temperature)
Pure vanilla extract (2 teaspoons)
Very hot brewed coffee (90ml or 3/4 cup)
- For the Cream Filling:
Granulated sugar (200g or 1 cup)
All-purpose flour (40g or 1/3 cup)
Whole milk (240ml or 1 cup)
Pure vanilla extract (1 teaspoon)
Unsalted butter (226g or 1 cup, softened)
- For the Chocolate Ganache:
Semisweet chocolate (226g or 1 and 1/2 cups, chopped or chips)
Heavy whipping cream (90ml or 3/4 cup)
Directions
- Prepare the Pans
- Preheat oven to 175°C (350°F).
- Grease two 20cm (8-inch) round cake pans with butter or baking spray.
- Line bottoms with parchment paper circles.
- Mix Dry Ingredients
- In large bowl, whisk together all-purpose flour, granulated sugar, unsweetened cocoa powder, baking powder, baking soda, and salt.
- Fully combined.
- No cocoa lumps remaining.
- Combine Wet Ingredients
- In separate medium bowl or liquid measuring cup, whisk together buttermilk, vegetable oil, eggs, and vanilla.
- No egg streaks visible.
- Make the Batter
- Add buttermilk mixture to flour mixture and whisk until combined.
- Pour in very hot brewed coffee and whisk until fully incorporated and smooth.
- Batter will be quite thin and pourable.
- This is completely normal.
- Bake the Cake
- Divide batter evenly between two prepared pans.
- Make sure equal amounts in each.
- Bake for 28-30 minutes until toothpick inserted in center comes out clean.
- Tops should look set.
- Let cool in pans 15 minutes on wire racks.
- Turn out onto racks and remove parchment.
- Cool completely.
- Takes about 1 and 1/2 hours.
- Make Cream Filling
- In medium saucepan, whisk together sugar and flour.
- Pour in milk while whisking constantly until smooth.
- Cook over medium heat, whisking frequently, until mixture begins to simmer.
- Takes 5-7 minutes.
- Reduce heat to medium-low and hold at simmer.
- Whisk constantly until thickens like pudding.
- Takes 1-2 minutes more.
- Remove from heat.
- Pour into medium bowl.
- Press plastic wrap directly onto surface to prevent skin.
- Let cool to room temperature.
- Takes about 2 hours.
- Can refrigerate to speed up.
- Make sure returns to room temperature before using.
- In stand mixer bowl with paddle attachment, beat softened butter on medium speed 2 minutes until smooth and creamy.
- Scrape down sides.
- Add cooled flour mixture to butter 2-3 tablespoons at a time.
- Mix on medium-low speed until fully combined between each addition.
- Add vanilla extract.
- Increase speed to medium and beat about 1 minute until smooth, light, and airy.
- Filling should be very thick.
- Assemble the Cake
- Place one cake layer top-side down on cake stand or serving plate.
- Make sure level.
- Spread cream filling evenly over top.
- Use offset spatula for even coverage.
- Place second cake layer top-side down on top.
- Press down gently to push filling to edges.
- Smooth filling around sides with offset spatula.
- Create even coverage all around.
- Refrigerate assembled cake 20 minutes while preparing ganache.
- Make Chocolate Ganache
- Place chopped semisweet chocolate in medium heatproof bowl.
- Make sure heat-safe.
- Microwave heavy whipping cream in liquid measuring cup on high for about 90 seconds until steaming.
- Immediately pour over chocolate.
- Let stand 5 minutes without stirring.
- Stir until chocolate fully melted.
- Ganache should be smooth and glossy.
- Mix gently from center outward.
- Coat with Ganache
- Let ganache cool for about 15 minutes until thick enough to spread.
- Should still be pourable but not too runny.
- Dollop ganache over top of chilled cake.
- Using small offset spatula, spread into even layer on top.
- Gently push ganache over edges.
- Run down sides.
- Spread evenly all over cake.
- Create iconic coating.
- Let ganache set completely before slicing.
- Refrigerate until ready to serve.