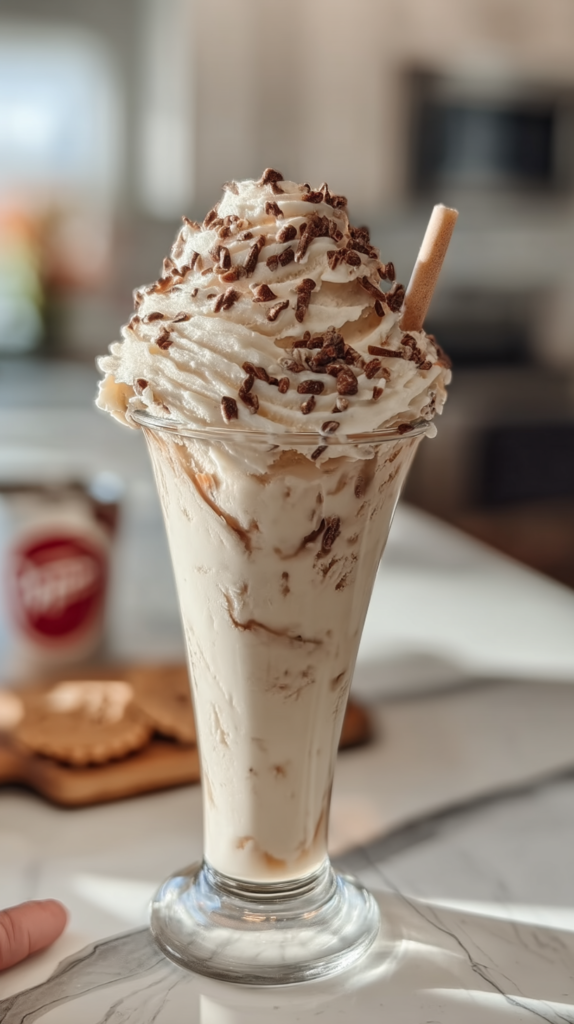
No Churn Dr Pepper Ice Cream is hands down one of the most unique and delicious frozen treats I’ve ever made, and it’s become my absolute favorite way to enjoy that classic Dr Pepper flavor in dessert form. The first time I made this creamy, no-machine-required ice cream, my partner Joe couldn’t believe that distinctive Dr Pepper taste could translate so perfectly into ice cream. The combination of sweet cream with that signature blend of 23 flavors from Dr Pepper creates this incredibly nostalgic yet innovative frozen dessert that tastes like a dreamy Dr Pepper float. Plus, the fact that you don’t need an ice cream maker makes this accessible to everyone.
What Makes This Ice Cream Special?
No Churn Dr Pepper Ice Cream is a homemade frozen dessert made by folding reduced Dr Pepper syrup into sweetened whipped cream and freezing it until firm, all without needing an ice cream maker. What sets this apart from regular ice cream is the no-churn method that uses whipped cream and sweetened condensed milk to create that creamy texture without any special equipment. The Dr Pepper is reduced down to a concentrated syrup that intensifies all those complex flavors and adds beautiful caramel color. Think of it as capturing the essence of a classic Dr Pepper float in smooth, scoopable ice cream form.
Simple Ingredients You’ll Need
Let’s break down the surprisingly simple ingredient list for this amazing No Churn Dr Pepper Ice Cream. You only need a few items to create this nostalgic treat.
- Dr Pepper (2 cups): The star ingredient that gives this ice cream its signature flavor. Use regular Dr Pepper, not diet, because you need the sugar to help create the syrup. The soda gets reduced down to concentrate all those amazing flavors.
- Heavy whipping cream (2 cups, cold): Make sure it’s very cold straight from the fridge for the best whipping results. This creates the creamy base of your no-churn ice cream.
- Sweetened condensed milk (14 oz can): Adds sweetness and helps create that smooth, creamy texture without ice crystals in your No Churn Dr Pepper Ice Cream.
- Vanilla extract (1 teaspoon): Rounds out the flavors and adds depth to the Dr Pepper taste.
- Salt (pinch): Just a tiny bit to balance the sweetness and make all the flavors pop.
- Chocolate sprinkles or mini chocolate chips (for topping, optional): Adds texture and makes it look extra special when serving.
- Whipped cream (for serving, optional): For topping your scoops like a real Dr Pepper float.
Making Your Dr Pepper Ice Cream
Alright, let’s make this incredibly unique frozen treat. The process is straightforward, and the hardest part is just waiting for it to freeze properly.
Reduce the Dr Pepper
Pour the Dr Pepper into a medium saucepan and bring it to a boil over medium-high heat. Once boiling, reduce the heat to medium and let it simmer, stirring occasionally, until it’s reduced to about ½ cup of thick syrup. This takes about 20-25 minutes.
You’ll know it’s ready when it’s thick like maple syrup and coats the back of a spoon. The reduction concentrates all those amazing Dr Pepper flavors and creates a beautiful caramel color. Let this syrup cool completely to room temperature before using it in your No Churn Dr Pepper Ice Cream. You can speed up the cooling by placing the saucepan in a bowl of ice water.
Whip the Cream
In a large bowl, pour the cold heavy whipping cream. Using an electric mixer, beat on medium-high speed until stiff peaks form. This takes about 3-4 minutes. The cream should stand up in firm peaks when you lift the beaters and not flop over.
Don’t overbeat or you’ll end up with butter instead of whipped cream. Stop as soon as you reach stiff peaks. The whipped cream is what gives your ice cream that light, creamy texture.
Mix the Base
In a separate bowl, whisk together the sweetened condensed milk, cooled Dr Pepper syrup, vanilla extract, and a pinch of salt until smooth and well combined. The mixture will be a beautiful caramel color from the reduced soda.
Make absolutely sure your Dr Pepper syrup is completely cool before adding it to the condensed milk. If it’s even slightly warm, it could cause problems when you fold in the whipped cream for your No Churn Dr Pepper Ice Cream.
Fold It Together
Take about a third of the whipped cream and fold it into the Dr Pepper mixture to lighten it. This makes it easier to incorporate the rest of the cream. Then gently fold in the remaining whipped cream using a rubber spatula.
Use gentle folding motions, lifting from the bottom and folding over the top. You want to maintain all that air you just whipped into the cream. Stop as soon as you don’t see any white streaks. The mixture should be light, fluffy, and a uniform caramel color.
Freeze Until Firm
Pour the ice cream mixture into a freezer-safe container. A metal loaf pan works great, or you can use a plastic container with a lid. Smooth the top with a spatula and cover tightly with plastic wrap pressed directly onto the surface, then add a lid or aluminum foil on top.
Freeze for at least 6 hours, or preferably overnight, until the ice cream is completely firm and scoopable. Your No Churn Dr Pepper Ice Cream needs this full freezing time to set properly. Don’t try to scoop it too early or it will be too soft.
Serve and Enjoy
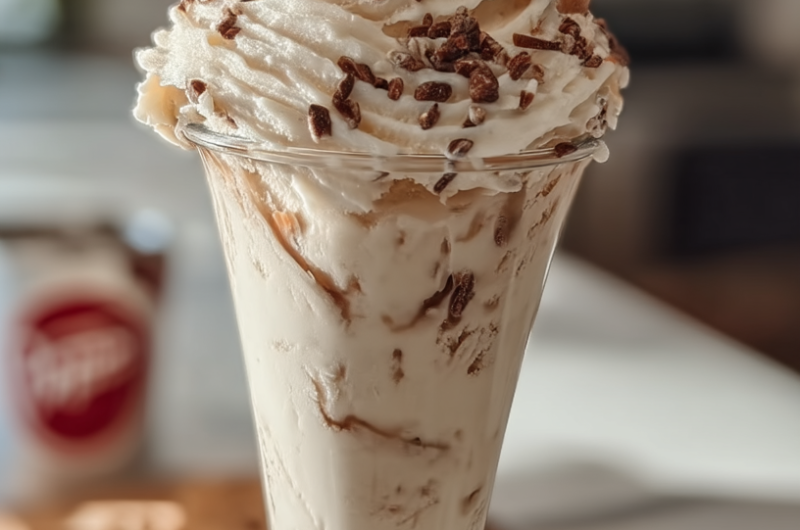
When ready to serve, let the ice cream sit at room temperature for about 5 minutes to soften slightly for easier scooping. Scoop into bowls or cones, top with whipped cream and chocolate sprinkles if desired, and enjoy that amazing Dr Pepper flavor in frozen form.
Perfect Pairings
This No Churn Dr Pepper Ice Cream is delicious on its own but pairs beautifully with several different treats. I love serving it alongside warm brownies or chocolate cake because the cold ice cream with warm chocolate is absolutely incredible. It’s also perfect for making actual Dr Pepper floats by scooping it into a glass and pouring Dr Pepper over the top. For a complete frozen dessert spread, serve it with other creative frozen treats like my Copycat Chick fil A Frozen Lemonade to give guests different nostalgic soda-inspired options. Chocolate chip cookies or waffle cones also make excellent accompaniments.
Pro Tips for Success
- Reduce Dr Pepper properly: Don’t rush the reduction process. You need it thick like syrup to get concentrated flavor in your No Churn Dr Pepper Ice Cream. Too thin and the flavor will be weak.
- Cool syrup completely: Warm syrup will deflate your whipped cream and ruin the texture. Make sure it’s room temperature or even chilled before mixing.
- Use cold cream: The colder your heavy cream, the better it whips. Some people even chill the bowl and beaters in the freezer first.
- Don’t overbeat cream: Stop as soon as you reach stiff peaks. Overbeating turns cream into butter and ruins your ice cream base.
- Fold gently: Gentle folding maintains all that air in the whipped cream, which is what creates the creamy texture without an ice cream maker.
- Press plastic wrap on surface: This prevents ice crystals from forming on top of your ice cream during freezing.
- Freeze overnight for best texture: While 6 hours is the minimum, overnight freezing gives you the best scoopable consistency.
- Let it soften before scooping: No-churn ice cream freezes harder than regular ice cream, so let it sit out 5-10 minutes for easier scooping.
Common Questions Answered
Can I use diet Dr Pepper?
I don’t recommend diet Dr Pepper for this No Churn Dr Pepper Ice Cream because it won’t reduce properly into a syrup without the sugar. The sugar in regular Dr Pepper is essential for creating that thick, concentrated syrup. Diet soda would just evaporate away without thickening, leaving you with very weak flavor.
Why is my ice cream icy instead of creamy?
The most common reason is not whipping the cream to stiff enough peaks or deflating it too much when folding. Make sure you beat the cream until it’s very firm, and fold gently to maintain all that air. Also, make sure your Dr Pepper syrup was completely cool before mixing. Warm syrup can cause the cream to deflate and create ice crystals.
How long does this keep in the freezer?
Stored in an airtight container, this No Churn Dr Pepper Ice Cream keeps for up to 2 weeks in the freezer. After that, it can develop ice crystals and the flavor starts to fade. For best quality, enjoy it within the first week when the texture and flavor are at their peak.
Can I make this with other sodas?
Absolutely! This no-churn method works with almost any soda. Try root beer for root beer float ice cream, Coca-Cola for a cola flavor, cream soda for extra vanilla vibes, or even cherry Coke. Just reduce whatever soda you choose down to a thick syrup the same way and follow the rest of the recipe exactly.
Why This Recipe Is a Winner
No Churn Dr Pepper Ice Cream is the perfect combination of nostalgia and innovation because it captures that beloved Dr Pepper flavor in a completely new format. The no-churn method makes it accessible to everyone since you don’t need any special equipment beyond a mixer. It’s unique enough to be a conversation starter at parties but familiar enough that everyone loves it. The creamy texture rivals any ice cream shop despite being made at home without a machine. Whether you’re a Dr Pepper fanatic or just love creative frozen treats, this delivers incredible flavor and satisfaction every single time.
For more creative frozen dessert ideas and nostalgic treats, check out my Pinterest page where I share all my favorite unique recipes.
No Churn Dr Pepper Ice Cream
Course: DrinksCuisine: AmericanDifficulty: Easy, Intermediate8-10
servings30
minutes25
minutes300
kcalIngredients
Dr Pepper (2 cups)
Heavy whipping cream (2 cups, cold)
Sweetened condensed milk (14 oz can)
Vanilla extract (1 teaspoon)
Salt (pinch)
Chocolate sprinkles or mini chocolate chips (for topping, optional)
Whipped cream (for serving, optional)
Directions
- Reduce the Dr Pepper
- Pour the Dr Pepper into a medium saucepan and bring it to a boil over medium-high heat. Once boiling, reduce the heat to medium and let it simmer, stirring occasionally, until it’s reduced to about ½ cup of thick syrup. This takes about 20-25 minutes.
- You’ll know it’s ready when it’s thick like maple syrup and coats the back of a spoon. The reduction concentrates all those amazing Dr Pepper flavors and creates a beautiful caramel color. Let this syrup cool completely to room temperature before using it in your No Churn Dr Pepper Ice Cream. You can speed up the cooling by placing the saucepan in a bowl of ice water.
- Whip the Cream
- In a large bowl, pour the cold heavy whipping cream. Using an electric mixer, beat on medium-high speed until stiff peaks form. This takes about 3-4 minutes. The cream should stand up in firm peaks when you lift the beaters and not flop over.
- Don’t overbeat or you’ll end up with butter instead of whipped cream. Stop as soon as you reach stiff peaks. The whipped cream is what gives your ice cream that light, creamy texture.
- Mix the Base
- In a separate bowl, whisk together the sweetened condensed milk, cooled Dr Pepper syrup, vanilla extract, and a pinch of salt until smooth and well combined. The mixture will be a beautiful caramel color from the reduced soda.
- Make absolutely sure your Dr Pepper syrup is completely cool before adding it to the condensed milk. If it’s even slightly warm, it could cause problems when you fold in the whipped cream for your No Churn Dr Pepper Ice Cream.
- Fold It Together
- Take about a third of the whipped cream and fold it into the Dr Pepper mixture to lighten it. This makes it easier to incorporate the rest of the cream. Then gently fold in the remaining whipped cream using a rubber spatula.
- Use gentle folding motions, lifting from the bottom and folding over the top. You want to maintain all that air you just whipped into the cream. Stop as soon as you don’t see any white streaks. The mixture should be light, fluffy, and a uniform caramel color.
- Freeze Until Firm
- Pour the ice cream mixture into a freezer-safe container. A metal loaf pan works great, or you can use a plastic container with a lid. Smooth the top with a spatula and cover tightly with plastic wrap pressed directly onto the surface, then add a lid or aluminum foil on top.
- Freeze for at least 6 hours, or preferably overnight, until the ice cream is completely firm and scoopable. Your No Churn Dr Pepper Ice Cream needs this full freezing time to set properly. Don’t try to scoop it too early or it will be too soft.
- Serve and Enjoy
- When ready to serve, let the ice cream sit at room temperature for about 5 minutes to soften slightly for easier scooping. Scoop into bowls or cones, top with whipped cream and chocolate sprinkles if desired, and enjoy that amazing Dr Pepper flavor in frozen form.