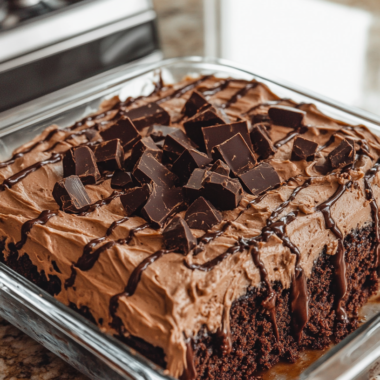
Oreo Icebox Cake is honestly one of those desserts I find myself coming back to every single summer, and I have absolutely zero regrets about it. It requires no oven, no fancy equipment, and yet it looks and tastes like something you spent hours on. I first made this for a backyard get-together a couple of years ago, and by the time I turned around, half the dish was already gone. So yes, it is that good. If you love cookies and cream anything, this recipe is going to become your new obsession.
What Is an Oreo Icebox Cake?
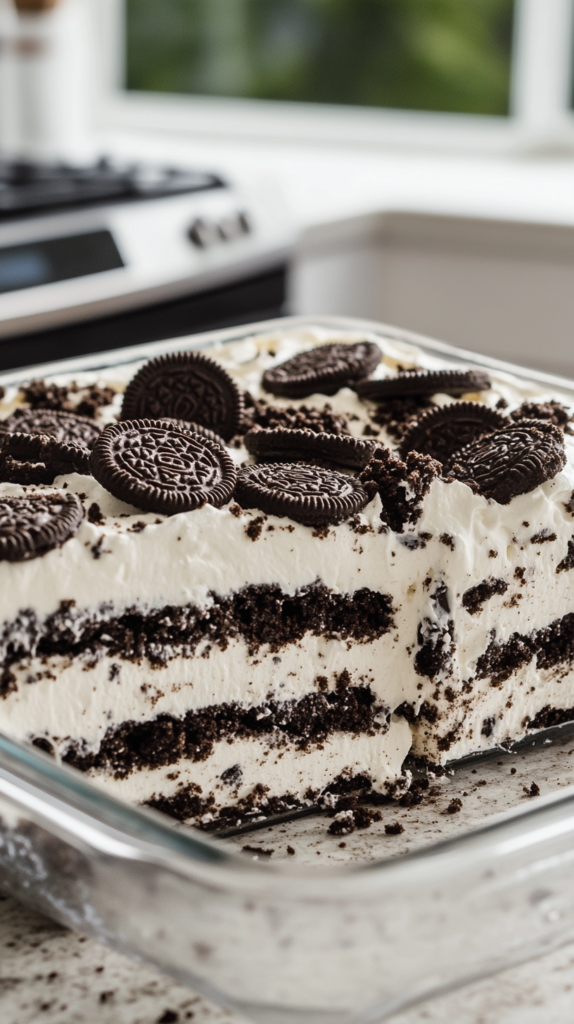
An Oreo icebox cake is a classic no-bake layered dessert made by stacking Oreo cookies with whipped cream, then letting it chill in the fridge until the cookies soften into a magical, almost cake-like texture. The result is incredibly creamy, soft, and rich with that deep chocolate cookie flavor throughout every single bite. It is basically the easiest dessert you will ever make, and the icebox part just refers to the old-school term for refrigerator. Pretty cute, right?
What You Will Need for This Oreo Icebox Cake
The ingredient list for this no-bake Oreo cake is wonderfully short. You probably already have most of these in your kitchen, which is exactly why I love it so much. Here is everything you need to pull this together:
- 3 packages (425g / 15 oz each) Double Stuf Oreo cookies – You will use about 2 and a half packages total. The Double Stuf variety gives you more of that creamy filling, which makes the layers extra indulgent. Regular Oreos work too if that is what you have on hand, but trust me, the Double Stuf version is worth it.
- 720ml (3 cups) heavy whipping cream, cold – This is the base of your whipped cream layer. Make sure it is really cold straight from the fridge before you whip it. Cold cream whips up so much better and holds its shape beautifully.
- 3 tbsp powdered sugar – Just enough to sweeten the cream without making it overly sugary. Granulated sugar can work in a pinch, but powdered dissolves much more smoothly into whipped cream.
- 2 tsp pure vanilla extract – This little addition makes such a difference in the flavor of the whipped cream. It adds warmth and depth that pairs perfectly with the chocolate cookies.
- Topping: Crushed Oreo cookies – Scattered generously across the entire top of the cake for a gorgeous, crumbly finish. I like to go heavy here because more Oreo is always the answer.
Step-by-Step Instructions: How to Make Oreo Icebox Cake
Making this layered Oreo dessert is so much simpler than it looks. Just follow these steps and you will have a stunning dessert chilling in the fridge in under 20 minutes. Let me walk you through it.
Step 1: Chill Your Bowl and Whisk
Before you do anything else, place your metal mixing bowl and whisk attachment in the freezer for about 15 minutes. This is a small step that makes a huge difference. Cold equipment helps the cream whip up faster and gives you that thick, fluffy texture you really want here. I skipped this once and the cream took forever, so now I never skip it.
Step 2: Make the Whipped Cream
Once your bowl is chilled, add the cold heavy whipping cream, powdered sugar, and vanilla extract. Beat everything together on medium-high speed until stiff peaks form. This usually takes about 7 to 9 minutes. Keep a close eye on it though, because overbeating is a real thing and will turn your beautiful cream into butter. You want it thick and cloud-like, not grainy or clumpy. Stop as soon as those stiff peaks hold their shape.
Step 3: Layer the First Row of Oreos
Grab a 23x33cm (9×13-inch) glass baking dish and arrange a single even layer of Double Stuf Oreos across the entire bottom. Break some cookies in half as needed to fit snugly along the sides and fill in any gaps. You want good coverage here because those cookies are going to become your first cake layer.
Step 4: Add the First Whipped Cream Layer
Spread exactly half of your whipped cream evenly over that first Oreo layer. Go thick and generous all the way to the edges. Do not be shy here. The more evenly you spread it, the better each slice will look when you cut into it.
Step 5: Add the Second Oreo Layer
Place a second single even layer of Oreos right on top of the whipped cream. Again, break cookies as needed to fill any gaps. Press them down very gently so they sit nice and flat against the cream layer beneath.
Step 6: Finish with the Remaining Whipped Cream
Spread the rest of your whipped cream evenly over that second cookie layer, going all the way to the edges of the dish. Smooth the top with a spatula so it looks clean and even. This top layer is basically your frosting, so take a moment to make it look pretty.
Step 7: Add the Crushed Oreo Topping
Now for the fun part. Scatter crushed Oreo cookie pieces generously across the entire top surface of the cake. Cover it completely. I like to use a zip-lock bag and a rolling pin to crush the cookies into chunky crumbles rather than fine crumbs. It gives the top a great texture and looks really beautiful.
Step 8: Refrigerate Until Set
Cover the dish tightly with plastic wrap and refrigerate for at least 6 hours, but overnight is honestly the best option. This chilling time is what transforms the Oreo cookies from crunchy to soft, almost like a layer of chocolate cake. When you cut into it the next day, the texture is just incredible. Please do not rush this step. It is the secret to the whole thing.
How to Serve Your No-Bake Oreo Cake
Once your Oreo icebox cake has chilled completely, it is ready to slice and serve straight from the dish. I like to use a sharp knife and clean it between cuts for tidy slices. This dessert looks beautiful on its own, but if you want to dress it up a little, you can add a dollop of extra whipped cream on each slice or even drizzle a little chocolate sauce on top. It pairs wonderfully with a scoop of vanilla ice cream too. Honestly though, it does not need any extras. It is already perfect.
Tips for the Perfect Oreo Icebox Cake
- Always use cold cream. Room temperature cream will not whip properly. Keep it in the fridge right until you are ready to use it.
- Do not skip the freezer bowl trick. Chilling your bowl and whisk for 15 minutes before whipping makes the whole process faster and gives you a fluffier, more stable whipped cream.
- Use a glass dish if you can. Glass lets you see those beautiful layers from the sides, and it also keeps everything at a consistent cold temperature.
- Overnight chilling is the goal. Six hours is the minimum, but overnight truly gives you the best texture. The cookies soften all the way through and the whole thing sets into this dreamy, sliceable dessert.
- Do not overbeat the cream. This is the biggest mistake people make. Stop the mixer as soon as stiff peaks form. Overbeaten cream gets grainy and will not spread as smoothly.
- Break cookies to fill gaps. Do not leave empty spaces in your cookie layers. Breaking cookies in half helps you get full, even coverage all the way to the corners of the dish.
- Make it ahead. This is actually a make-ahead dream. You can make it the night before and it will be even better the next day. Perfect for parties and potlucks.
Your Questions Answered About Oreo Icebox Cake
Can I use store-bought whipped topping instead of making my own whipped cream?
You can, and it will still taste great. If you are short on time, a tub of whipped topping like Cool Whip works as a quick substitute. That said, homemade whipped cream made with real heavy cream has a much richer, fresher flavor that really makes this Oreo icebox cake shine. If you have the extra 10 minutes, homemade is the way to go.
How long does Oreo icebox cake last in the fridge?
It stays good for up to 3 days covered in the fridge. After that, the cookies get a bit too soft and the cream starts to lose its structure. In my house it never lasts longer than a day anyway, so this is rarely a concern!
Can I freeze Oreo icebox cake?
Yes, actually! If you freeze it, it turns into something almost like an Oreo ice cream cake, which is honestly amazing in its own right. Freeze it covered for up to 2 weeks, and let it sit at room temperature for about 10 to 15 minutes before slicing so it is not rock hard.
Can I make a smaller version of this recipe?
Absolutely! You can halve the recipe and use an 8×8-inch square dish instead of the 9×13. It makes a perfect smaller batch for when you are not feeding a crowd. The method stays exactly the same, just scaled down.
Why You Will Absolutely Love This Recipe
This Oreo icebox cake is the kind of dessert that makes everyone in the room stop and ask for the recipe. It is incredibly simple, uses just a handful of ingredients, and turns out looking and tasting like something from a fancy bakery. There is no baking involved, which means no hot oven and no stress. It is also super easy to make ahead, which makes it a total lifesaver for entertaining. Basically, if you need a reliable, crowd-pleasing no-bake dessert that people will talk about, this is the one.
Behind the Scenes: How This Recipe Came Together
Okay, so let me be honest with you. My first attempt at this Oreo icebox cake was a tiny bit of a disaster, and it was entirely my fault. I was in a rush and I did not chill the bowl before whipping the cream. The cream took so long to come together, and when it finally did, I may have overbeaten it just slightly. The texture was a little grainy instead of silky smooth. The flavor was still great, but I knew I could do better.
My second attempt was where everything clicked. I chilled the bowl, watched the cream carefully, and stopped the mixer at exactly the right moment. I also gave it a full overnight chill in the fridge and the difference was remarkable. The cookies softened completely into the cream and the whole thing sliced so beautifully. That was the moment I knew this recipe was a keeper.
If you want to see more behind-the-scenes moments, testing fails, and recipe wins, come find me on Pinterest where I share all my favorite dessert ideas and inspiration. You can check out my boards at Pinterest for more no-bake treats, easy layered desserts, and cookies and cream recipes that will make your week so much sweeter.
PrintOreo Icebox Cake
A no-bake dessert layered with Double Stuf Oreo cookies and whipped cream, offering a rich, creamy texture and deep chocolate flavor. Perfect for summer get-togethers or dessert cravings.
- Total Time: 20
- Yield: 12 servings 1x
Ingredients
3 packages (425g / 15 oz each) Double Stuf Oreo cookies
720ml (3 cups) heavy whipping cream, cold
3 tbsp powdered sugar
2 tsp pure vanilla extract
Crushed Oreo cookies for topping
Instructions
Separate Oreo cookies; crush half for layers, keep the rest whole.
In a bowl, whip cold heavy cream with powdered sugar and vanilla extract until stiff peaks form.
In a 9×13-inch dish, layer crushed Oreos and whipped cream alternately, ending with a top layer of whipped cream.
Sprinkle crushed Oreos generously over the top layer.
Chill in the refrigerator for at least 4-6 hours or overnight before serving.
Notes
Use cold ingredients for better whipped cream stability.
Double Stuf Oreos enhance the chocolate flavor; regular Oreos work as a substitute.
Chill thoroughly to soften the cookies into a cake-like texture.
Store in an airtight container in the fridge for up to 3 days.
- Prep Time: 20
- Category: Desserts
- Method: No-Bake
- Cuisine: American
- Diet: Vegetarian
Nutrition
- Serving Size: 1 slice (1/12 of recipe)
- Calories: 380
- Sugar: 35g
- Sodium: 150mg
- Fat: 20g
- Saturated Fat: 12g
- Carbohydrates: 42g
- Fiber: 2g
- Protein: 4g
- Cholesterol: 65mg