Woolworth Icebox Cheesecake is honestly one of those recipes that stopped me in my tracks the first time I heard about it. A no-bake, creamy, cloud-like cheesecake with a lemony punch, built on a buttery graham cracker crust? Yes, please. I could not believe something this good had been hiding in my grandmother’s old recipe box all along.
What Is Woolworth Icebox Cheesecake?
If you have never heard of it, the Woolworth Icebox Cheesecake is a classic American no-bake dessert that became wildly popular at Woolworth’s lunch counters back in the day. It is light and airy rather than dense, thanks to the whipped evaporated milk that gives it a mousse-like texture. The lemon jello mix adds a bright, tangy flavor that makes it taste refreshing and totally different from your typical heavy cheesecake. So think of it as the cool, retro cousin of modern cheesecake.
What You Will Need for Woolworth Icebox Cheesecake
One of the reasons I fell in love with this recipe is how simple the ingredients list is. You probably have most of these in your kitchen right now. Let me walk you through everything you need and a few handy swaps just in case.
Crust
- Honey Graham Crackers (2 cups / 14-16 sheets / 168g, finely crushed): These create that classic golden, slightly sweet base. If you cannot find honey graham crackers, regular ones work just fine.
- Granulated Sugar (1 tablespoon): Just a touch to sweeten up the crust a little more.
- Butter (1/2 cup / 1 stick / 113g, melted): This binds everything together and gives the crust that rich, buttery flavor. Unsalted butter is my go-to here.
Filling
- Cream Cheese (1 block / 8 ounces, room temperature): This is the base of the filling. Make sure it is fully softened so you get a smooth, lump-free mixture. Full-fat cream cheese works best here.
- Granulated Sugar (1 cup / 200g): This sweetens the cream cheese base nicely. You can reduce it slightly if you prefer a less sweet dessert.
- Vanilla Extract (2 teaspoons): Pure vanilla extract adds warmth and depth. Imitation works in a pinch but the real stuff is always better.
- Lemon Jello Mix (1 box / 3 ounces): This is the magic ingredient! It gives the cheesecake that gorgeous light yellow color and bright, citrusy flavor. You can try other jello flavors like strawberry or raspberry for a fun twist.
- Boiling Water (1/2 cup, about 212F): This is used to dissolve the jello mix completely. Make sure it is actually boiling for best results.
- Cold Water (1/2 cup, about 50F): This cools the jello mixture down before adding it to the filling.
- Evaporated Milk (1 can / 12 ounces, chilled in freezer for 30 minutes): This is what makes the Woolworth Icebox Cheesecake so light and airy. Do not skip the chilling step since cold evaporated milk whips up into soft peaks and creates that signature fluffy texture.
Step-by-Step Instructions for Woolworth Icebox Cheesecake
Okay, here is where the fun begins. This no-bake lemon cheesecake comes together in a few simple stages, and I promise it is easier than it looks. Just follow along and you will be golden.
Step 1: Chill Everything First Before you do anything else, pop the bowl of your stand mixer, the whisk attachment, and the can of evaporated milk into the freezer for at least 30 minutes. I know it feels like a minor detail, but trust me, this step is non-negotiable. Cold tools and cold milk are what help you get those beautiful soft peaks. I skipped this once and ended up with a sad, soupy mess. Learn from my mistake!
Step 2: Prepare the Crust Lightly spray a 9×13-inch baking dish with nonstick cooking spray. In a medium bowl, combine your finely crushed graham crackers and the tablespoon of sugar. Pour in the melted butter and stir until everything comes together with no dry spots remaining. Now here is a tip I love: reserve about 1/4 cup of the crumb mixture and set it aside. This will become your gorgeous crumbly topping later.
Step 3: Press the Crust Press the remaining graham cracker mixture firmly and evenly into the bottom of your prepared baking dish. Use the back of a flat measuring cup to really pack it in. Set the pan aside while you make the filling.
Step 4: Make the Cream Cheese Base In a medium bowl, use a hand mixer to cream together the softened cream cheese and granulated sugar until smooth and fluffy. Add the vanilla extract and mix for another 2 to 3 minutes until everything is well blended. Set this aside.
Step 5: Dissolve the Jello In a separate large bowl, combine the lemon jello mix and the boiling water. Whisk vigorously for 1 to 2 minutes until the jello is fully dissolved. Then stir in the cold water. Pop this in the refrigerator for a few minutes to cool it down, but watch it closely. You want it to cool slightly but not start setting. This balance is key!
Step 6: Whip the Evaporated Milk Pull your chilled bowl and whisk attachment out of the freezer. Add the very cold evaporated milk and whip on high speed for about 5 minutes until soft peaks form. It is so satisfying to watch it transform into something fluffy and cloud-like.
Step 7: Combine Everything Add the jello mixture to the whipped evaporated milk and whisk for another 30 seconds. Then add the cream cheese mixture and whisk for 30 more seconds. You want everything just combined and fluffy, so do not over-mix it.
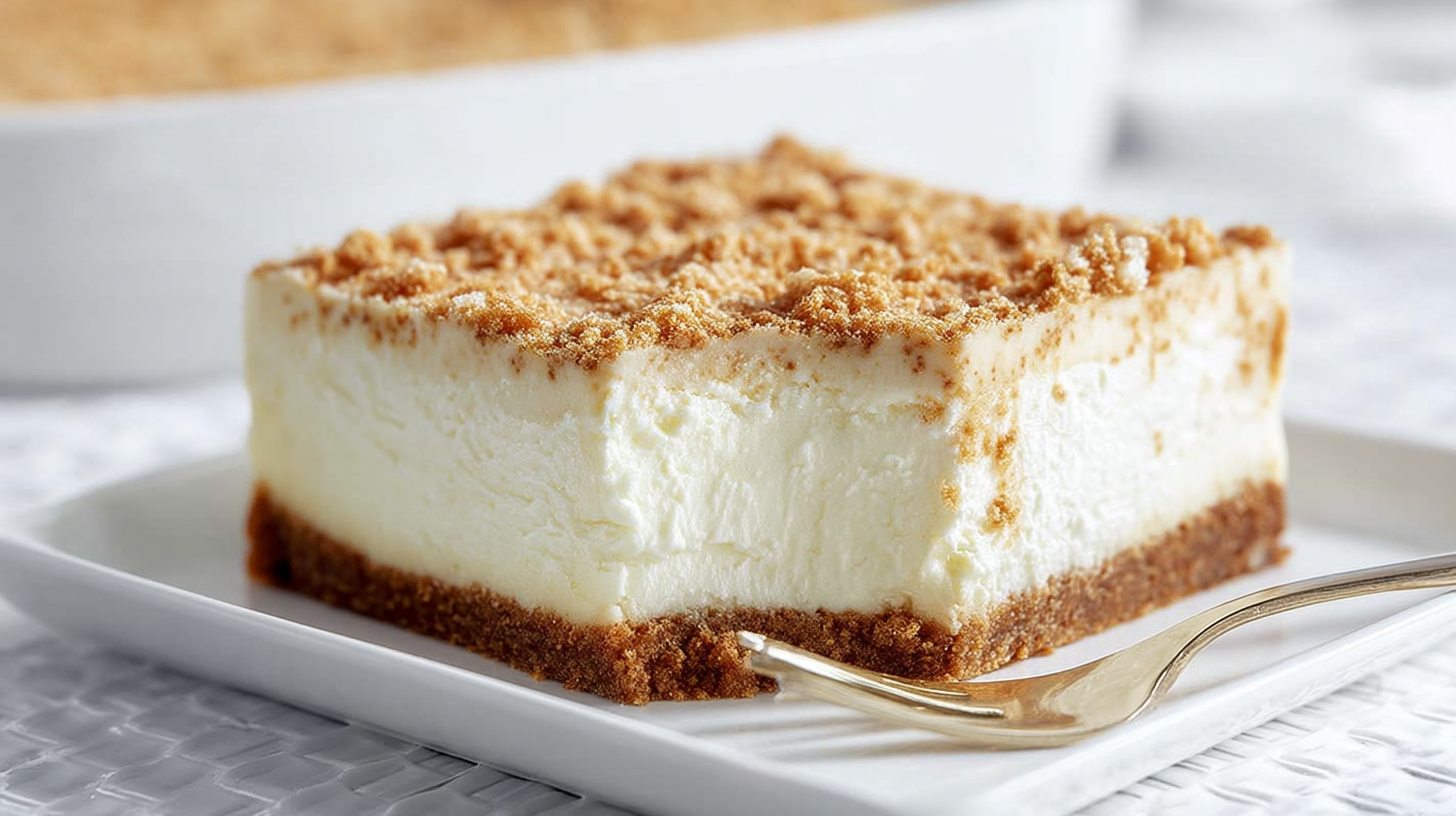
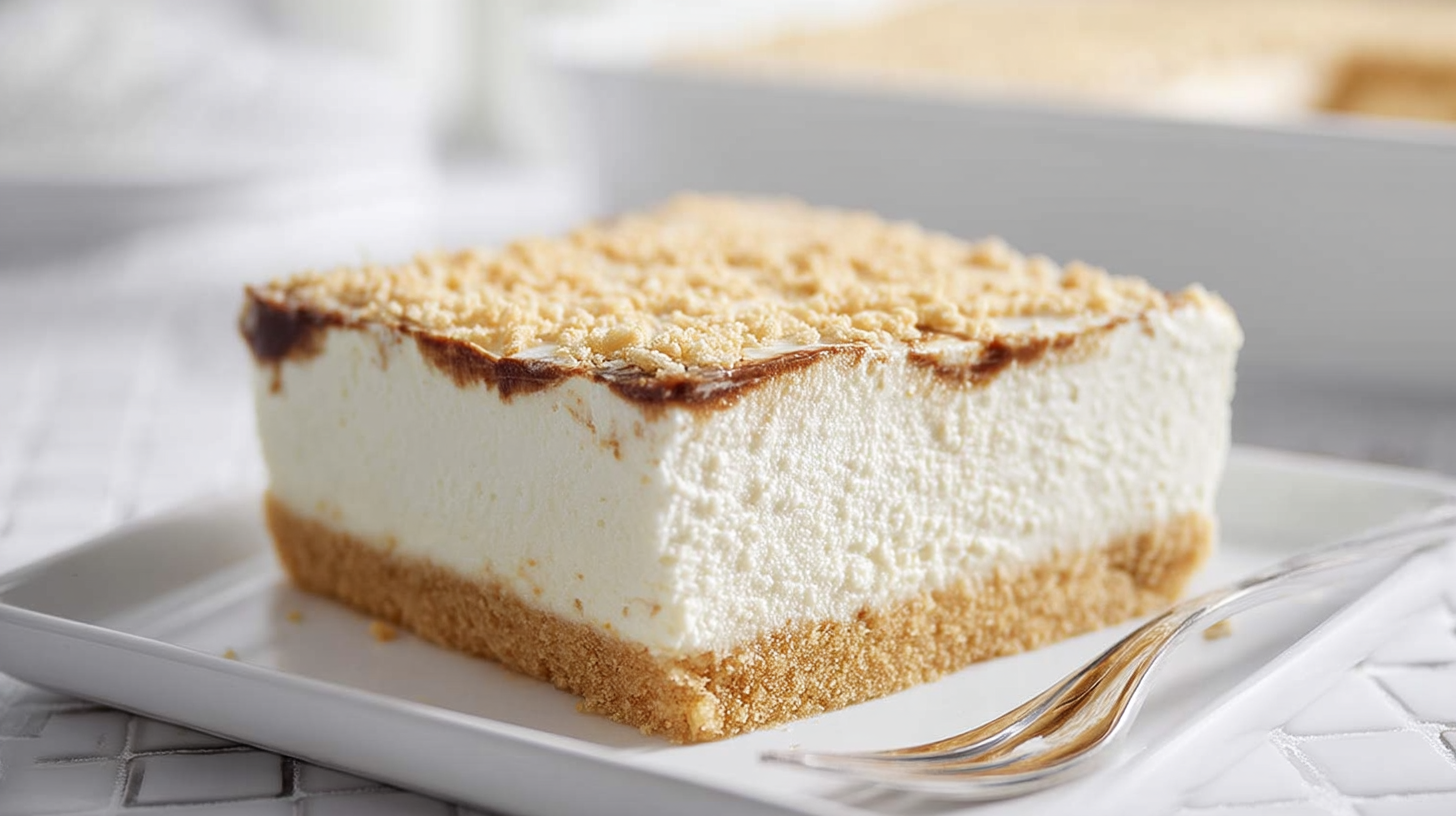
Step 8: Assemble and Chill Pour the filling over your prepared crust and spread it evenly. Sprinkle the reserved graham cracker crumbs on top for that pretty, crumbly finish. Cover the dish and refrigerate overnight before serving. I know waiting overnight is hard, but this Woolworth Icebox Cheesecake truly needs that time to set properly and develop its full flavor.
Serving Suggestions for This Classic Icebox Dessert
Once your Woolworth Icebox Cheesecake has chilled overnight, cut it into squares and serve it straight from the dish. I love adding a dollop of freshly whipped cream on top and a few thin lemon slices for decoration. Fresh berries like strawberries or blueberries on the side look beautiful and add a lovely pop of color. This retro no-bake cheesecake is also great for potlucks, summer BBQs, or holiday gatherings because it is easy to transport and feeds a crowd with no fuss at all.
Tips for the Perfect Woolworth Icebox Cheesecake
- Do not skip chilling the evaporated milk: This is the most important tip. Cold evaporated milk whips up to soft peaks. Room-temperature milk will not do that and your filling will be flat and runny.
- Use room-temperature cream cheese: Cold cream cheese will leave lumps in your filling no matter how long you mix it. Set it out at least an hour before you start.
- Watch the jello carefully: You want the jello mixture cooled but still liquid when you add it to the whipped milk. If it starts to gel, gently warm it for a few seconds in the microwave.
- Press the crust firmly: A well-packed crust holds together beautifully when you slice and serve. Use the flat bottom of a measuring cup to press it in tight.
- Chill overnight for best results: I have tried cutting corners and serving it after just a few hours, and while it tastes good, it is much firmer and easier to cut after a full overnight rest in the fridge.
- Try other jello flavors: Strawberry, raspberry, or even orange jello all work beautifully here. Each one gives you a completely different-tasting version of this classic no-bake cheesecake.
- Store covered in the fridge: This dessert will last up to 4 to 5 days in the refrigerator. Just keep it tightly covered so it does not absorb other fridge odors.
Your Questions Answered About Woolworth Icebox Cheesecake
Can I make Woolworth Icebox Cheesecake ahead of time? Absolutely, and honestly you should! This dessert is made to be prepared ahead. Make it the night before your event and let it chill in the refrigerator overnight. It will be perfectly set and ready to slice and serve the next day. This makes it one of the best make-ahead desserts for entertaining.
Can I freeze Woolworth Icebox Cheesecake? Yes, you can freeze it! Wrap individual slices tightly in plastic wrap and then place them in a freezer-safe container. They will keep well for up to 2 months. Thaw slices in the refrigerator overnight before serving. The texture is slightly different after freezing but it still tastes delicious.
What can I use instead of evaporated milk? Evaporated milk is really what gives this Woolworth Icebox Cheesecake its iconic airy texture, so I highly recommend using it as written. However, in a pinch, you can try using full-fat coconut milk chilled overnight. It whips up similarly and adds a subtle tropical flavor that is actually quite nice with the lemon jello.
Why is my filling not fluffy enough? This usually happens when the evaporated milk is not cold enough before whipping. Make sure both the can of milk and the mixing bowl are properly chilled in the freezer for at least 30 minutes. Also, make sure you are whipping on high speed and giving it a full 5 minutes to develop those soft peaks.
Why You Will Absolutely Fall for This Recipe
Honestly, this Woolworth Icebox Cheesecake checks every box. It is no-bake, which means zero oven stress. It comes together with basic pantry staples. It feeds a crowd from one simple 9×13 pan. The texture is unbelievably light and airy, almost like a lemon cloud. And the bright citrus flavor is refreshing in the best way. Whether you are a beginner baker or a seasoned home cook, this classic refrigerator cheesecake will quickly become a regular in your recipe rotation. I promise you will be making it again and again.
If you love retro desserts as much as I do, you will also want to check out my Pinterest page for more vintage-inspired sweet treats and no-bake dessert ideas: Visit My Pinterest Page. There are so many fun recipes over there that I know you will love just as much as this one.
Print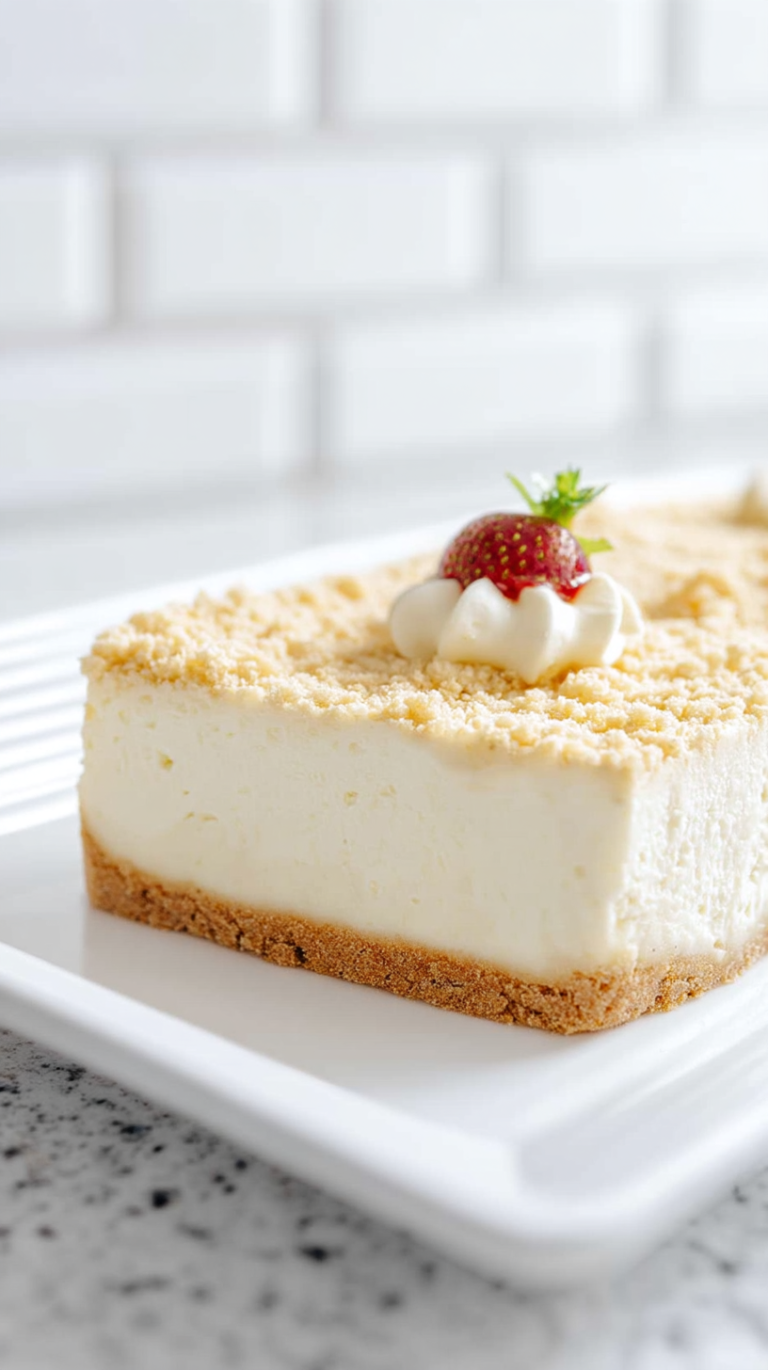
Woolworth Icebox Cheesecake
A no-bake, light, and lemony cheesecake with a buttery graham cracker crust. This retro classic offers a refreshing mousse-like texture with a tangy twist, perfect for summer or anytime.
- Total Time: 20
- Yield: 16 servings 1x
Ingredients
2 cups honey graham crackers, finely crushed (168g)
1 tablespoon granulated sugar
1/2 cup (113g) melted unsalted butter
8 ounces (227g) full-fat cream cheese, room temperature
1 cup (200g) granulated sugar
2 teaspoons pure vanilla extract
1 box (3 ounces / 85g) lemon Jell-O mix
1/2 cup boiling water
1 can (14 oz / 400g) evaporated milk
1 teaspoon fresh lemon zest or juice (optional)
Instructions
Preheat oven to 350°F (180°C)
Mix crushed graham crackers, 1 tablespoon sugar, and melted butter in a bowl
Press the crust firmly into a 9″ pie dish or springform pan
Chill crust in refrigerator for 20 minutes
In a large bowl, beat cream cheese and 1 cup sugar until smooth
Stir in vanilla extract until fully combined
Add boiling water to Jell-O mix and wait for it to dissolve
Slowly blend Jell-O mixture into the cream cheese base
Fold in evaporated milk gently to preserve airiness
Add lemon zest or juice if using
Pour filling over chilled crust
Chill for at least 4 hours, or until fully set
Notes
Use regular graham crackers if honey graham crackers are unavailable.
For halal compliance, ensure cream cheese and Jell-O are certified halal.
Jell-O flavor can be swapped with strawberry or raspberry for a different twist.
Best served chilled within 24–48 hours of assembly.
Crushing graham crackers: Use a food processor or zip-top bag with a rolling pin.
Total prep + setting time is ~5 hours, but only 20 minutes active work.
- Prep Time: 20
- Category: Desserts
- Method: No-bake
- Cuisine: American
- Diet: Vegetarian
Nutrition
- Serving Size: 1 slice (1/16 of recipe)
- Calories: 250
- Sugar: 13g
- Sodium: 180mg
- Fat: 16g
- Saturated Fat: 10g
- Carbohydrates: 24g
- Fiber: 1g
- Protein: 5g
- Cholesterol: 55mg