
The first time I made a Yule Log, I was convinced I’d mess up the roll. Everyone talks about how finicky it is, how the cake might crack, how the whole thing could fall apart. So I was surprised when it worked beautifully on my first attempt. What I discovered is that Yule Logs aren’t actually difficult, they just require understanding one specific technique: the sponge cake roll. Once you understand why each step matters, the rest becomes straightforward.
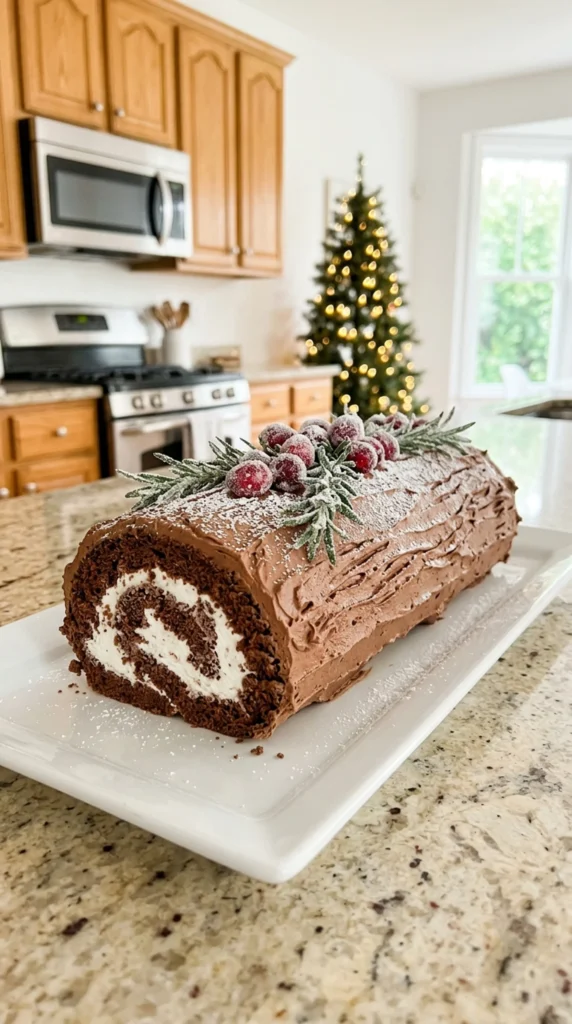
This version features a light chocolate sponge cake that rolls without breaking, a simple whipped cream filling with a hint of almond extract, and silky chocolate frosting. The beauty of a Yule Log is that it looks completely impressive and festive while being much simpler than a layered cake. The rustic bark-like frosting actually hides any imperfections, and the optional sugared cranberries and rosemary make it look like something from a fine bakery.
Understanding the Sponge Cake Roll
The key to a successful cake roll is the sponge cake itself. This isn’t a traditional butter cake — it’s an airy, light structure built on separated eggs. The egg whites are whipped to stiff peaks and folded in gently, which creates a cake with just enough structure to roll without cracking, but enough air to stay tender. This is important because dense cakes crack when rolled.
The other critical detail is baking time. A sponge cake roll bakes for only 10-12 minutes. If you overbake it, the edges become brittle and will crack when rolling. If you underbake it, it’ll be too moist to hold together. The cake should spring back when lightly touched — that’s your indicator.
Room temperature egg whites matter more than you might think. They whip faster and incorporate more air than cold egg whites. The same goes for egg yolks — beaten for a full 5 minutes until thick and lemon-colored, they create the base that holds everything together.
What You’ll Need
For the Chocolate Sponge Cake: Four large eggs separated (this is essential — don’t skip it), sugar split between the yolk mixture and the whites, all-purpose flour, baking cocoa, baking powder, and salt. A jelly-roll pan (15x10x1-inch) is the right size — smaller pans won’t work.
For the Whipped Cream Filling: Heavy whipping cream, sugar, and almond extract. The almond extract is subtle but adds sophistication that plain cream doesn’t have.
For the Chocolate Frosting: Softened butter, confectioners’ sugar, melted unsweetened chocolate, milk, and vanilla. This creates a silky frosting that’s not too sweet.
For Decoration: More confectioners’ sugar for dusting, plus optional sugared cranberries and rosemary sprigs that make this look festive and elegant.
Making the Sponge Cake
Start by separating your eggs carefully. Even a tiny bit of egg yolk in the whites will prevent them from whipping properly, so take your time. Set the whites out at room temperature for 30 minutes while you prepare your pan. Grease a jelly-roll pan, line it with parchment paper, grease the parchment, and set it aside.
Preheat your oven to 190°C (375°F). This temperature is higher than you’d use for a traditional cake, but it’s correct for this thin, airy sponge.
Beat the egg yolks on high speed for a full 5 minutes until they’re thick and pale. Gradually beat in one-third of the sugar. The mixture will become even thicker and more voluminous. This step is not optional — the 5 minutes of beating creates the structure.
Sift your dry ingredients together twice. This isn’t busywork — sifting combines and aerates the flour and cocoa, which helps them incorporate smoothly into the yolk mixture. Gradually add the sifted mixture to the yolk mixture and mix well. The batter will be very thick at this point.
Using clean beaters (this is important — any grease will prevent the whites from whipping), beat the egg whites on medium speed until soft peaks form. Gradually add the remaining sugar, one tablespoon at a time, on high speed until stiff peaks form. The whites should be glossy and hold their shape.
Now comes the delicate part: fold the egg whites into the yolk mixture. Do this gently using a spatula, folding just until combined. Over-folding will deflate the whites and create a dense cake.
Spread the batter evenly into the prepared pan. It will be thin — this is correct. Bake for 10-12 minutes until the cake springs back when lightly touched. The edges might smell slightly burnt, which is normal at this temperature.
Cool for just 5 minutes, then turn the cake onto a kitchen towel dusted with cocoa powder. Gently peel off the parchment paper. Here’s where many people hesitate — roll the cake up in the towel, starting with a short side, using the towel to help guide the roll. The towel prevents sticking. Let it cool completely on a wire rack while still rolled in the towel. This allows the cake to set in its rolled shape.
Filling and Frosting
While the cake cools, beat the heavy cream until soft peaks form. Gradually add the sugar and almond extract, beating until stiff peaks form. The almond extract is just a whisper — it enhances the chocolate without being noticeable as almond flavor.
Unroll the cooled cake carefully. Spread the filling to within 1 inch of the edges. Leave that border because the filling will squeeze out when you roll it again. Roll it up again without the towel this time.
For the frosting, cream the butter and confectioners’ sugar together for 3-4 minutes until light and fluffy. Beat in the melted chocolate, milk, and vanilla until completely smooth. The frosting should be thick but spreadable.
Frost the cake generously, using a metal spatula to create a bark-like effect. Don’t smooth it — the rustic, rough texture is exactly what you want. It looks like tree bark and hides any imperfections in the cake roll itself.
Dust with additional confectioners’ sugar if desired, and decorate with sugared cranberries and rosemary sprigs. These add festive color and a hint of botanical elegance.
Serving and Storage
Slice with a sharp, warm knife — warming the blade between slices helps prevent dragging the filling. Serve at room temperature or chilled. A Yule Log serves 10 generously. Store covered in the refrigerator for up to three days. It actually tastes slightly better the next day as the flavors settle.
Tips from Making This Dozens of Times
Separate your eggs over three bowls — one for whites, one for yolks, and one for each egg as you separate it. This way if one yolk breaks into the whites, you lose only that one egg.
Don’t skip the room temperature resting for the egg whites. It genuinely affects how well they whip.
Sift the dry ingredients twice. I know it sounds excessive, but it makes a real difference in how smoothly they incorporate.
Don’t overbake the cake. Set a timer for 10 minutes and check it then. Most ovens will be done by 11 minutes. The cake should just barely spring back — slightly underbaked is better than slightly overbaked for this application.
The sponge cake should be completely cooled before unrolling. If it’s still warm, it’s more likely to crack.
The almond extract in the filling is subtle. If you prefer, you can use vanilla instead, but the almond adds something special.
Make the frosting smooth and glossy before frosting the cake. If it’s too thick, warm it slightly. If it’s too thin, refrigerate it for a few minutes.
Questions About This Cake
Why does my cake crack when I roll it?
Usually because it’s either underbaked (too moist to hold together) or overbaked (too dry and brittle). The perfect bake is when it springs back immediately when touched — not when you press hard, but with a light touch.
Can I make this ahead?
Yes. You can bake the cake roll up to a day ahead, frost it, and decorate it the day you serve it. Or assemble it completely and refrigerate for up to three days before serving.
What if I don’t have almond extract?
Vanilla extract works fine. The almond extract is subtle — it just adds a layer of sophistication, but the cake is delicious without it.
Can I use chocolate chips instead of melted unsweetened chocolate?
Not really. Chocolate chips contain stabilizers that prevent them from melting smoothly into frosting. Use unsweetened chocolate or high-quality cocoa powder mixed with butter.
Why This Becomes a Tradition
A Yule Log has built-in drama. The moment you slice into it and reveal the spiral of cake and filling is genuinely impressive every single time. The festive decoration makes it look like something you’d buy from a high-end bakery. But it’s achievable for home bakers, which is why it becomes tradition — you make it once, people go wild for it, and suddenly you’re making it every December.
This dessert bridges something important: it requires skill and attention to detail, which makes it feel special and earned. But the techniques are understandable and learnable, which means it’s not intimidating once you understand what’s happening at each step.
Print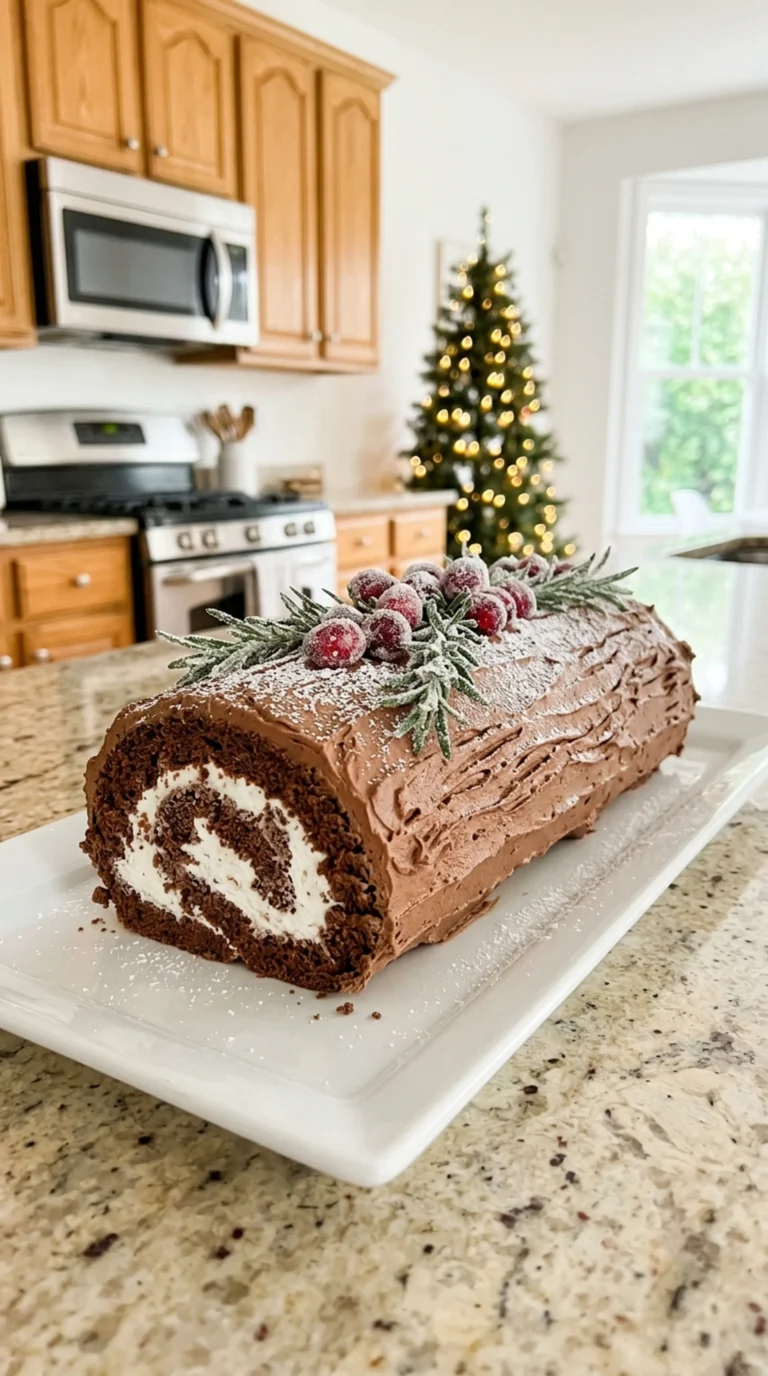
Yule Log: A Festive Chocolate Showstopper That’s Easier Than It Looks
Ingredients
Chocolate Sponge Cake:
- 4 large eggs, separated
- 133g sugar, divided (⅔ cup total)
- 63g all-purpose flour (½ cup)
- 10g baking cocoa, plus more for dusting the towel (2 tablespoons)
- 1 teaspoon baking powder
- ¼ teaspoon salt
Whipped Cream Filling:
- 240ml heavy whipping cream (1 cup)
- 25g sugar (2 tablespoons)
- ¼ teaspoon almond extract
Chocolate Frosting:
- 113g butter, softened (½ cup)
- 240g confectioners’ sugar (2 cups)
- 57g unsweetened chocolate, melted (2 ounces)
- 30ml 2% milk (2 tablespoons)
- 2 teaspoons vanilla extract
Decoration (Optional):
- Additional confectioners’ sugar, for dusting
- Sugared cranberries
- Sugared rosemary sprigs
Instructions
Step 1: Separate eggs and prepare pan. Separate 4 large eggs carefully into two bowls. Let egg whites stand at room temperature for 30 minutes. Grease a 15x10x1-inch jelly-roll pan, line with parchment paper, grease the parchment, and set aside.
Step 2: Preheat oven. Preheat oven to 190°C (375°F).
Step 3: Beat egg yolks. In a large bowl, beat egg yolks on high speed for 5 minutes until thick and lemon-colored. Gradually beat in ⅓ cup of the sugar.
Step 4: Sift and combine dry ingredients. Sift the flour, cocoa, baking powder, and salt together twice. Gradually add to the yolk mixture and mix well.
Step 5: Whip egg whites. With clean beaters, beat egg whites on medium speed until soft peaks form. Gradually beat in remaining sugar on high speed until stiff peaks form.
Step 6: Fold whites into batter. Gradually fold egg whites into the batter until just combined.
Step 7: Bake the cake. Spread batter evenly into prepared pan. Bake 10-12 minutes until cake springs back when lightly touched.
Step 8: First roll. Cool 5 minutes, then turn cake onto kitchen towel dusted with cocoa powder. Gently peel off parchment. Roll up cake in towel jelly-roll style, starting with a short side. Cool completely on wire rack.
Step 9: Make filling. Beat heavy cream until soft peaks form. Gradually add sugar and almond extract, beating until stiff peaks form.
Step 10: Unroll and fill. Unroll cooled cake and spread filling to within 1 inch of edges. Roll up cake again without the towel.
Step 11: Make frosting. Cream softened butter and confectioners’ sugar until light and fluffy, 3-4 minutes. Beat in melted chocolate, milk, and vanilla until smooth.
Step 12: Frost the log. Frost the cake using a metal spatula to create a bark-like effect.
Step 13: Decorate. Dust with confectioners’ sugar if desired and decorate with sugared cranberries and rosemary sprigs.
Step 14: Slice and serve. Slice with a warm knife and serve at room temperature or chilled.
