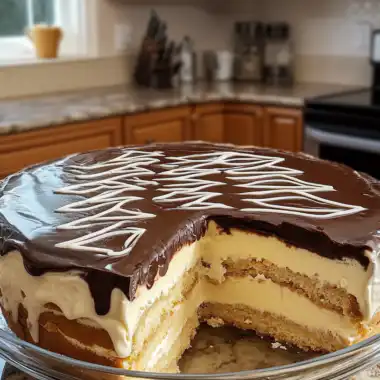
Coffee and Chocolate Ice Cream Trunk is hands down the most stunning and delicious frozen dessert I’ve ever made, and it’s become my absolute showstopper recipe when I need something that looks incredibly impressive but is actually a no-bake frozen treat. The first time I made this gorgeous rectangular ice cream cake with its layers of espresso-soaked biscuits, coffee chocolate chip cream, and dramatic chocolate ganache dripping down the sides, everyone at the party couldn’t stop taking photos before devouring slice after slice. The combination of rich coffee cream studded with chocolate chips, soft cookie layers, and glossy ganache creates this incredibly elegant dessert that tastes like the fanciest ice cream cake from a professional patisserie.
What Is Coffee and Chocolate Ice Cream Trunk?
Coffee and Chocolate Ice Cream Trunk is a frozen layered dessert made with espresso-soaked biscuits, coffee-flavored cream cheese filling studded with chocolate chips, and topped with dark chocolate ganache, hazelnuts, and more chocolate chips. What makes this trunk special is how it’s assembled in a loaf pan and frozen solid, then unmolded and covered with ganache that creates those dramatic drips down the sides. The rectangular shape gives it that classic ice cream cake trunk appearance. Think of it as a sophisticated frozen tiramisu meets ice cream cake that’s perfect for make-ahead entertaining and coffee lovers.
Simple Ingredients You’ll Need For Coffee and Chocolate Ice Cream Trunk
Let’s break down all the ingredients for this stunning Coffee and Chocolate Ice Cream Trunk. I’ve organized everything by component so you can prep efficiently.
For the Biscuit Layers:
- Golden digestive biscuits or speculoos biscuits (400g): Create the structured layers. Speculoos add amazing spiced flavor.
- Strong brewed espresso (1 cup, cooled): For soaking the biscuits. Must be completely cool before using.
- Coffee liqueur such as Kahlúa (2 tablespoons, optional): Adds adult sophistication to your Coffee and Chocolate Ice Cream Trunk.
For the Coffee Chocolate Chip Cream:
- Full-fat cream cheese (500g, softened): Room temperature is crucial for smooth filling.
- Double cream (400ml, cold): Whipped and folded in for light, airy texture.
- Powdered sugar (150g, sifted): Sweetens without grittiness.
- Instant espresso powder (3 tablespoons): Dissolved in 3 tablespoons hot water, then cooled. Provides intense coffee flavor.
- Vanilla extract (2 teaspoons): Rounds out the flavors.
- Dark chocolate chips (200g): Studded throughout the coffee cream for texture and flavor.
For the Dark Chocolate Ganache:
- Dark chocolate (300g, finely chopped): Use good quality chocolate for best results.
- Double cream (180ml): Creates smooth, pourable ganache.
- Unsalted butter (2 tablespoons): Adds shine and richness.
- Golden syrup (1 tablespoon): Keeps ganache glossy and flowing for your ice cream trunk.
For Decoration:
- Roasted hazelnuts (100g, roughly chopped): Add crunch and nutty flavor.
- Dark chocolate chips (50g): Extra chocolate on top.
- Extra ganache drizzle: For additional drama.
Building Your Frozen Masterpiece
Alright, let’s make this gorgeous frozen dessert. The process takes some time for freezing but the assembly is straightforward.
Make the Coffee Chocolate Chip Cream
Beat the softened cream cheese, sifted powdered sugar, dissolved cooled espresso, and vanilla together until completely smooth, light, and fluffy with no lumps at all. This takes about 3 minutes on medium-high speed.
In a separate bowl, whip the cold double cream to firm peaks. This takes about 3-4 minutes. Fold gently into the cream cheese mixture in two additions using slow, sweeping movements until the filling is light, airy, and beautifully stable. Fold in the dark chocolate chips until evenly distributed for your Coffee and Chocolate Ice Cream Trunk. Refrigerate until needed.
Assemble the Trunk
Line a large rectangular loaf tin very generously with cling film, leaving a large overhang on all four sides. This is essential for clean unmolding later. Spread a layer of coffee cream evenly across the base of the lined tin, about 2cm thick, as the first layer.
Dip each biscuit briefly into the cooled espresso for just 1 second per side. Arrange a snug, complete layer of soaked biscuits directly on top of the cream layer, breaking pieces to fill any gaps. Spread another generous, thick layer of coffee chocolate chip cream evenly over the biscuits.
Add another layer of espresso-soaked biscuits. Repeat with cream then biscuits until the tin is completely full, finishing with a final generous layer of cream on top. Fold the cling film overhang tightly over the top to cover completely. Freeze for a minimum of 6 hours or overnight until completely solid and frozen through.
Prepare the Dark Chocolate Ganache
Heat the cream until just steaming. Pour over the finely chopped dark chocolate, add the butter and golden syrup, and leave for 2 minutes without stirring. Then stir slowly from the center outward until completely smooth, deeply glossy, and fluid.
Allow to cool for 10 minutes until slightly thickened but still very pourable. It needs to flow freely and dramatically down the sides of your Coffee and Chocolate Ice Cream Trunk.
Finish and Decorate
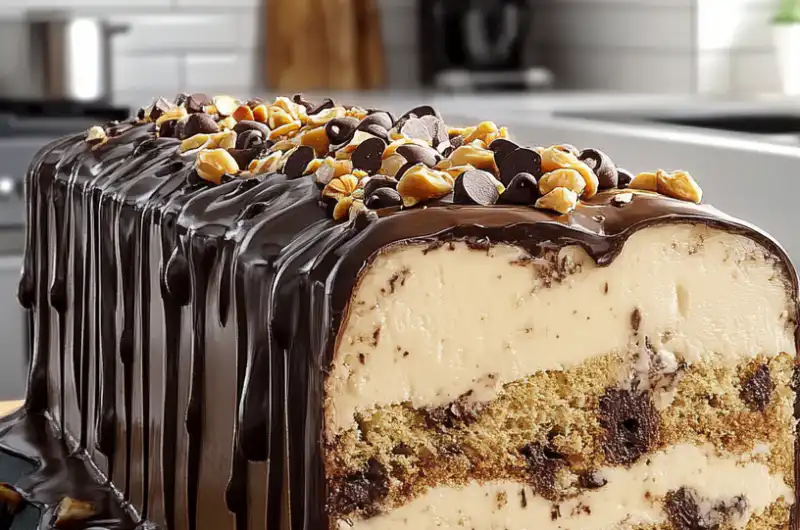
Remove the trunk from the freezer. Unfold the cling film from the top and invert confidently onto a dark slate board or serving tray. Peel away all the cling film completely. Pour the dark chocolate ganache generously and slowly over the entire top, letting it pour down all four sides in long, dramatic, thick drips.
Use the entire ganache because more is more here. Immediately scatter the roughly chopped hazelnuts and dark chocolate chips generously over the entire top before the ganache sets. Return to the freezer for 20-30 minutes until the ganache is fully set and firm.
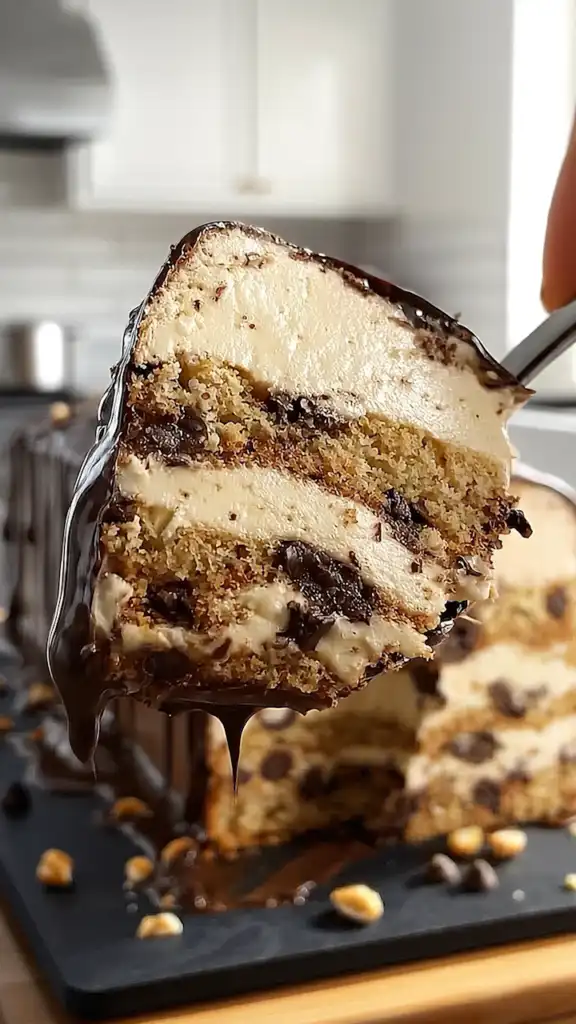
Slice with a sharp knife dipped in hot water and wiped completely dry between every single cut for those clean, beautiful layers.
Serving This Frozen Showstopper
This Coffee and Chocolate Ice Cream Trunk is best served frozen, sliced into generous portions. Remove from the freezer 10 minutes before serving to allow the cream layers to soften slightly to perfect texture for slicing. The combination of coffee and chocolate makes it ideal for dinner parties and special celebrations. I love serving it at summer gatherings because it’s completely make-ahead and stays frozen until you’re ready. For a complete frozen dessert spread, serve it alongside other ice cream treats like my No Churn Dr Pepper Ice Cream to give guests variety. Garnish each slice with extra whipped cream or a dusting of cocoa powder if desired.
Pro Tips for Success
- Generous cling film lining is critical: Use enough to leave a large overhang on all four sides so you can invert the trunk cleanly without any tearing for your Coffee and Chocolate Ice Cream Trunk.
- Start and finish with cream: Cream layers on top and bottom give clean, smooth, flat surfaces when unmolded.
- Brief espresso dip only: Just 1 second per side keeps biscuits structured enough to hold shape after freezing. Over-soaking makes them dissolve.
- Pour ganache while frozen solid: The cold surface makes ganache set quickly into dramatic, thick, defined drips.
- Work fast with toppings: Add hazelnuts and chocolate chips immediately after ganache because it sets very quickly on the frozen surface.
- Hot knife for slicing: Dip knife in hot water and wipe dry between every cut for the cleanest slices through all layers.
- Make it days ahead: This keeps beautifully in the freezer for up to 2 weeks, making it perfect for party planning.
- Freeze completely before unmolding: The full 6 hours minimum is essential. Overnight is even better for easiest handling.
Common Questions Answered
Can I make this without coffee liqueur?
Absolutely! The coffee liqueur is completely optional and just adds a subtle boozy depth to your Coffee and Chocolate Ice Cream Trunk. Simply use all espresso for soaking the biscuits if you prefer to skip it. The dessert will taste just as delicious without it.
What if I don’t have a loaf tin?
You can use any rectangular container that holds about 2 liters. A square cake pan works well too, though the shape will be different. The key is lining it very generously with cling film so you can unmold it easily after freezing. Just adjust the number of biscuit layers to fit your container.
Can I use regular coffee instead of espresso?
Yes, but espresso gives much stronger coffee flavor that holds up better after freezing. If using regular strong brewed coffee, make it as concentrated as possible. The instant espresso powder dissolved in the cream filling is what really delivers that intense coffee taste in your ice cream trunk.
How do I get those perfect ganache drips?
The secret is pouring the ganache while the trunk is completely frozen solid. The cold surface makes the ganache set immediately as it drips down, creating those thick, defined drips. Pour generously and let gravity do the work. Don’t try to spread it or you’ll lose the dramatic drip effect.
Why This Recipe Is Perfect
Coffee and Chocolate Ice Cream Trunk is the ultimate make-ahead frozen dessert because it delivers professional patisserie results while living happily in your freezer for up to two weeks. The sophisticated coffee and chocolate flavor combination appeals to adult palates and makes it perfect for elegant entertaining. The dramatic presentation with ganache drips and nut topping looks incredibly impressive but uses straightforward assembly techniques. Whether you’re hosting a dinner party, celebrating a special occasion, or just want a luxurious frozen treat ready in your freezer, this trunk delivers every single time.
For more frozen dessert recipes and make-ahead entertaining ideas, check out my Pinterest page where I share all my favorite showstopping treats.
Coffee and Chocolate Ice Cream Trunk
Course: DessertCuisine: European, French-inspiredDifficulty: Medium16
servings40
minutes480
kcalIngredients
- For the Biscuit Layers:
Golden digestive biscuits or speculoos biscuits (400g)
Strong brewed espresso (1 cup, cooled)
Coffee liqueur such as Kahlúa (2 tablespoons, optional)
- For the Coffee Chocolate Chip Cream:
Full-fat cream cheese (500g, softened)
Double cream (400ml, cold)
Powdered sugar (150g, sifted)
Instant espresso powder (3 tablespoons dissolved in 3 tablespoons hot water, cooled)
Vanilla extract (2 teaspoons)
Dark chocolate chips (200g)
- For the Dark Chocolate Ganache:
Dark chocolate (300g, finely chopped)
Double cream (180ml)
Unsalted butter (2 tablespoons)
Golden syrup (1 tablespoon)
- For Decoration:
Roasted hazelnuts (100g, roughly chopped)
Dark chocolate chips (50g)
Extra ganache drizzle
Directions
- Make the Coffee Chocolate Chip Cream
- Beat the softened cream cheese, sifted powdered sugar, dissolved cooled espresso, and vanilla together until completely smooth, light, and fluffy with no lumps at all. This takes about 3 minutes on medium-high speed.
- In a separate bowl, whip the cold double cream to firm peaks. This takes about 3-4 minutes. Fold gently into the cream cheese mixture in two additions using slow, sweeping movements until the filling is light, airy, and beautifully stable. Fold in the dark chocolate chips until evenly distributed. Refrigerate until needed.
- Assemble the Trunk
- Line a large rectangular loaf tin very generously with cling film, leaving a large overhang on all four sides. This is essential for clean unmolding later. Spread a layer of coffee cream evenly across the base of the lined tin, about 2cm thick, as the first layer.
- Dip each biscuit briefly into the cooled espresso for just 1 second per side. Arrange a snug, complete layer of soaked biscuits directly on top of the cream layer, breaking pieces to fill any gaps. Spread another generous, thick layer of coffee chocolate chip cream evenly over the biscuits.
- Add another layer of espresso-soaked biscuits. Repeat with cream then biscuits until the tin is completely full, finishing with a final generous layer of cream on top. Fold the cling film overhang tightly over the top to cover completely. Freeze for a minimum of 6 hours or overnight until completely solid and frozen through.
- Prepare the Dark Chocolate Ganache
- Heat the cream until just steaming. Pour over the finely chopped dark chocolate, add the butter and golden syrup, and leave for 2 minutes without stirring. Then stir slowly from the center outward until completely smooth, deeply glossy, and fluid.
- Allow to cool for 10 minutes until slightly thickened but still very pourable. It needs to flow freely and dramatically down the sides.
- Finish and Decorate
- Remove the trunk from the freezer. Unfold the cling film from the top and invert confidently onto a dark slate board or serving tray. Peel away all the cling film completely. Pour the dark chocolate ganache generously and slowly over the entire top, letting it pour down all four sides in long, dramatic, thick drips.
- Use the entire ganache. Immediately scatter the roughly chopped hazelnuts and dark chocolate chips generously over the entire top before the ganache sets. Return to the freezer for 20-30 minutes until the ganache is fully set and firm.
- Slice with a sharp knife dipped in hot water and wiped completely dry between every single cut for those clean, beautiful layers.