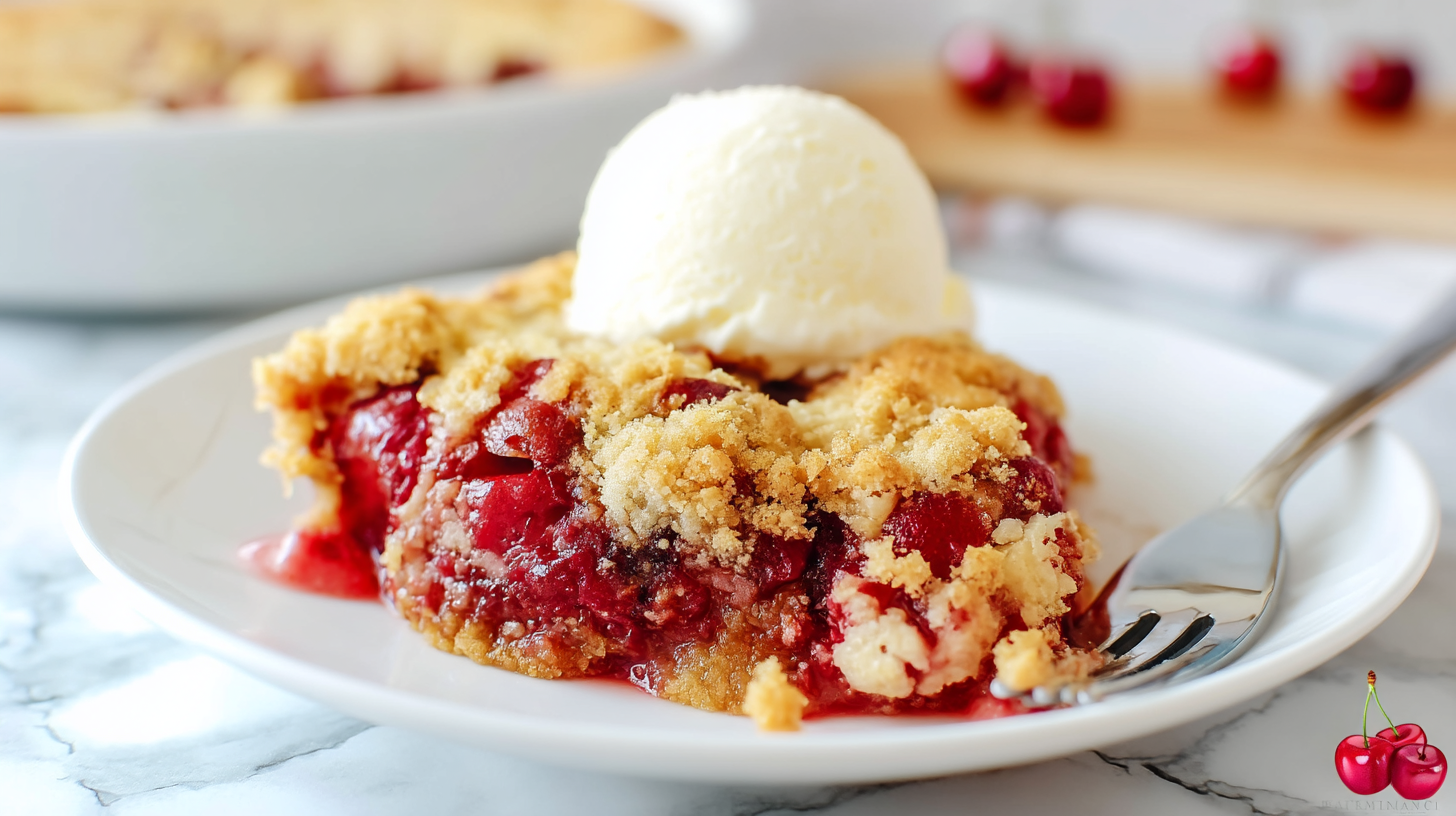
Cherry Dump Cake is honestly one of my all-time favorite go-to desserts, and I am not even a little bit ashamed of that. The first time I made it, I was in a total panic because I had people coming over and zero energy to bake anything complicated. So I grabbed a box of cake mix, two cans of cherry pie filling, some butter, and just went for it. The result? Pure golden, bubbly, cherry-loaded perfection. And everyone thought I had been baking all day. I definitely did not correct them.
What Is Cherry Dump Cake?
If you have never heard of a dump cake before, let me be the one to change your life today. A cherry dump cake is basically the laziest, most delicious dessert method ever invented. You literally dump your ingredients into a baking dish, one on top of the other, and let the oven do all the work. No mixing bowls. No electric mixer. No complicated steps. The cherry pie filling bubbles up through the dry cake mix and the butter creates this amazing crispy, golden crust on top. It is half cake, half cobbler, and one hundred percent addictive.
What You Will Need for Cherry Dump Cake
One of the best things about this cherry dump cake recipe is how short the ingredient list is. Seriously, just four ingredients and you are done. Here is exactly what you need, plus a few swap ideas in case you want to mix things up a little.
- 2 (21 ounce) cans cherry pie filling – This is the star of the show. The filling gives you that thick, sweet, jammy cherry base that makes everything taste so good. You can also use other fruit pie fillings like blueberry or peach if you want to switch flavors sometime.
- 1 teaspoon almond extract (divided use, optional) – Okay, this little ingredient is the secret weapon. You stir half a teaspoon into each can of cherry pie filling before you pour it in. It adds this warm, slightly nutty depth that makes the cherry flavor taste way more complex and bakery-style. You can totally skip it if you are not a fan of almond flavoring, but I really do recommend trying it at least once.
- 1 box yellow cake mix – Standard box size, nothing fancy. Yellow cake mix gives you that buttery, slightly vanilla flavor that pairs perfectly with the tart cherries. White cake mix works great too if that is what you have on hand.
- 1/2 cup salted butter (1 stick), melted – The butter is what transforms the dry cake mix into a golden, crispy, slightly crunchy topping. Salted butter is key because that little bit of salt balances the sweetness beautifully. If you only have unsalted butter, just add a small pinch of salt on top before baking.
That is genuinely the whole list. Four ingredients and you have a crowd-pleasing cherry dessert that looks like you put in way more effort than you did. I love it so much.
Step-by-Step Instructions for Cherry Dump Cake
Making this cherry dump cake is so simple that I almost feel silly writing out steps. But let me walk you through it anyway so everything turns out perfectly golden and bubbly on your first try.
Step 1: Preheat and Prep Your Pan
Start by preheating your oven to 350 degrees F. While it heats up, grab a 9×13 inch baking dish and give it a good spray with nonstick cooking spray. This makes serving so much easier later and keeps those sticky cherry edges from gluing themselves to your pan.
Step 2: Add the Almond Extract to the Cherry Filling
Open both cans of cherry pie filling. Stir half a teaspoon of almond extract into each can separately. Give each one a good stir so the extract is evenly mixed in throughout the filling. This step is totally optional but I really encourage you to try it. The almond flavor adds such a lovely warmth that takes this from basic to absolutely delightful.
Step 3: Layer the Cherry Filling
Pour both cans of your cherry pie filling into the prepared baking dish. Spread it out evenly so you get a nice, consistent cherry layer across the whole bottom. Do not stress about making it perfect. It is a dump cake after all.
Step 4: Add the Cake Mix
Open your box of yellow cake mix and sprinkle it evenly all over the top of the cherry filling. Do your best to get a nice, even layer from edge to edge. You want every bite to have that golden, crumbly topping so take a few extra seconds to spread it out well.
Step 5: Pour On the Butter
Melt your butter and slowly pour it all over the top of the dry cake mix layer. Try to cover as much of the surface as you can so you get that golden crust forming everywhere. A little tip I love: instead of pouring melted butter, you can also slice the stick into small squares and place them evenly all over the top. As it bakes, the butter melts and spreads out. Either method works great.
Step 6: Bake Until Golden
Pop your dish into the preheated oven and bake for about 50 to 60 minutes. You are looking for a deep golden brown color on top and lots of beautiful bubbling around the edges. The longer it bakes, the crispier the topping gets, so if you like a softer top, check it at the 50-minute mark. If you want more crunch, let it go the full hour.
How to Serve Your Cherry Dump Cake
This cherry dump cake is honestly great served warm, straight from the oven with a big scoop of vanilla ice cream melting right on top. The contrast between the warm, bubbly cherry base and the cold, creamy ice cream is just absolutely dreamy. You can also serve it with a dollop of whipped cream if that is more your style. For a slightly fancier presentation, dust a tiny bit of powdered sugar over the top right before serving. It looks beautiful and adds just a hint of extra sweetness. Leftovers are wonderful at room temperature the next day too, almost like a cherry crumble bar situation.
Tips for the Perfect Cherry Dump Cake
- Do not skip the almond extract: Even if you are not sure about it, just try it once. It genuinely makes the cherry flavor taste more layered and rich. Half a teaspoon per can is the sweet spot.
- Cover any dry spots with butter: After you pour your melted butter on top, look closely at the surface. If you see any dry powdery patches of cake mix, add a tiny drizzle of extra butter. Dry spots will not crisp up the same way and can taste a bit chalky.
- Use salted butter for balance: The salt in the butter does a lot of heavy lifting here. It balances out the sweetness of the cherry filling and the cake mix. Please do not use margarine as a swap. It does not give you the same flavor or golden crust.
- Let it rest before serving: I know it is hard to wait, but giving it about 10 minutes out of the oven helps everything set up a little so it is easier to scoop. Plus, the cherry filling gets extremely hot and needs time to cool slightly before you eat it.
- Try adding nuts on top: Sprinkling some chopped pecans or sliced almonds over the cake mix layer before adding the butter gives the topping even more crunch and a lovely nutty flavor that pairs perfectly with the cherry.
- Switch up the fruit filling: While cherry is truly the classic for a reason, this exact same method works beautifully with peach pie filling, blueberry pie filling, or even apple. The formula stays the same, just swap the cans.
Your Cherry Dump Cake Questions Answered
Can I make cherry dump cake ahead of time?
Yes, absolutely! You can bake it the day before and store it covered at room temperature or in the fridge. When you are ready to serve, warm individual portions in the microwave for about 30 to 45 seconds. The topping softens a bit overnight but it still tastes amazing, especially with ice cream on top.
Why is the top of my cherry dump cake still powdery after baking?
This usually means some spots of cake mix did not get enough butter coverage. Next time, make sure your melted butter is spread as evenly as possible over the entire surface. You can also use a little extra butter to be safe. Around 3/4 of a cup works well if you want a really thorough coverage without it being greasy.
Do I need to mix anything in this cherry dump cake recipe?
Nope, that is literally the beauty of it. The only mixing you do is stirring the almond extract into the cherry pie filling. Beyond that, everything is just layered directly into the baking dish. No mixing bowls needed at all.
How should I store leftover cherry dump cake?
Cover your baking dish tightly with plastic wrap or transfer leftovers into an airtight container. It keeps well in the fridge for up to four days. You can also freeze individual portions for up to two months. Just thaw in the fridge overnight and reheat in the microwave or oven before serving.
Why You Are Going to Absolutely Love This Recipe
This cherry dump cake is everything you want in a dessert. It is ridiculously easy, uses pantry staple ingredients, and the result is this gorgeous, golden, bubbling dish that tastes like something your grandma spent hours on. The cherry filling gets all thick and jammy underneath while the top bakes into this incredible buttery, crumbly crust. It is warm, sweet, slightly tart from the cherries, and utterly comforting. Whether you are making it for a potluck, a family dinner, or just a Tuesday night when you need something sweet, this one always delivers. Plus, cleanup is basically nothing. Win-win.
I have since made this at least a dozen times for various gatherings and it disappears every single time. Someone always asks for the recipe and gets genuinely shocked when I tell them how simple it is. If you want to save this recipe and find more easy dessert ideas like this one, you can check out my Pinterest boards at pinterest.com where I share all my favorite simple baking recipes and sweet treat inspiration. Happy baking, friend!
Print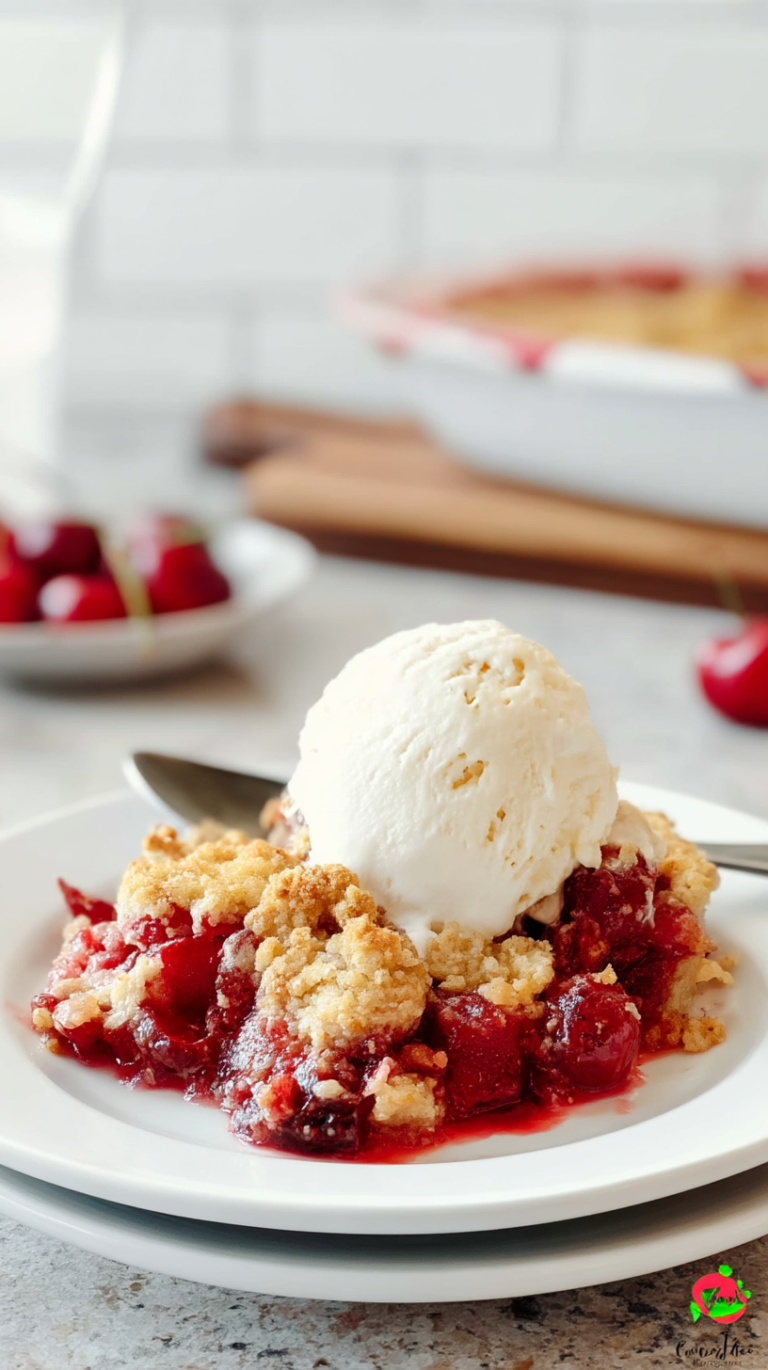
Cherry Dump Cake
This golden, bubbly Cherry Dump Cake requires just four ingredients and minimal effort. A crispy cake topping bakes perfectly over sweet cherry filling for a hybrid dessert everyone will love.
- Total Time: 60
- Yield: 8 servings 1x
Ingredients
2 (21 ounce) cans cherry pie filling
1 teaspoon almond extract (optional)
1 box yellow or white cake mix (standard 15.25-ounce box)
1/2 cup salted butter (1 stick), melted
Instructions
Preheat oven to 350°F (175°C)
Spray a 9×13-inch baking dish with cooking spray
If using almond extract, stir 1/2 teaspoon into each can of cherry pie filling
Pour cherry filling into the prepared dish
Sprinkle cake mix evenly over the filling
Drizzle melted butter over the top
Bake for 45-55 minutes until golden and bubbly
Let cool slightly before serving
Notes
For best results, use peach or blueberry pie filling instead of cherry as an alternative flavor.
Add 1/4 teaspoon salt over the cake mix if using unsalted butter.
Store leftovers at room temperature up to 2 days or refrigerate for 4 days.
- Prep Time: 10
- Cook Time: 50
- Category: Desserts
- Method: Baking
- Cuisine: American
- Diet: Vegetarian
Nutrition
- Serving Size: 1 slice (1/8 of recipe)
- Calories: 320
- Sugar: 45g
- Sodium: 380mg
- Fat: 16g
- Saturated Fat: 10g
- Carbohydrates: 50g
- Fiber: 1g
- Protein: 4g
- Cholesterol: 30mg