No-Bake Chocolate Cheesecake is honestly one of those recipes I keep coming back to every single time I need a dessert that feels fancy but takes barely any effort. I remember the first time I made this for a dinner party and my friends genuinely thought I had spent hours in the kitchen. Spoiler: I had not. It is silky, rich, deeply chocolatey, and so satisfying. And the best part? You never even turn on the oven.

What Is No-Bake Chocolate Cheesecake?
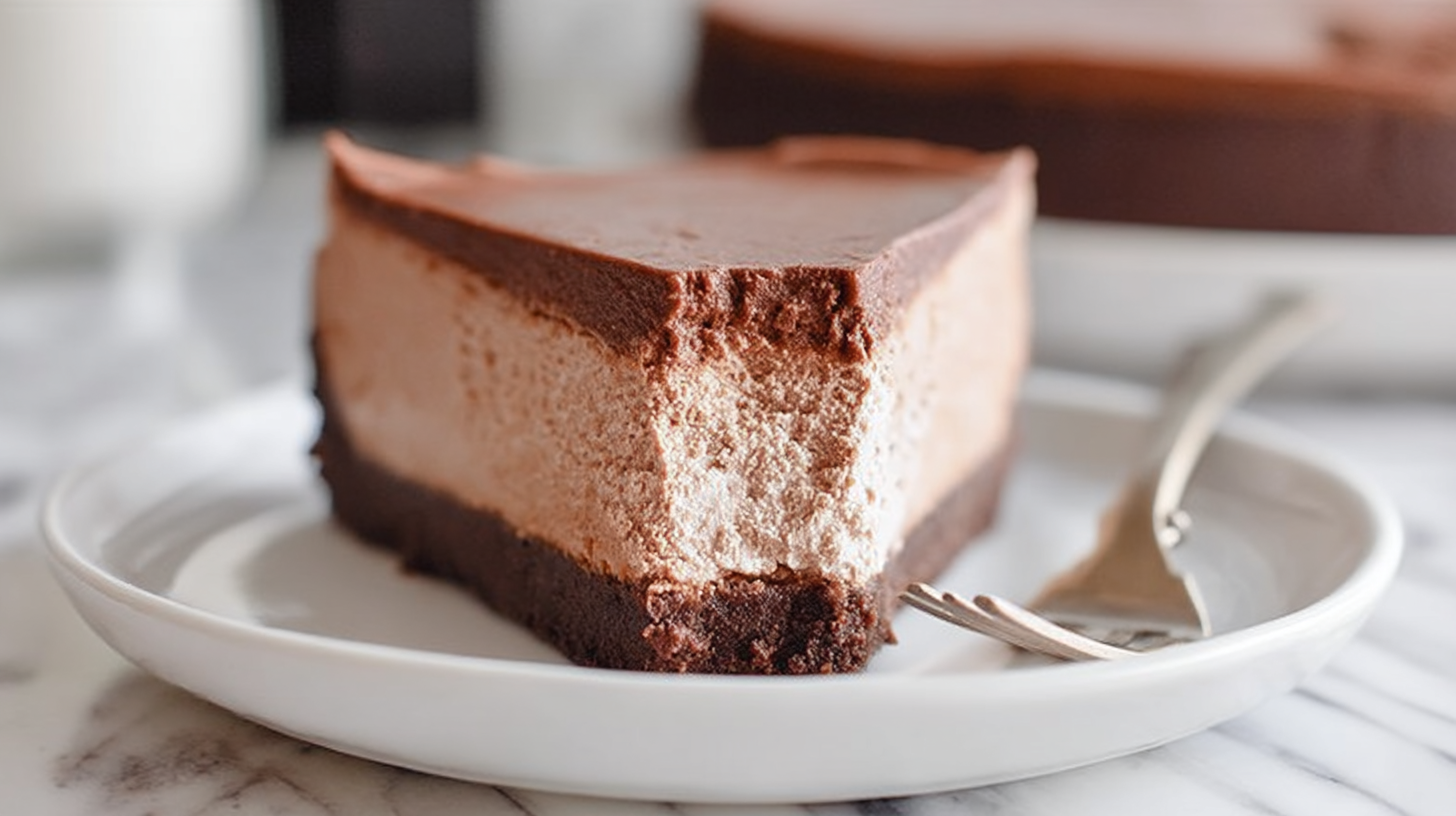
A no-bake chocolate cheesecake is a chilled dessert made with a buttery chocolate crust and a luscious cream cheese filling that sets in the fridge instead of the oven. Unlike traditional baked cheesecake, there are no water baths, no cracked tops, and no stress. It is basically a dream chocolate dessert for anyone who loves that thick, creamy cheesecake texture with a bold cocoa flavor running through every single bite.
What You Will Need for No-Bake Chocolate Cheesecake
Before we jump into the steps, let me walk you through everything that goes into this beauty. The ingredient list is short, simple, and totally beginner-friendly. Here is what you need:
For the Crust:
- Chocolate graham cracker crumbs (2 cups / 200 g): These give the crust that deep chocolate base. You can blitz whole crackers in a food processor or buy pre-crushed ones. In a pinch, Oreo crumbs work amazingly too.
- Granulated sugar (1 tablespoon): Just a touch to balance the chocolate. You can skip this if your crackers are already sweet enough.
- Salted butter, melted (7 tablespoons): This holds the crust together and adds a rich, buttery flavor. If you only have unsalted butter, just add a tiny pinch of salt to the mix.
For the Cheesecake Filling:
- Cream cheese, softened (3 packages / 681 g): This is the star of the show. Make sure it is fully at room temperature before you start, otherwise you will end up with lumps and nobody wants that in their no-bake cheesecake filling.
- Powdered sugar (1 1/2 cups / 171 g): Also called icing sugar, it dissolves smoothly into the cream cheese without any graininess. Sifting it first helps even more.
- Sour cream (1/4 cup / 57 g): This adds a subtle tang that balances out all that rich chocolate. Greek yogurt works as a great swap if that is what you have on hand.
- Vanilla extract (1 teaspoon): Pure vanilla makes everything taste more rounded and warm. It is a small addition but it genuinely matters.
- Bittersweet chocolate, melted and cooled (1 1/2 cups / 255 g): This is what gives the filling its deep, intense chocolate flavor. Let it cool to room temperature before adding it to the cream cheese mixture. If you prefer a milder flavor, semi-sweet chocolate chips work too.
Step-by-Step Instructions for No-Bake Chocolate Cheesecake
Okay, this is where the magic happens. I promise these steps are super simple and totally doable even on a busy weeknight. Let me walk you through it.
Step 1: Make the Chocolate Crust
Start by combining your chocolate graham cracker crumbs, granulated sugar, and melted butter in a small bowl. Stir everything together until the mixture looks sandy and wet, kind of like damp beach sand. That texture means the crust will hold together nicely once it chills.
Next, press that mixture evenly into the bottom of a 9-inch springform pan, pushing it about an inch up the sides too. You can also use a 9.5-inch pie plate if that is what you have. I like using the bottom of a measuring cup to press it down flat. Once it is packed in, pop the pan in the fridge while you work on the filling.
Step 2: Beat the Cream Cheese
In a large bowl, use an electric hand mixer or stand mixer with the whisk attachment to beat the softened cream cheese until it is completely smooth and creamy. This usually takes about 1 to 2 minutes. Do not rush this step because a smooth base is the foundation of your whole no-bake chocolate cheesecake.
Step 3: Add the Sugar, Sour Cream, and Vanilla
Add the powdered sugar and beat again for about a minute until fully combined. Then add the sour cream and vanilla extract and mix everything together until smooth. The filling will start to look glossy and really luscious at this point.
Step 4: Add the Melted Chocolate
This is the most important step, so pay attention here. Make absolutely sure your melted bittersweet chocolate has cooled down to room temperature before adding it. If it is too warm, it will melt the cream cheese mixture and the texture will be off. Once it is cool, pour it in and whip the mixture for 2 to 3 minutes until it becomes extremely light and fluffy. That whipping time is the secret to a silky, airy cheesecake filling rather than a dense one.
Step 5: Fill and Chill
Spread the finished cheesecake filling evenly over your chilled crust. Use a spatula to smooth the top. Cover the whole thing with plastic wrap and refrigerate for at least 3 to 4 hours. If you can wait up to 12 hours, even better. The longer it chills, the cleaner and more set the slices will be.
Step 6: Slice Like a Pro
For those gorgeous clean slices, run a long thin knife under really hot water and wipe it dry before each cut. Repeat the hot water trick between every single slice. I know it sounds like extra work, but it honestly makes such a visual difference, especially if you are serving this no-bake chocolate cheesecake to guests.
Serving Ideas That Make It Even Better
This chilled chocolate cheesecake is already stunning on its own, but a few simple toppings can take it to a whole new level. Try a dollop of freshly whipped cream and some chocolate shavings on top. Fresh raspberries or sliced strawberries add a pop of color and a fruity contrast to all that rich chocolate. A light dusting of cocoa powder also works beautifully for a simple, elegant finish.
Tips for the Perfect No-Bake Chocolate Cheesecake
- Room temperature cream cheese is non-negotiable: Cold cream cheese will not whip smoothly. Take it out of the fridge at least an hour before you start.
- Cool the chocolate before adding it: Warm chocolate will seize up your filling or make it too runny. Be patient and wait until it is genuinely room temperature.
- Whip the filling long enough: That 2 to 3 minute whipping time after adding the chocolate is what creates a light, mousse-like texture instead of a heavy, dense one.
- Press the crust firmly: A well-packed crust holds together when you slice. A loosely pressed one will crumble and fall apart.
- Chill long enough: Three to four hours is the minimum. Overnight chilling gives you the cleanest, most set results.
- Use quality chocolate: Since chocolate is the main flavor here, using good bittersweet chocolate really does make a difference in the final taste.
Your Questions Answered
Can I make no-bake chocolate cheesecake ahead of time?
Yes, absolutely! This is actually one of the best make-ahead desserts out there. You can make it the night before and let it chill overnight. It will be perfectly set and ready to serve by the next day. Just keep it covered in the fridge and add any toppings right before serving.
Can I freeze no-bake chocolate cheesecake?
You sure can. Wrap individual slices tightly in plastic wrap and then place them in a freezer-safe container. They will keep well for up to one month. When you are ready to eat, let a slice thaw in the fridge for a few hours or on the counter for about 30 minutes.
What if I do not have a springform pan?
No worries at all. A 9.5-inch pie dish works just as well for this no-bake chocolate cheesecake recipe. You just scoop out slices instead of releasing the sides cleanly. It will taste exactly the same, and honestly it has a very cozy, homey look that I love.
Can I use milk chocolate instead of bittersweet chocolate?
Yes, you can swap in milk chocolate if you prefer a sweeter, milder flavor in your creamy chocolate cheesecake. Just keep in mind that the filling will be noticeably sweeter, so you might want to reduce the powdered sugar slightly to keep things balanced.
Why You Will Absolutely Love This Recipe
This no-bake chocolate cheesecake is pure joy in dessert form. It is rich without being overwhelming, chocolatey without being too sweet, and creamy in a way that feels almost indulgent. Plus, since there is zero baking involved, you do not have to worry about timing, temperatures, or anything stressful. It is truly the kind of recipe that makes you look like a rockstar with very little effort involved.
I also tried the recipe with Oreo crumbs for the crust once instead of chocolate graham crackers, and honestly? Both versions are incredible. If you want more ideas and visual inspiration for recipes like this one, you can check out my Pinterest page at Pinterest where I save all my favorite no-bake dessert ideas and chocolate treats. There is a whole board dedicated to easy cheesecake recipes that I think you will love browsing through.
Print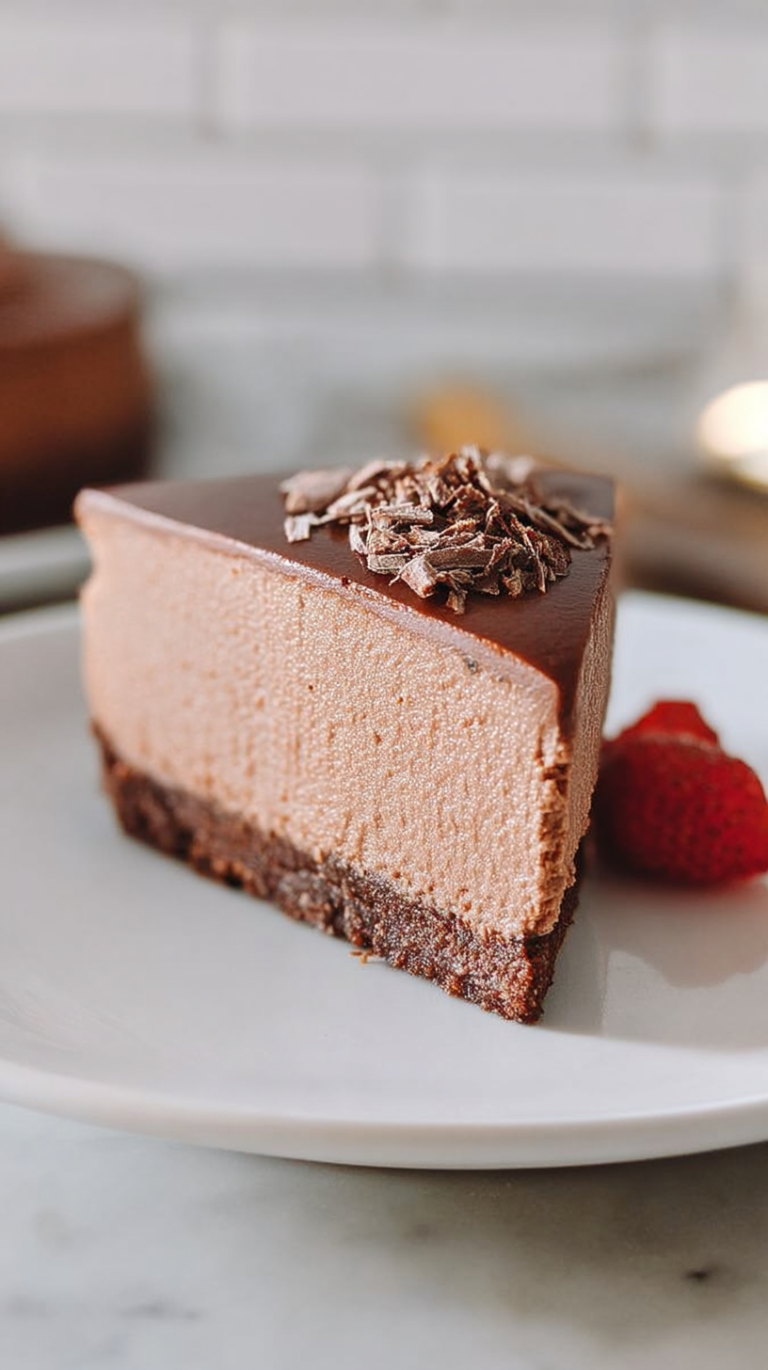
No-Bake Chocolate Cheesecake
A silky, rich no-bake chocolate cheesecake with a buttery chocolate crust and luscious cream cheese filling that chills in the fridge for a showstopping dessert requiring no oven work.
- Total Time: 2880
- Yield: 12 servings
Ingredients
Chocolate graham cracker crumbs (2 cups / 200 g)
Granulated sugar (1 tablespoon)
Salted butter, melted (7 tablespoons)
Cream cheese, softened (3 packages / 681 g)
Powdered sugar (1 1/2 cups / 171 g)
Sour cream (1/4 cup / 57 g)
Vanilla extract (1 teaspoon)
Semi-sweet chocolate chips (1/2 cup)
Cocoa powder (3 tablespoons)
Instructions
Combine graham cracker crumbs, granulated sugar, and melted butter in a bowl to form crust
Press crust into a greased springform or pie dish, chilling for 15-30 minutes if desired
Beat cream cheese and powdered sugar until smooth
Fold in sour cream and vanilla extract
Incorporate chocolate chips and cocoa powder until well-combined
Pour filling into prepared crust
Chill for at least 4 hours or overnight
Top with optional chocolate shavings or ganache before serving
Notes
Oreo crumbs can substitute graham crackers
Greek yogurt works in place of sour cream
Chill on parchment paper for easier unmolding
Serve at least 4 hours after assembly for optimal texture
Store in fridge for up to 5 days
- Prep Time: 15
- Category: Desserts
- Method: Chilling
- Cuisine: American
- Diet: Vegetarian
Nutrition
- Serving Size: 1 slice (1/12 of recipe)
- Calories: 420
- Sugar: 45g
- Sodium: 650mg
- Fat: 28g
- Saturated Fat: 18g
- Carbohydrates: 48g
- Fiber: 1.5g
- Protein: 5g
- Cholesterol: 60mg